

Zmodell Power Series, Part 1: Wind Turbine
Jun 11, 2021 14:53:38 GMT -5
Kez, billmock, and 11 more like this
Post by scanrail on Jun 11, 2021 14:53:38 GMT -5
Greetings to all,
I would like to introduce my next development – Z scale wind turbine. I started this project around a year ago; after some test 3D prints, I put it on hold, but recently decided to finish it. Items related to the power generation and distribution are indeed quite rare in Z scale; we can see certain wind turbines and high voltage transmission towers in bigger scales – N and H0, but actually nothing similar exists in our scale. I know only two Z scale items related to the power industry – cooling tower from Archistories (Art. No. 701171) and very rare item – high voltage transmission tower from Japanese manufacturer Sankei.
Some years ago, I purchased some Faller N scale Nordex wind turbines (Art. No. 232251) and planned to use them on my Z scale layout, accepting a slightly out of scale compromise. Later, when I got more experience in designing and producing models and accessories, I decided to develop my own variant that had to be true to scale and feature higher level of details.
Another reason why I was seeking for the replacement of Faller wind turbines was a necessity of using big external underfloor AC motor with a separate AC power supply (quite expensive by the way) to drive Faller windmills. The problem was to find a suitable driving gear for it – very small, quiet and with a very low RPM.
I had a luck with this and I found a very small 6 mm diameter coreless motor featuring integrated reducer with as much as 1:700 gear ratio:

I successfully fitted Faller lumber mill (Art. No. 282743) with it, and then I decided to start another development where this gear motor can also be used – the wind turbine.
I found design of Faller Nordex turbines quite primitive and I started looking for better prototypes, which, in my opinion, would look better in Z scale. I chose a beautifully designed wind turbine from Enercon – class E-82. This model can often be seen in Germany and some other countries. It is designed for 2000-3000 kW power output, has 82-meter rotor diameter and can be installed onto pylons with a different height from 59 to 138 meters:

Too high objects may look not so good on railway layouts that are always limited by space; therefore, I decided to design a lowest variant with a pylon 59 m high as a prototype. Now I had to do a lot of research work. It is hard to find detailed drawings of wind turbines, but abundance of real life pictures was enough for designing.
The biggest problem was to find a detailed picture of the wind turbine from above. After looking among thousands pictures over the net, I decided to find a suitable drone video. Luckily, I found a very good one on YouTube:
I made some screenshots from it and used them as a visual reference. After a while, 3D design was complete. Considering 3D printer limits (Formlabs Form 3), I had to split the pylon into two parts:

I added all possible external details to the egg-shaped head:


The blades were modeled with great care, exactly following the design of the prototype:

Prototype:

My 1:220 wind turbine has the following dimensions:
– Height of the pylon – 24 cm
– Rotor diameter – 19 cm
– Maximal height when the blade of the rotor is in vertical position – 33.5 cm
I printed first test copy with white resin. However, I was not satisfied with results for 100% and printed another set with already proven gray material – the one that offers best resolution and strength:


And here is a beacon. I accepted the challenge and decided to equip it with real red blinking LEDs. For this, I developed a super-small circuit board with white mask that is only 0.9 x 9 mm size. If someone wanted to see the smallest ever circuit board – probably here is it:


After cleaning, drying and polishing, all parts were carefully airbrushed. I chose Tamiya LP-35 “Insignia White” quick-drying lacquer paint – a slightly grayish tint of white color that, in my opinion, suits the best for the wind turbine. The similar color is used for ICE trains. It was difficult to fix small parts with “crocodiles”, and I attached them directly to the wooden sticks with double-sided adhesive tape:

The door and electric junction box were airbrushed with aluminum paint. I know that these items are green in the prototype, but I decided to make them a bit more distinguishable in such a small scale:

In order to achieve maximal realism, I also developed some metal etched parts – wind sensors and doorstep with handrail:


Prototypes:


Then, another complex task waited for me. I decided to reproduce a beautiful green to white color transition that is common to many wind turbines in Germany. No manufacturer produces ready to use paint kits for this; thus, I had to mix five different shades of green manually. Conventional dropper was not precise enough for this, and I used 2 ml syringes:


Then the next routine followed: “Mask and paint it. Wait 1 hour. Repeat 5 times”:

After this, the base of the pylon was separately airbrushed with gray concrete-like color.
I decided to add one more detail – Enercon logo to the egg-shaped housing of the engine room, like on the prototype:

I printed it on Mimaki UV-printer, just like on the locomotives and cars. The lower half of the “egg” should has been fixed in a very specific way for this. Lego was not helpful here, so I made special “cradles” from the polymer modeling clay in order to fix the part on the printing table:

The part was successfully printed at the both sides (please note that it is very small and zoom is strong here):

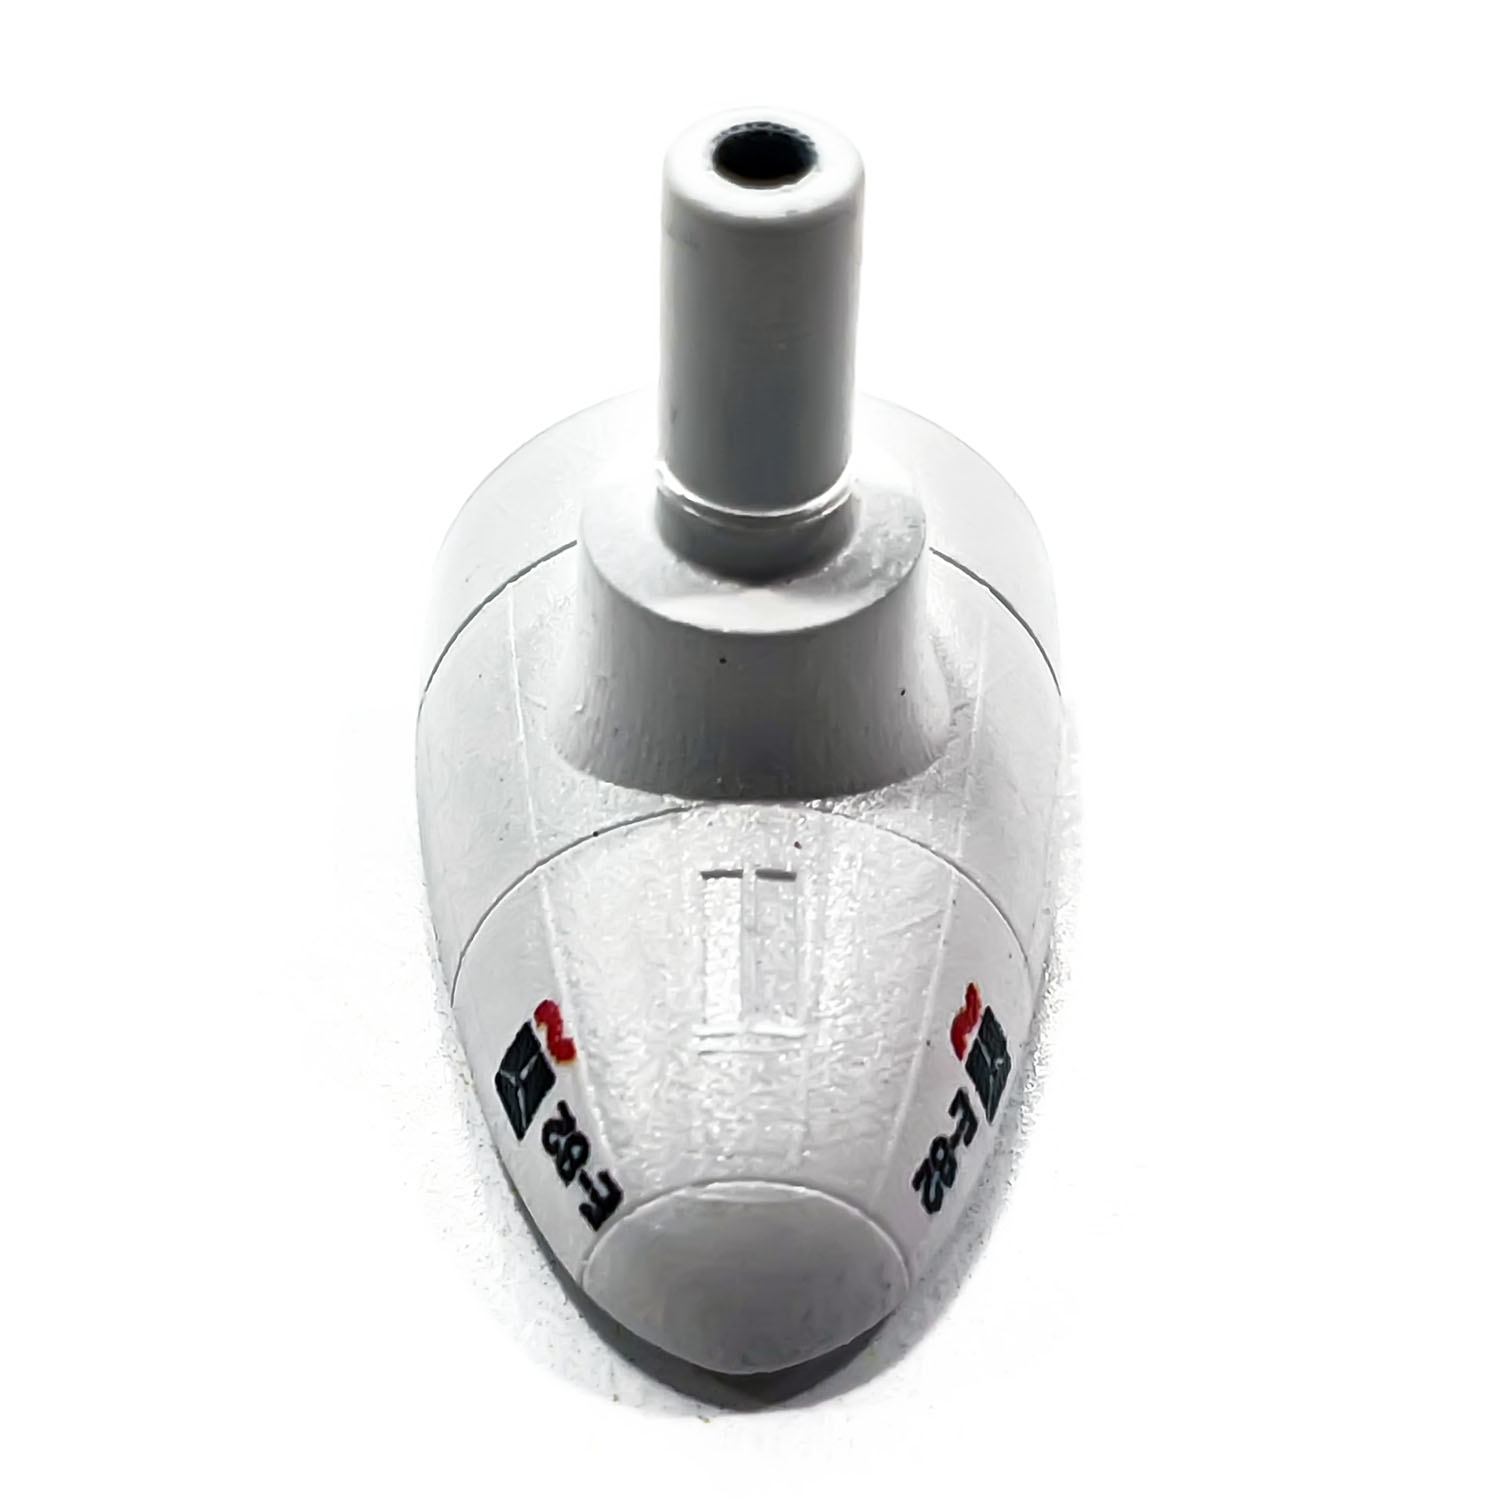
Note a thin transparent silicone ring on the pictures above – I used it to fix the motor head on the pylon and allow it to rotate with fingers when needed. This silicone ring also reduces noise and vibration.
Now let’s return to the beacon. Here is an airbrushed 3D printed cover, circuit board and small pieces of red fiber optic that were used as light filters:

The circuit board is assembled – two red SMD 0402 LEDs (1 x 0.5 mm size) from above and pieces of gold-plated pins from circuit board connectors with ultra-thin thin PTFE-coated wire from below:

And it really works!

Now about electronics. I used two separate devices here: a small blinker circuit for beacon from Hungarian manufacturer TrainModules:

And a small step-down switching converter which can output as low as 0.8 Volts – exactly what is needed for average prototypical rotation speed 12 rpm (one turn in 5 seconds). Here is how these circuit boards allocated inside the pylon (old version shown here – split into halves; I made tubes solid in the second version):

In the future, I plan to replace these two separate circuit boards with my own variant that will include both step-down converter and blinker circuits on the same board.
Then I started to assemble all parts together. Here is how the gear motor is allocated inside tiny egg-shaped case:


For demonstration purposes, I made a special 10 cm diameter stand that looks like a mini-diorama – it was covered with grass and has a narrow path:

The stand was combined from 3 layers of gray CNC-machined polystyrene. I attached a circle of anti-slip foamed material from the bottom:

The wind turbine was fixed on the stand with two small screws:

Central layer has a channel for wire outputs:

This is a rare case when I used “classic” decal technology for adding high voltage warning sign to the door, as it is too complex to do it here using UV-printing or pad printing technology:

Here is a couple of closeup views – the door with the path:

And electric junction box:

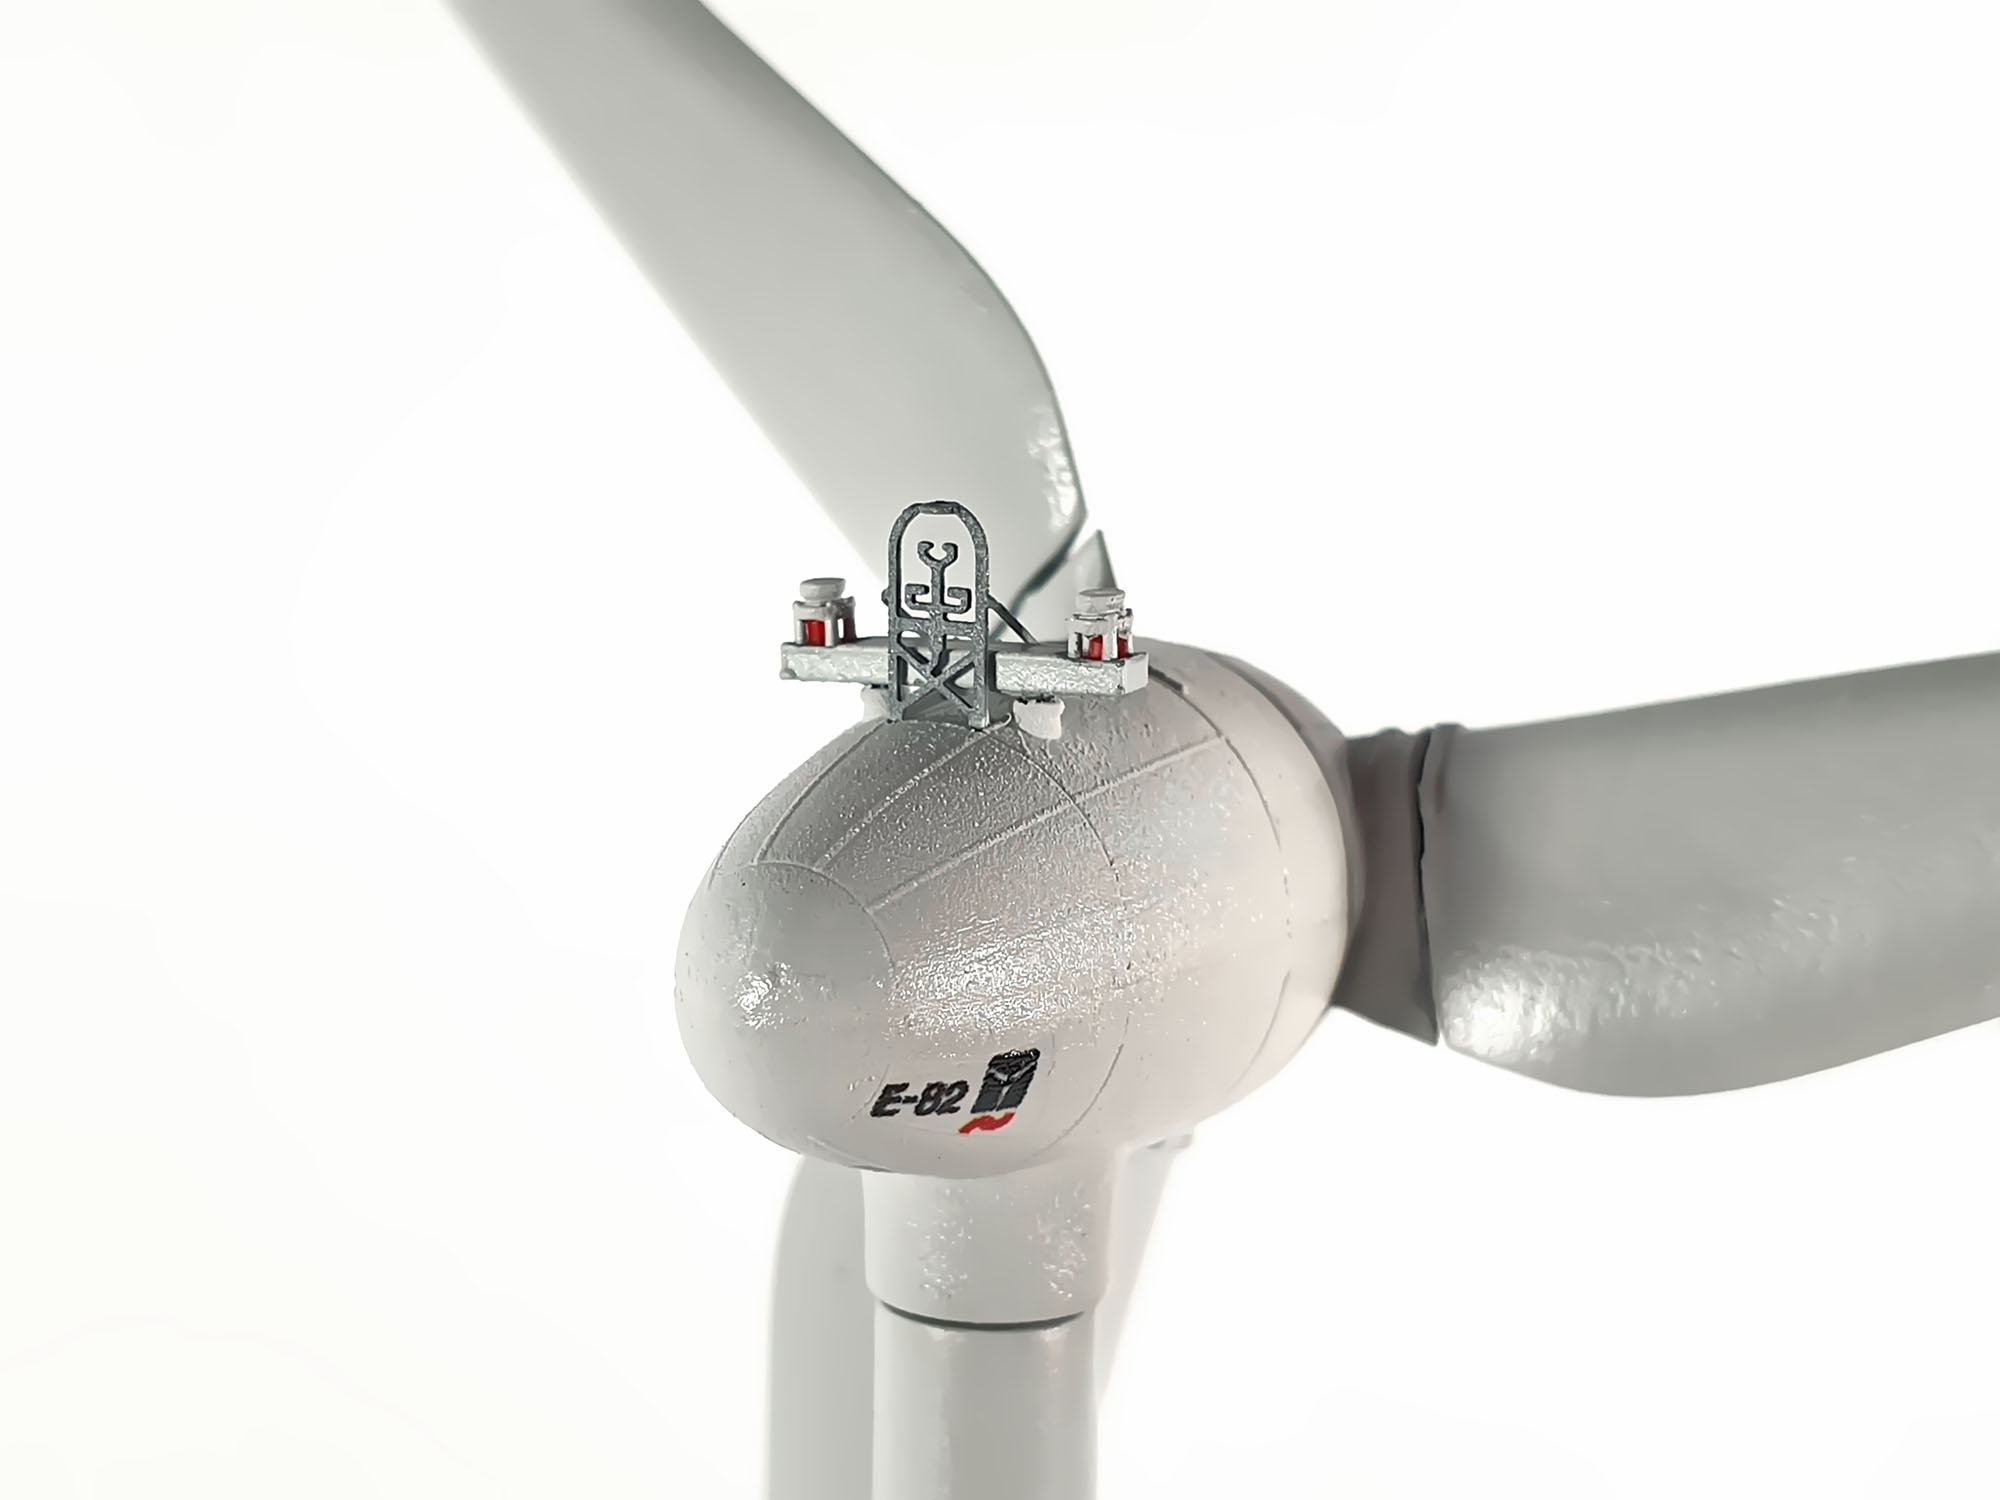
Now the wind turbine is complete:


Close view of the motor head with all installed equipment – beacon lights and wind sensors:


I made these pictures to show the real size of the wind turbine in comparison with other Z scale items – some buildings from Kibri and Faller and Green Cargo train:


I recorded some demonstration videos. On the first one, you can see a general view of the wind turbine together with other Z scale items. Note a very smooth rotation with a speed completely true to the prototype – 12 rpm. This is an average speed within the range of prototypical rotation speeds claimed by Enercon for this type of the wind turbine – from 6 to 18 rpm:
The second video demonstrates work of the beacon with red flashing lights:
Regarding noise level: I did not make any specific measurements, but I can say that the turbine is very quiet. The motor itself is silent at all; only quiet rustling of plastic gears in the reducer can be heard. To mention something for comparison, I can say that my wind turbine is quieter than modern Märklin Z scale locomotives fitted with coreless motors.
I plan to install three wind turbines on my own layout. I think I can produce some of them on demand, but probably a bit later, only when I complete all my current open orders.
Best regards,
Alex
I would like to introduce my next development – Z scale wind turbine. I started this project around a year ago; after some test 3D prints, I put it on hold, but recently decided to finish it. Items related to the power generation and distribution are indeed quite rare in Z scale; we can see certain wind turbines and high voltage transmission towers in bigger scales – N and H0, but actually nothing similar exists in our scale. I know only two Z scale items related to the power industry – cooling tower from Archistories (Art. No. 701171) and very rare item – high voltage transmission tower from Japanese manufacturer Sankei.
Some years ago, I purchased some Faller N scale Nordex wind turbines (Art. No. 232251) and planned to use them on my Z scale layout, accepting a slightly out of scale compromise. Later, when I got more experience in designing and producing models and accessories, I decided to develop my own variant that had to be true to scale and feature higher level of details.
Another reason why I was seeking for the replacement of Faller wind turbines was a necessity of using big external underfloor AC motor with a separate AC power supply (quite expensive by the way) to drive Faller windmills. The problem was to find a suitable driving gear for it – very small, quiet and with a very low RPM.
I had a luck with this and I found a very small 6 mm diameter coreless motor featuring integrated reducer with as much as 1:700 gear ratio:
I successfully fitted Faller lumber mill (Art. No. 282743) with it, and then I decided to start another development where this gear motor can also be used – the wind turbine.
I found design of Faller Nordex turbines quite primitive and I started looking for better prototypes, which, in my opinion, would look better in Z scale. I chose a beautifully designed wind turbine from Enercon – class E-82. This model can often be seen in Germany and some other countries. It is designed for 2000-3000 kW power output, has 82-meter rotor diameter and can be installed onto pylons with a different height from 59 to 138 meters:
Too high objects may look not so good on railway layouts that are always limited by space; therefore, I decided to design a lowest variant with a pylon 59 m high as a prototype. Now I had to do a lot of research work. It is hard to find detailed drawings of wind turbines, but abundance of real life pictures was enough for designing.
The biggest problem was to find a detailed picture of the wind turbine from above. After looking among thousands pictures over the net, I decided to find a suitable drone video. Luckily, I found a very good one on YouTube:
I made some screenshots from it and used them as a visual reference. After a while, 3D design was complete. Considering 3D printer limits (Formlabs Form 3), I had to split the pylon into two parts:
I added all possible external details to the egg-shaped head:
The blades were modeled with great care, exactly following the design of the prototype:
Prototype:
My 1:220 wind turbine has the following dimensions:
– Height of the pylon – 24 cm
– Rotor diameter – 19 cm
– Maximal height when the blade of the rotor is in vertical position – 33.5 cm
I printed first test copy with white resin. However, I was not satisfied with results for 100% and printed another set with already proven gray material – the one that offers best resolution and strength:
And here is a beacon. I accepted the challenge and decided to equip it with real red blinking LEDs. For this, I developed a super-small circuit board with white mask that is only 0.9 x 9 mm size. If someone wanted to see the smallest ever circuit board – probably here is it:
After cleaning, drying and polishing, all parts were carefully airbrushed. I chose Tamiya LP-35 “Insignia White” quick-drying lacquer paint – a slightly grayish tint of white color that, in my opinion, suits the best for the wind turbine. The similar color is used for ICE trains. It was difficult to fix small parts with “crocodiles”, and I attached them directly to the wooden sticks with double-sided adhesive tape:
The door and electric junction box were airbrushed with aluminum paint. I know that these items are green in the prototype, but I decided to make them a bit more distinguishable in such a small scale:
In order to achieve maximal realism, I also developed some metal etched parts – wind sensors and doorstep with handrail:
Prototypes:
Then, another complex task waited for me. I decided to reproduce a beautiful green to white color transition that is common to many wind turbines in Germany. No manufacturer produces ready to use paint kits for this; thus, I had to mix five different shades of green manually. Conventional dropper was not precise enough for this, and I used 2 ml syringes:
Then the next routine followed: “Mask and paint it. Wait 1 hour. Repeat 5 times”:
After this, the base of the pylon was separately airbrushed with gray concrete-like color.
I decided to add one more detail – Enercon logo to the egg-shaped housing of the engine room, like on the prototype:
I printed it on Mimaki UV-printer, just like on the locomotives and cars. The lower half of the “egg” should has been fixed in a very specific way for this. Lego was not helpful here, so I made special “cradles” from the polymer modeling clay in order to fix the part on the printing table:
The part was successfully printed at the both sides (please note that it is very small and zoom is strong here):
Note a thin transparent silicone ring on the pictures above – I used it to fix the motor head on the pylon and allow it to rotate with fingers when needed. This silicone ring also reduces noise and vibration.
Now let’s return to the beacon. Here is an airbrushed 3D printed cover, circuit board and small pieces of red fiber optic that were used as light filters:
The circuit board is assembled – two red SMD 0402 LEDs (1 x 0.5 mm size) from above and pieces of gold-plated pins from circuit board connectors with ultra-thin thin PTFE-coated wire from below:
And it really works!
Now about electronics. I used two separate devices here: a small blinker circuit for beacon from Hungarian manufacturer TrainModules:
And a small step-down switching converter which can output as low as 0.8 Volts – exactly what is needed for average prototypical rotation speed 12 rpm (one turn in 5 seconds). Here is how these circuit boards allocated inside the pylon (old version shown here – split into halves; I made tubes solid in the second version):
In the future, I plan to replace these two separate circuit boards with my own variant that will include both step-down converter and blinker circuits on the same board.
Then I started to assemble all parts together. Here is how the gear motor is allocated inside tiny egg-shaped case:
For demonstration purposes, I made a special 10 cm diameter stand that looks like a mini-diorama – it was covered with grass and has a narrow path:
The stand was combined from 3 layers of gray CNC-machined polystyrene. I attached a circle of anti-slip foamed material from the bottom:
The wind turbine was fixed on the stand with two small screws:
Central layer has a channel for wire outputs:
This is a rare case when I used “classic” decal technology for adding high voltage warning sign to the door, as it is too complex to do it here using UV-printing or pad printing technology:
Here is a couple of closeup views – the door with the path:
And electric junction box:
Now the wind turbine is complete:
Close view of the motor head with all installed equipment – beacon lights and wind sensors:
I made these pictures to show the real size of the wind turbine in comparison with other Z scale items – some buildings from Kibri and Faller and Green Cargo train:
I recorded some demonstration videos. On the first one, you can see a general view of the wind turbine together with other Z scale items. Note a very smooth rotation with a speed completely true to the prototype – 12 rpm. This is an average speed within the range of prototypical rotation speeds claimed by Enercon for this type of the wind turbine – from 6 to 18 rpm:
The second video demonstrates work of the beacon with red flashing lights:
Regarding noise level: I did not make any specific measurements, but I can say that the turbine is very quiet. The motor itself is silent at all; only quiet rustling of plastic gears in the reducer can be heard. To mention something for comparison, I can say that my wind turbine is quieter than modern Märklin Z scale locomotives fitted with coreless motors.
I plan to install three wind turbines on my own layout. I think I can produce some of them on demand, but probably a bit later, only when I complete all my current open orders.
Best regards,
Alex


