Post by scanrail on May 20, 2021 5:31:18 GMT -5
Greetings to all,
I would like to announce availability of selected products from my lineup at dealers in the USA:
zscalehobo.com/zmodell/zmodell.html
www.zscalemonster.com/zmodell/
More products to come later; now let's start from small but useful accessories for Z scale layouts – temporary outdoor barrier structures. Currently this category counts two types of crowd control barriers, or simply, fences, and two different kinds of temporary bridges or pedestrian walkways.
All kinds of barriers and bridges are compatible with each other and can be connected together in any combinations. Possible usage scenarios are very wide: these temporary structures are widely used for road works, for protecting various outdoor restoration facilities, as well as sport and cultural events.
Such bridges often used to organize pedestrian traffic over trenches and pits, as well as the entrance checkpoints for outdoor events or certain restricted areas.
All items are made of 0.2 mm etched nickel silver and airbrushed with high quality flat aluminum lacquer paint at the both sides for imitation of zinc-anodized surface. They all come unassembled. I prepared detailed instructions and included printed versions to all of them.
For fixing the barriers and bridges on the layout, I recommend using non-destructive glue, such as Faller Expert Lasercut (No. 170494) or similar. Using polystyrene or cyanoacrylate glues not recommended, as they can damage paint coating.
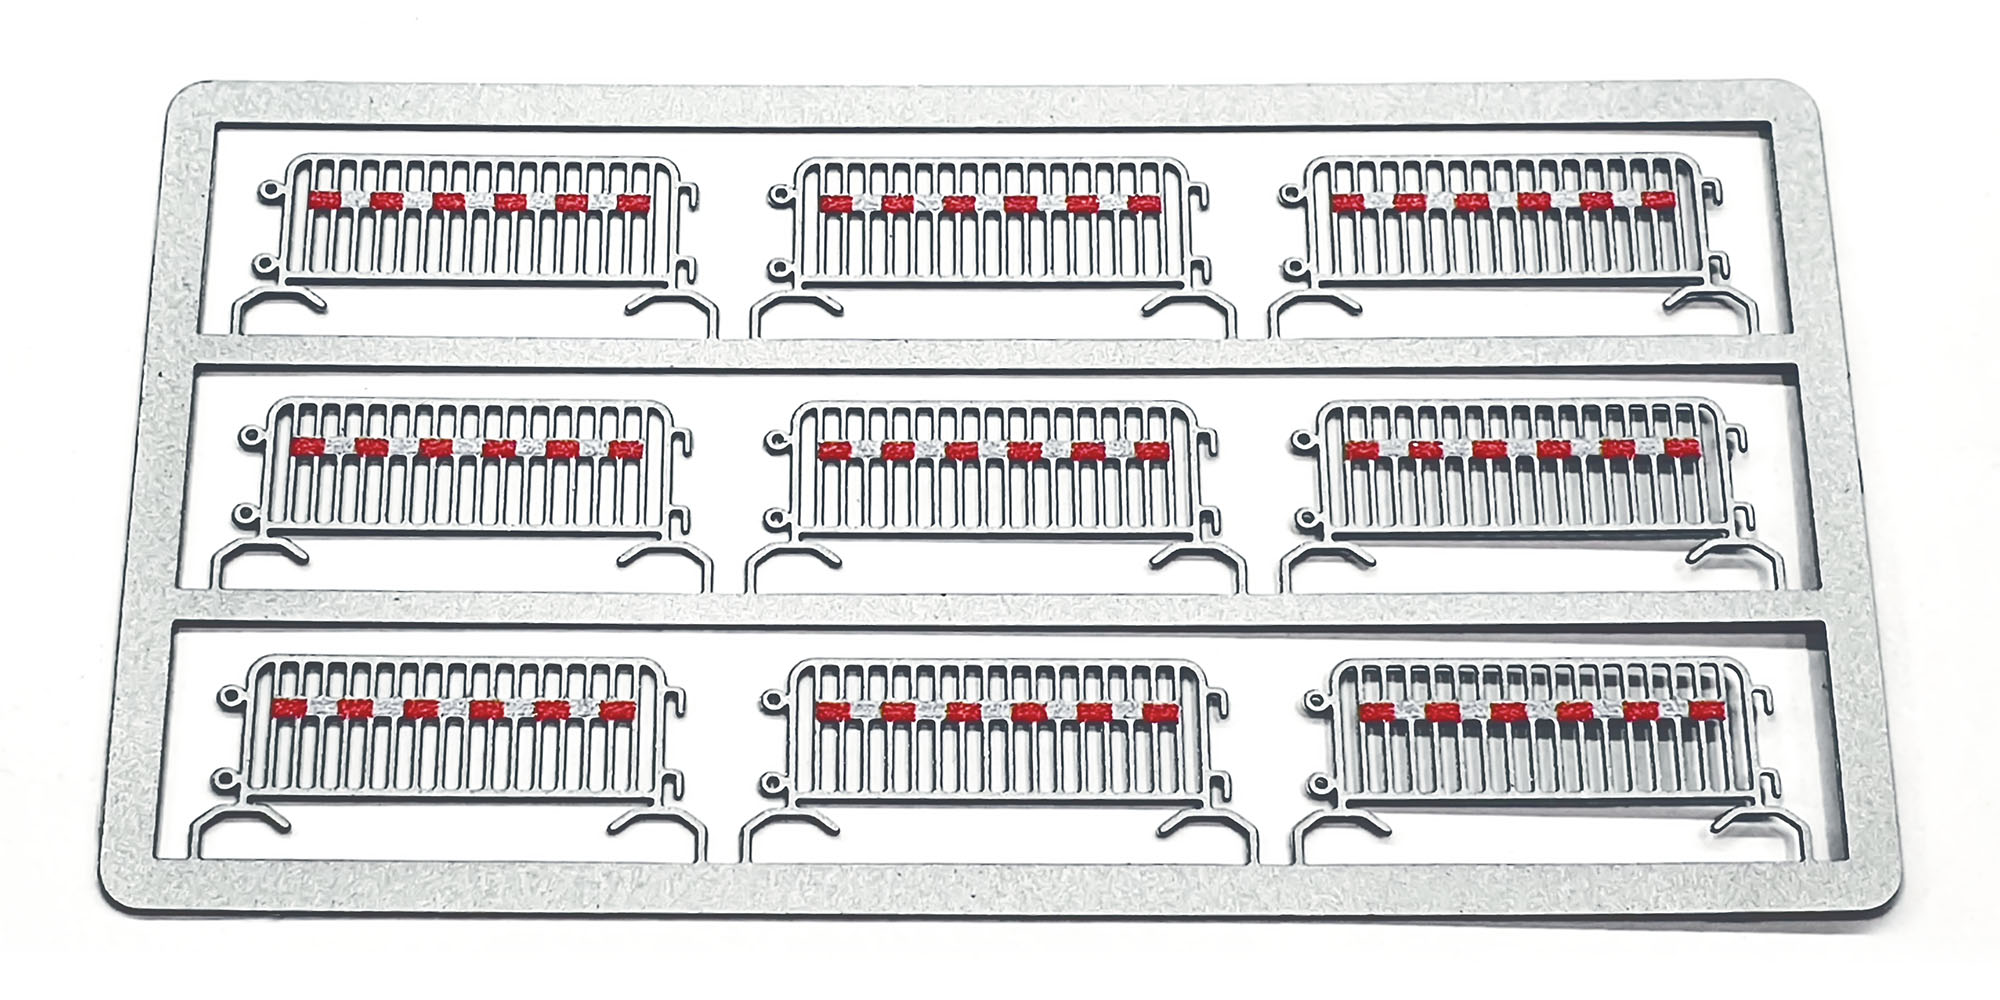
Both variants of fences arranged into 9-piece sets. To assemble them, you will need only a cutter or small scissors capable of cutting thin metal and precise tweezers. Each fence section has a size of 12 x 5.25 mm (without hinges and hooks) which equals to the real-life size of 2.5 x 1 m.
Important: nickel silver is a good material for making many models and accessories; however, it is relatively brittle. What does it mean? If you fold a piece of nickel silver several times back and forth, it will break very quickly. That’s why I ask to assemble these tiny parts very carefully. I intentionally made them very thin in order to achieve realistic look in such a small scale as much as possible. Nevertheless, they are strong enough if assembled correctly.
Crowd control barriers, set #1
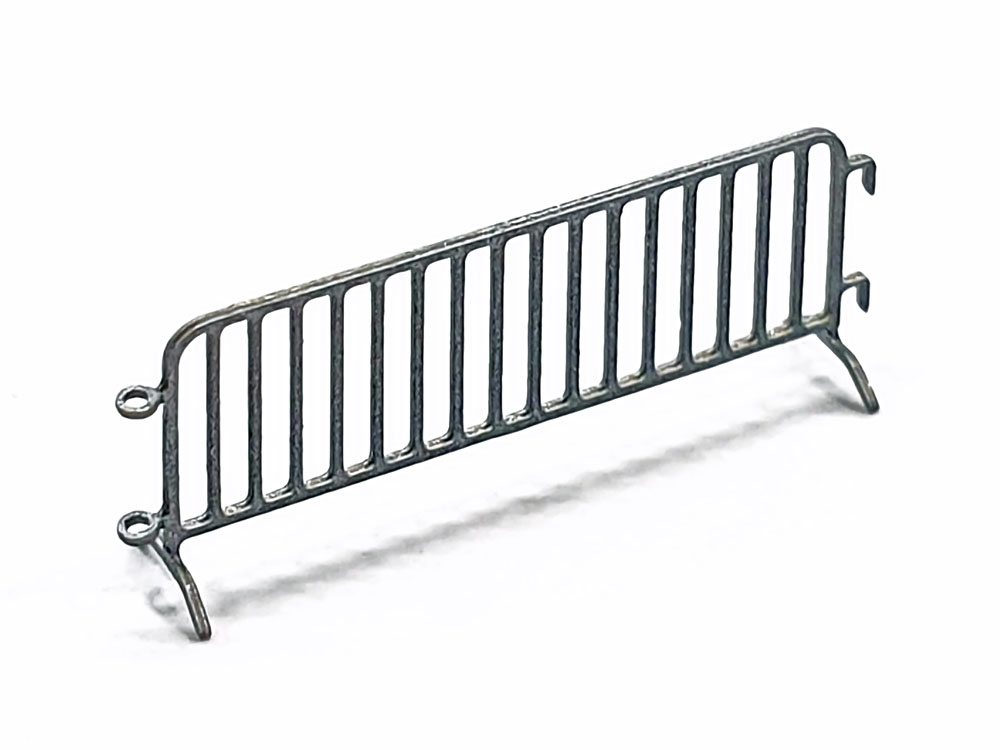


Prototypes:
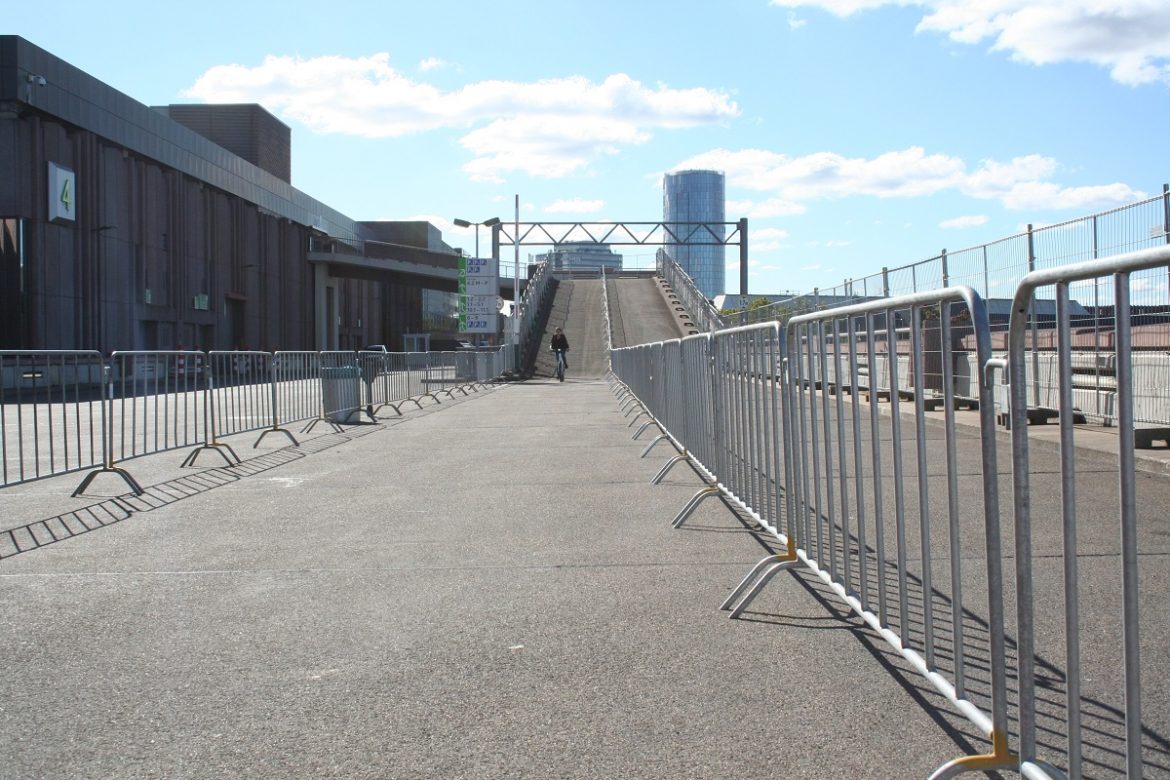
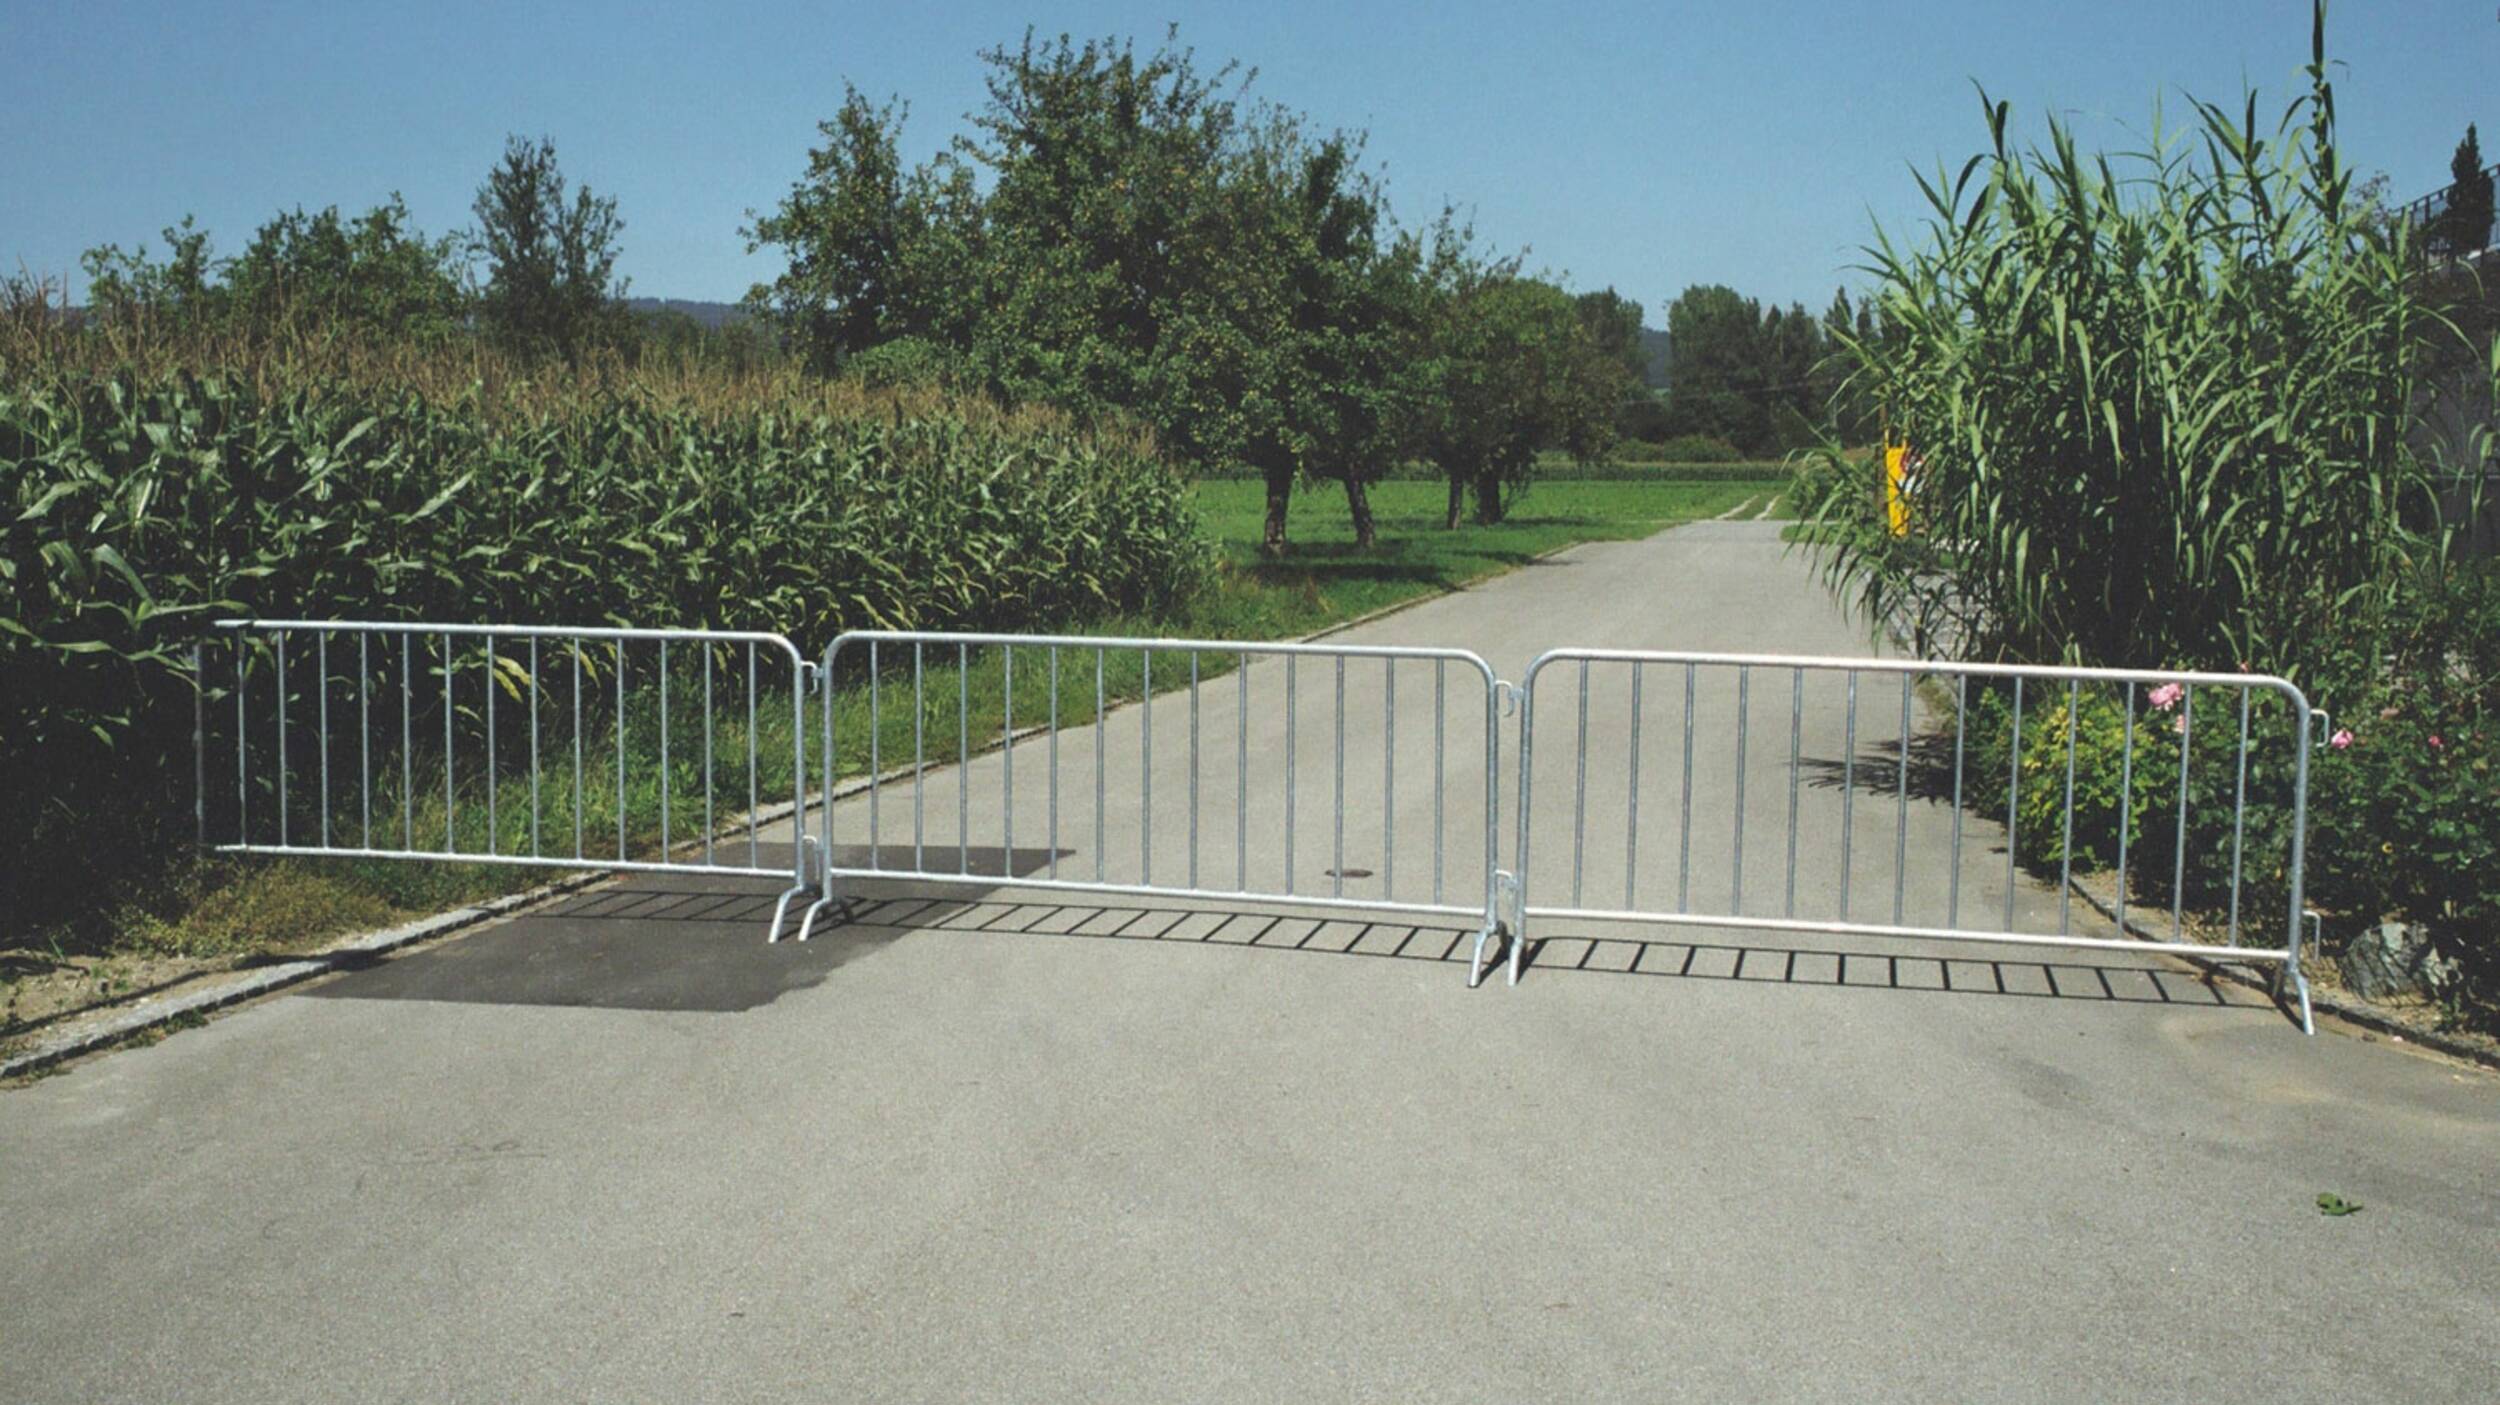
Assembly instructions:
ZM-MS-008.pdf
Crowd control barriers with warning stripes, set #2
Red and white color stripes were printed directly onto the surface using UV-printing technology:
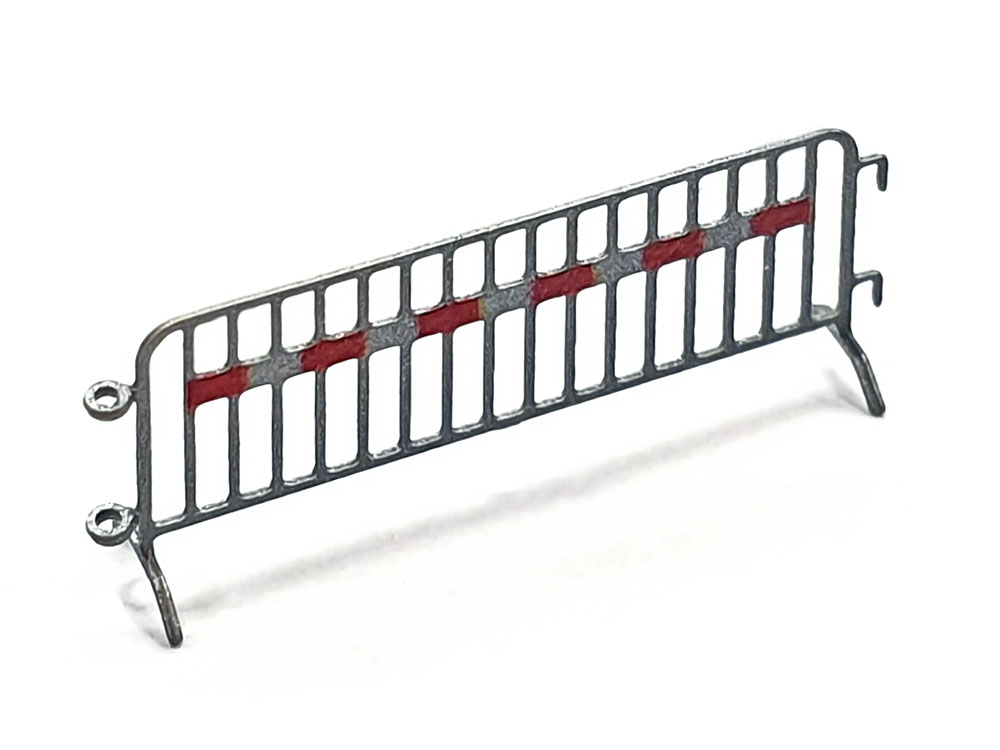
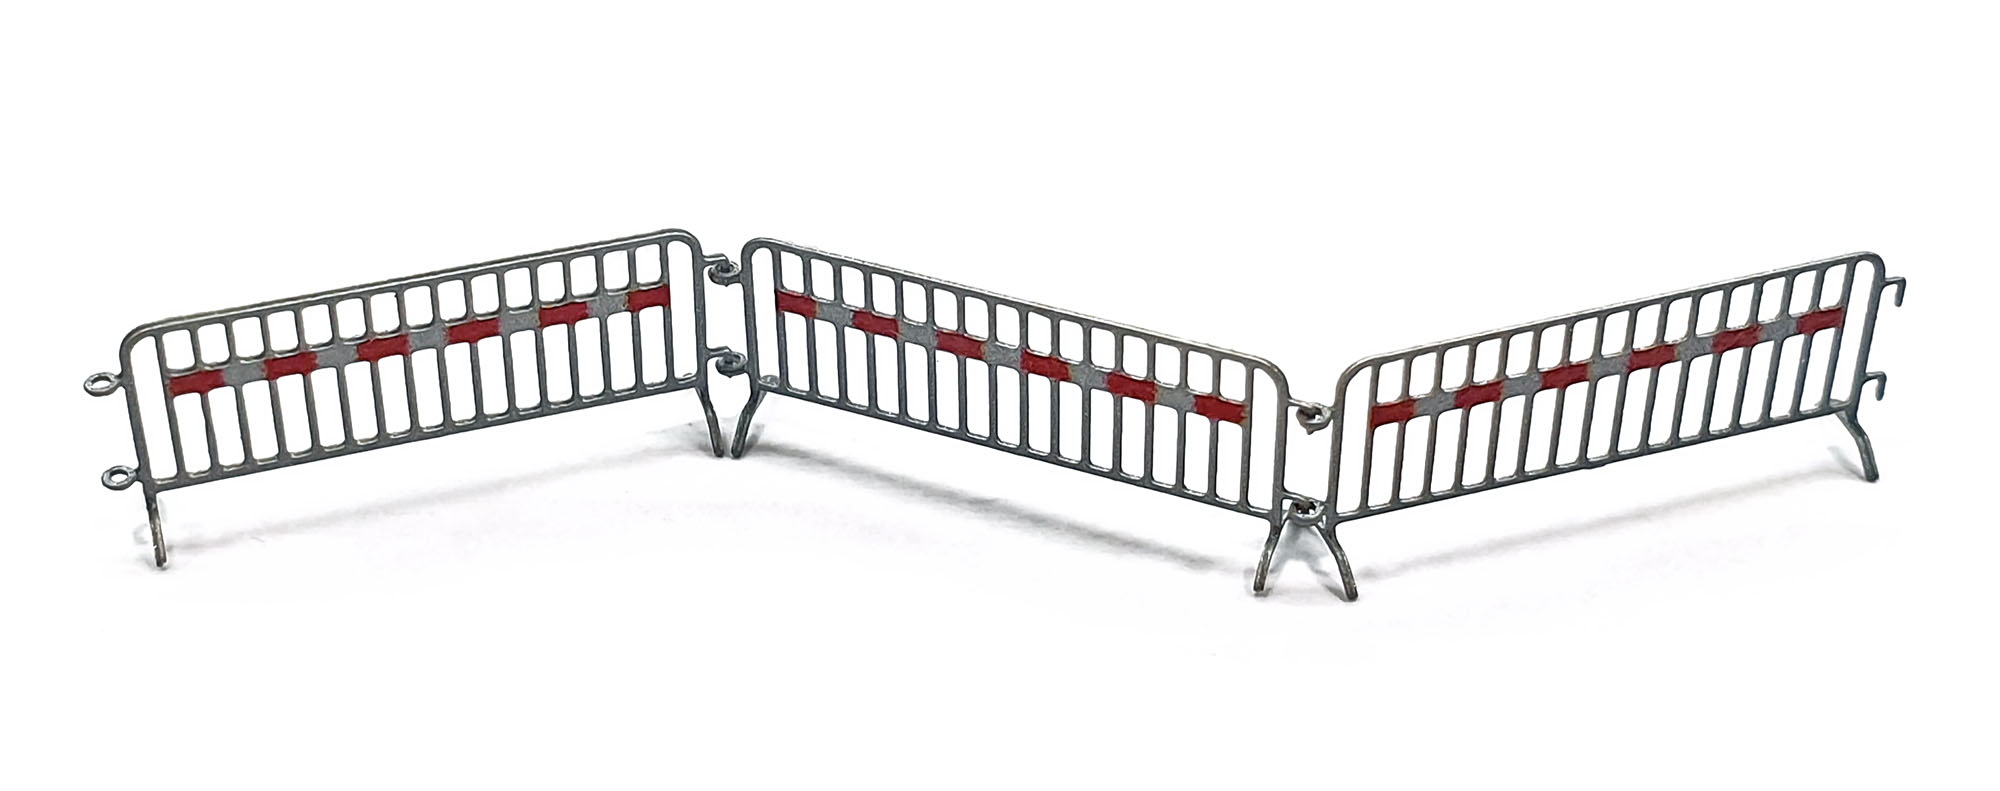
Prototype (the colors of warning stripes are different):

Assembly instructions:
ZM-MS-009.pdf
Bridges
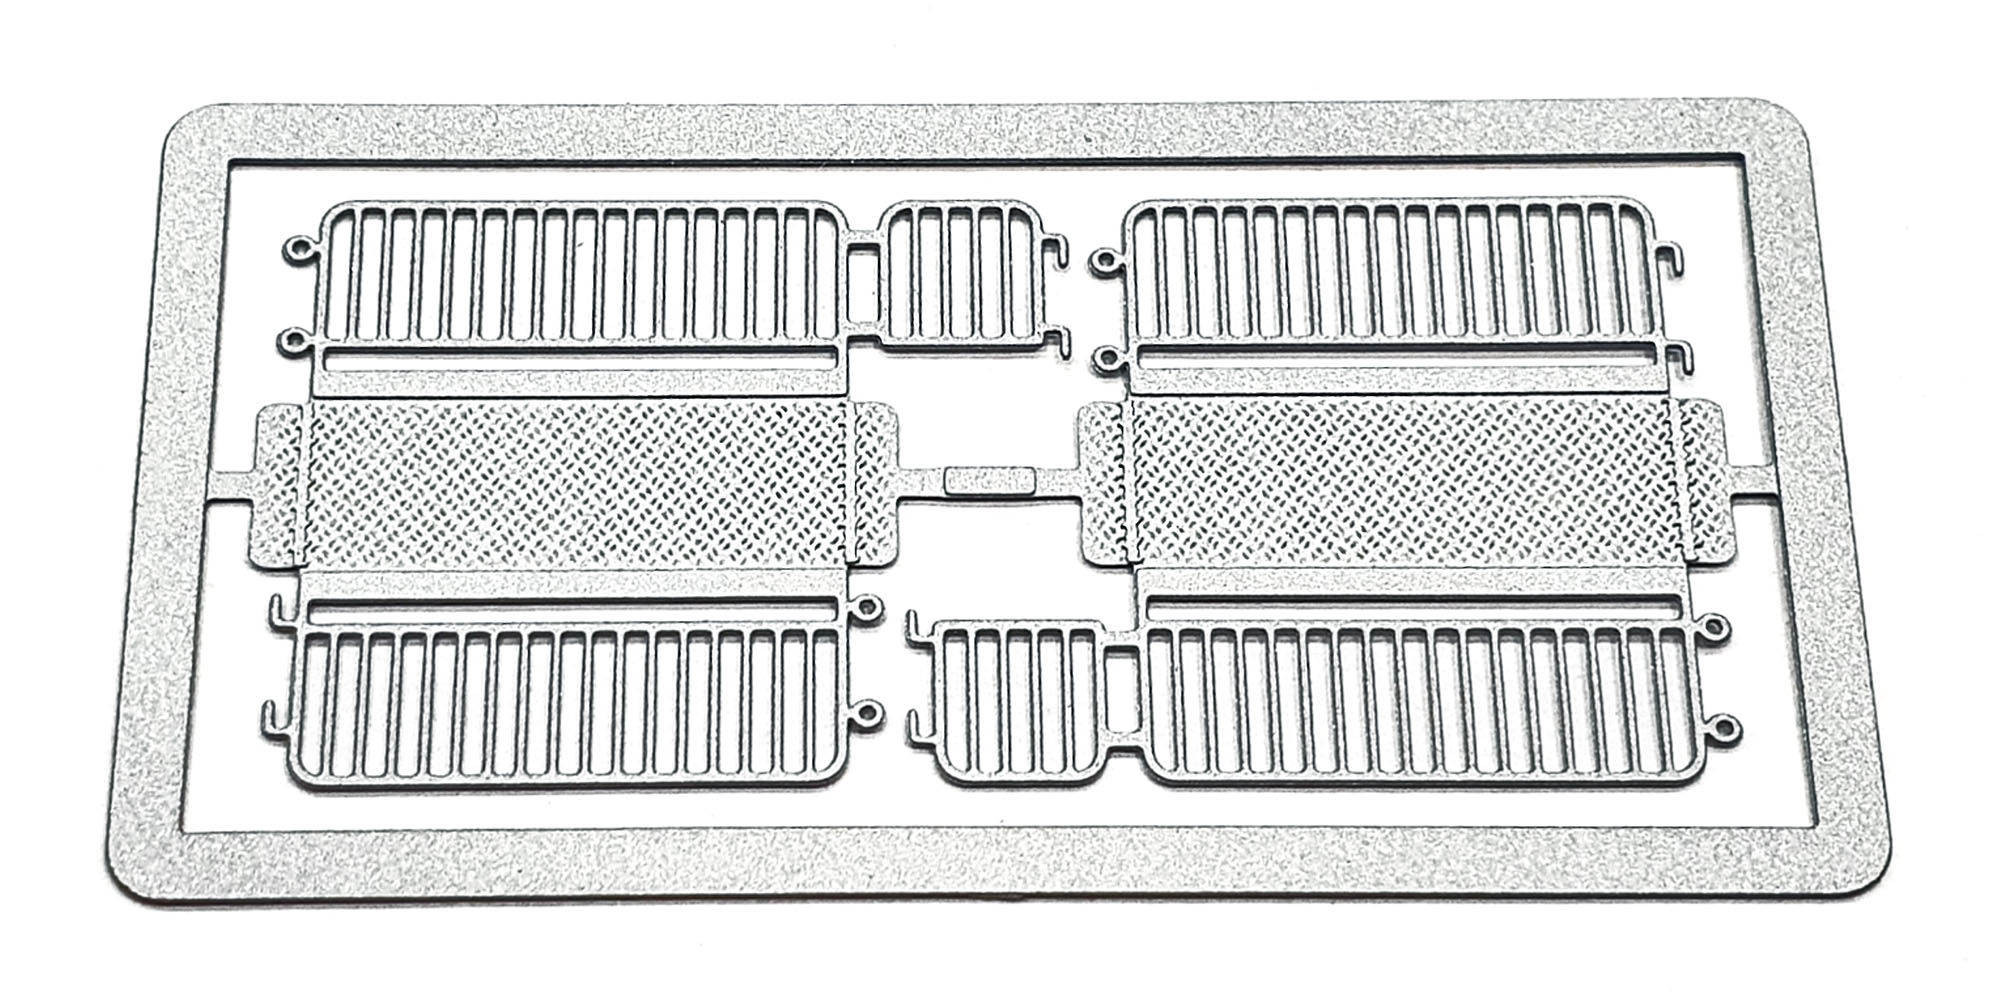
Now let me show the bridges. The size of the side railings is equal to the size of barriers – 12 x 5.25 mm (equals to 2.5 x 1 m in 1:1 scale). The width of the walkway is 4.5 mm that equals to nearly 1 meter in the real life. Note the typical metal texture reproduced on the walkway’s floors.
Important: a special bending tool is required for assembly of these bridges. It is impossible to bend them correctly using only tweezers or any other universal tool – the bridges will definitely be damaged! I will not accept any complaints in this case. Please I kindly ask for understanding.
A big number of different variants of this tool is available on the market; here is a sample of what is needed:
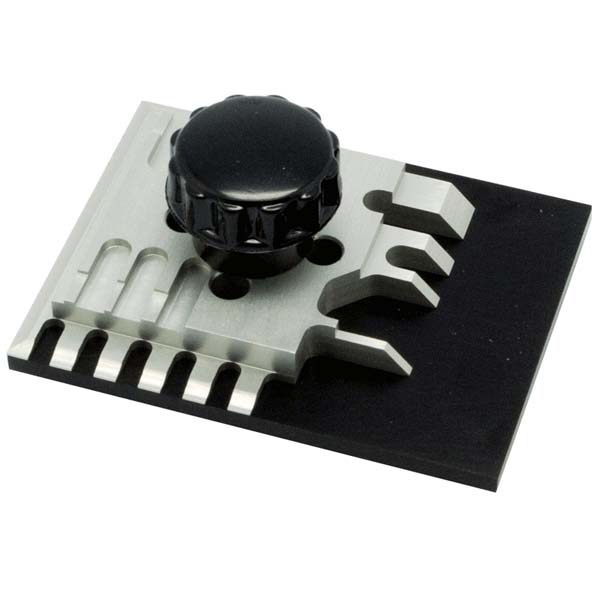
This one is available here:
www.zscalemonster.com/the_small_shop/
Temporary pedestrian walkway bridge, variant #1

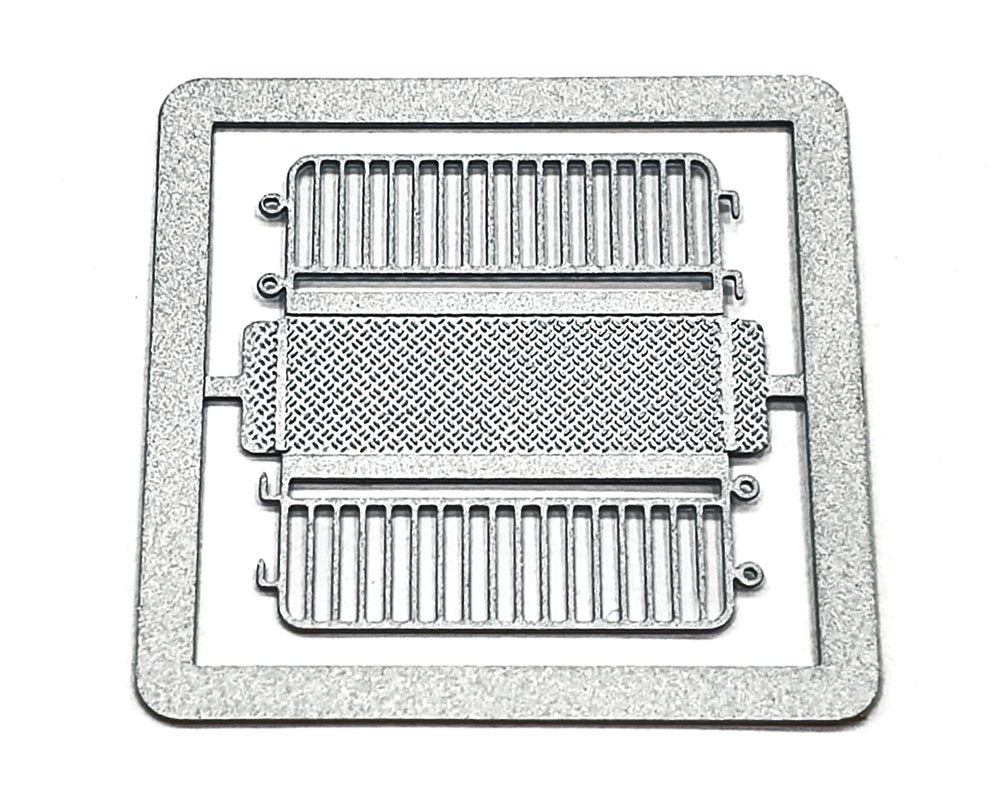
Prototype:

Assembly instructions:
ZM-MS-010.pdf
Double temporary pedestrian walkway bridge, variant #2
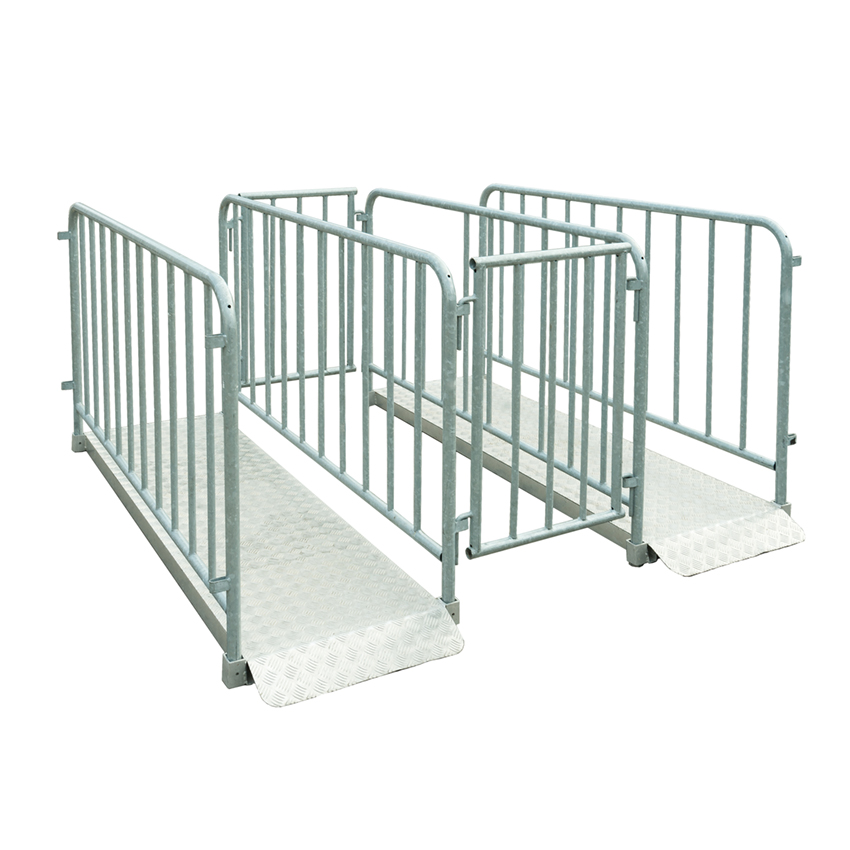
Dimensions of each walkway section are similar to the variant #1. Total width is 13.5 mm.

Prototype:
Assembly instructions:
ZM-MS-011.pdf
Here is a couple of usage samples for barriers and bridges together:

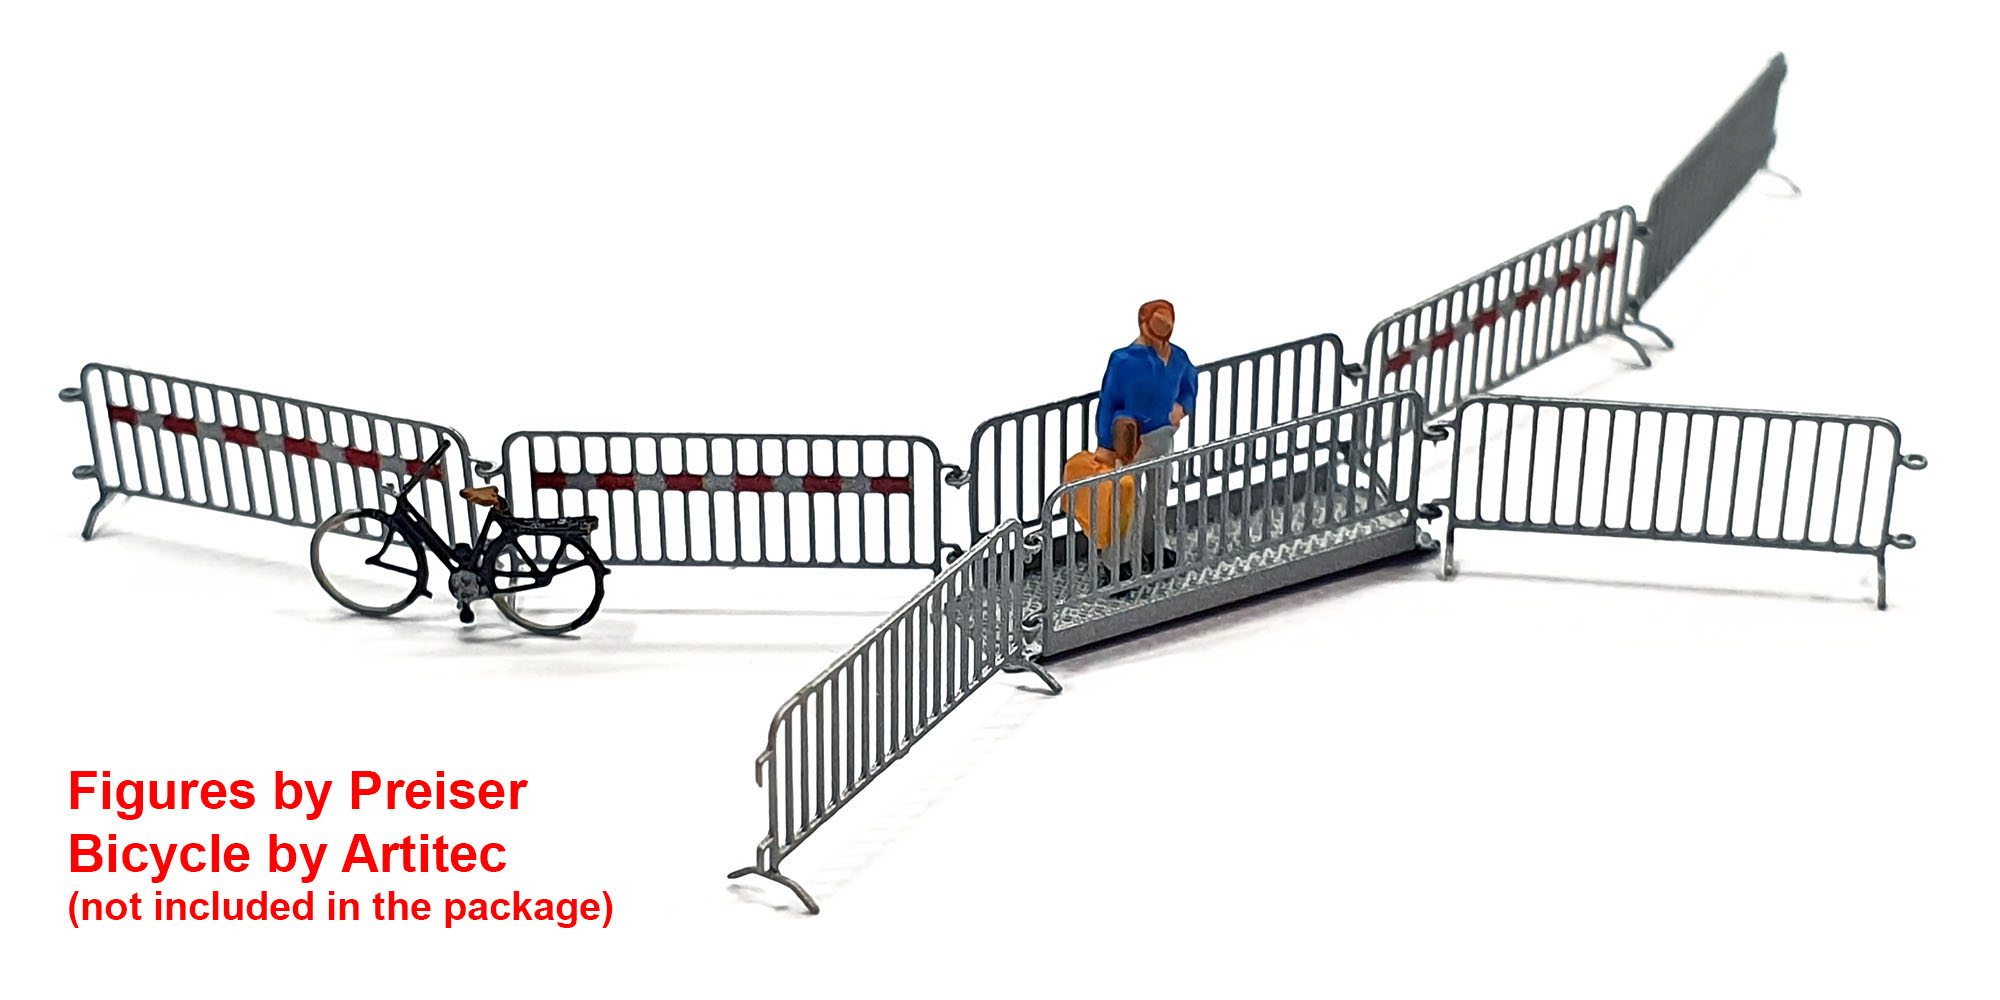
Note: Airbrushed flat aluminum lacquer coating is strong enough even to withstand deformations like bending. Nevertheless, sometimes, minor scratching of the lacquer coating may occur when using bending tool. To fix possible scratches, use Tamiya LP-38 “Flat Aluminum” lacquer paint. It can be applied manually using thin paintbrush either airbrushed. For airbrushing, it is recommended to mix Tamiya LP-38 paint with Tamiya Lacquer Thinner (Retarder Type, Art. #87194) by 50/50 proportion.
Replacement LEDs for digitizing Märklin EMD E8A/E9A diesel locomotives
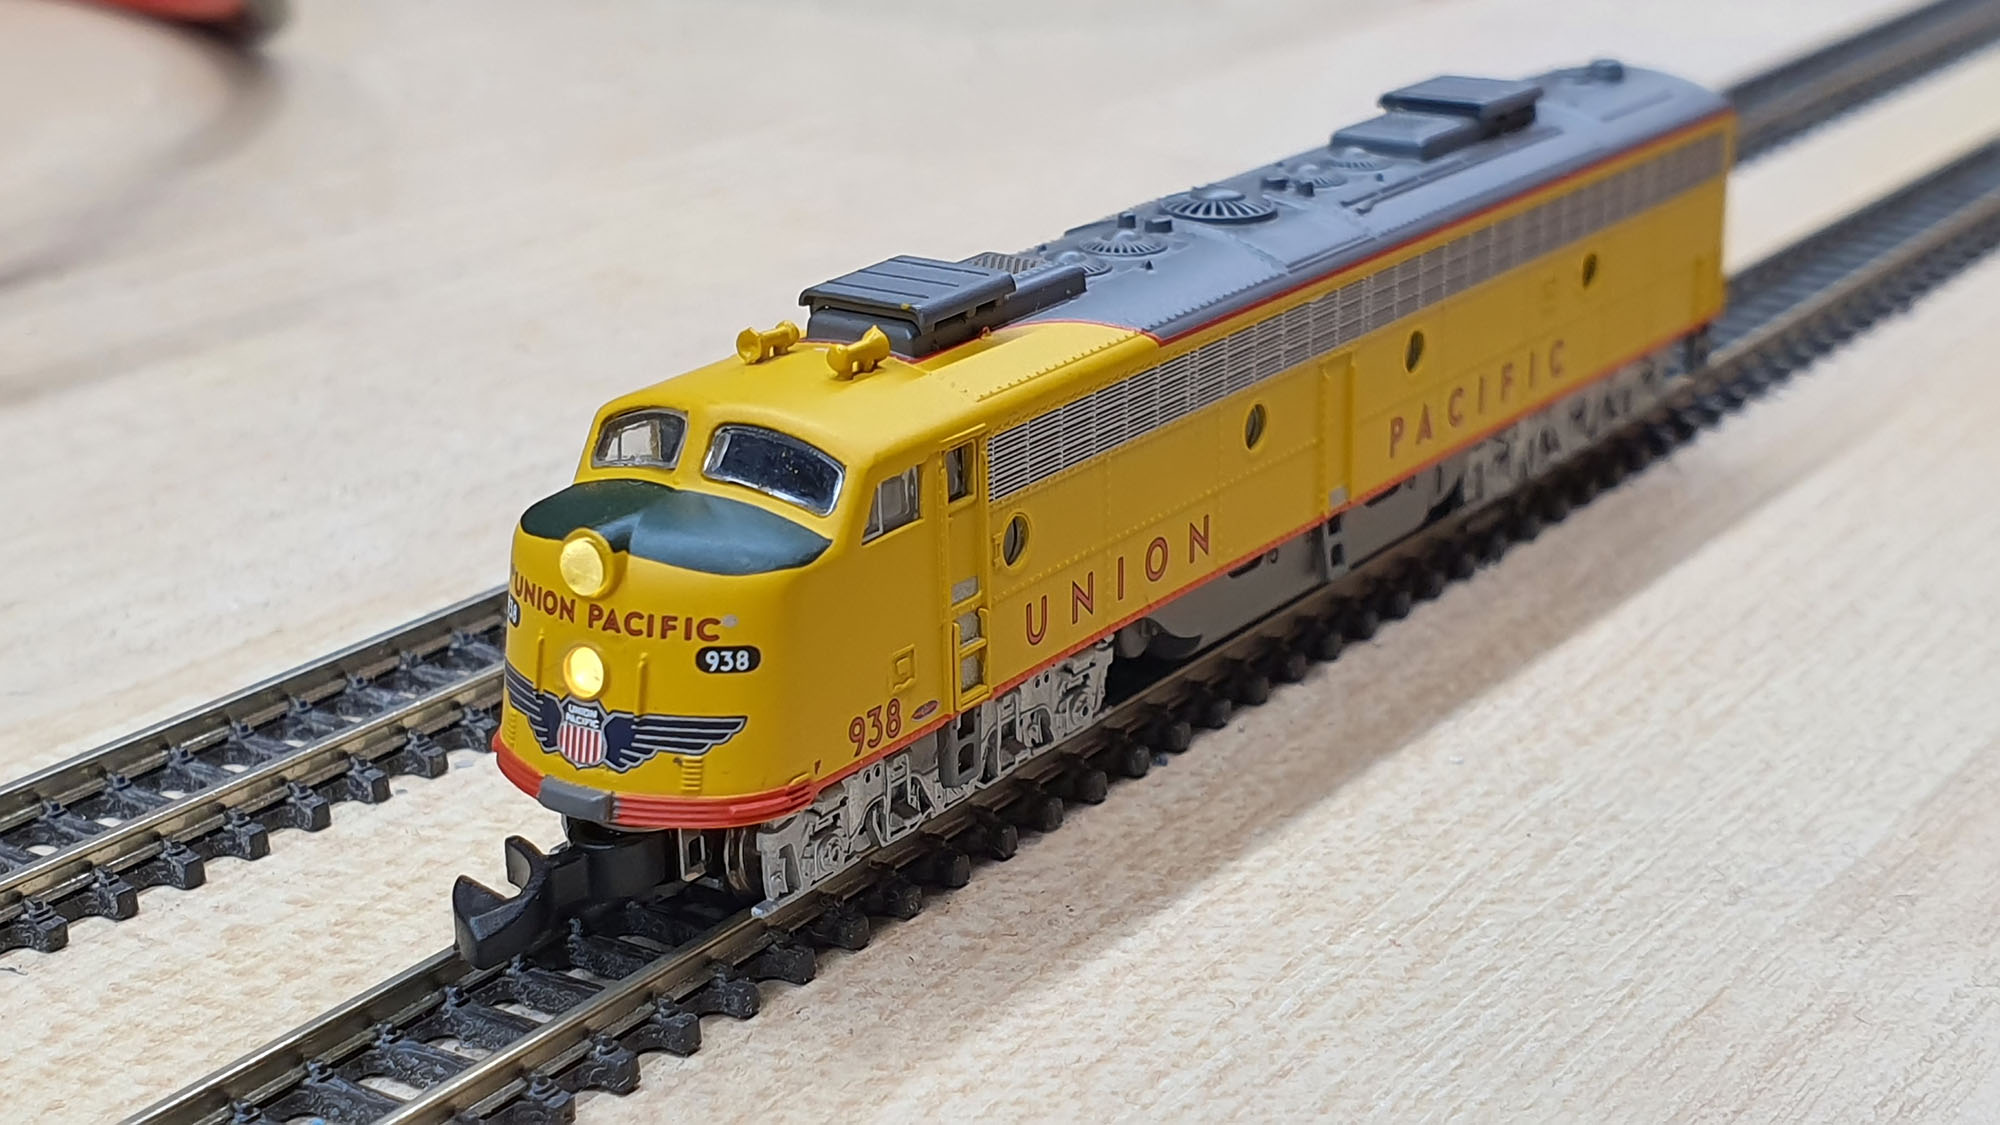
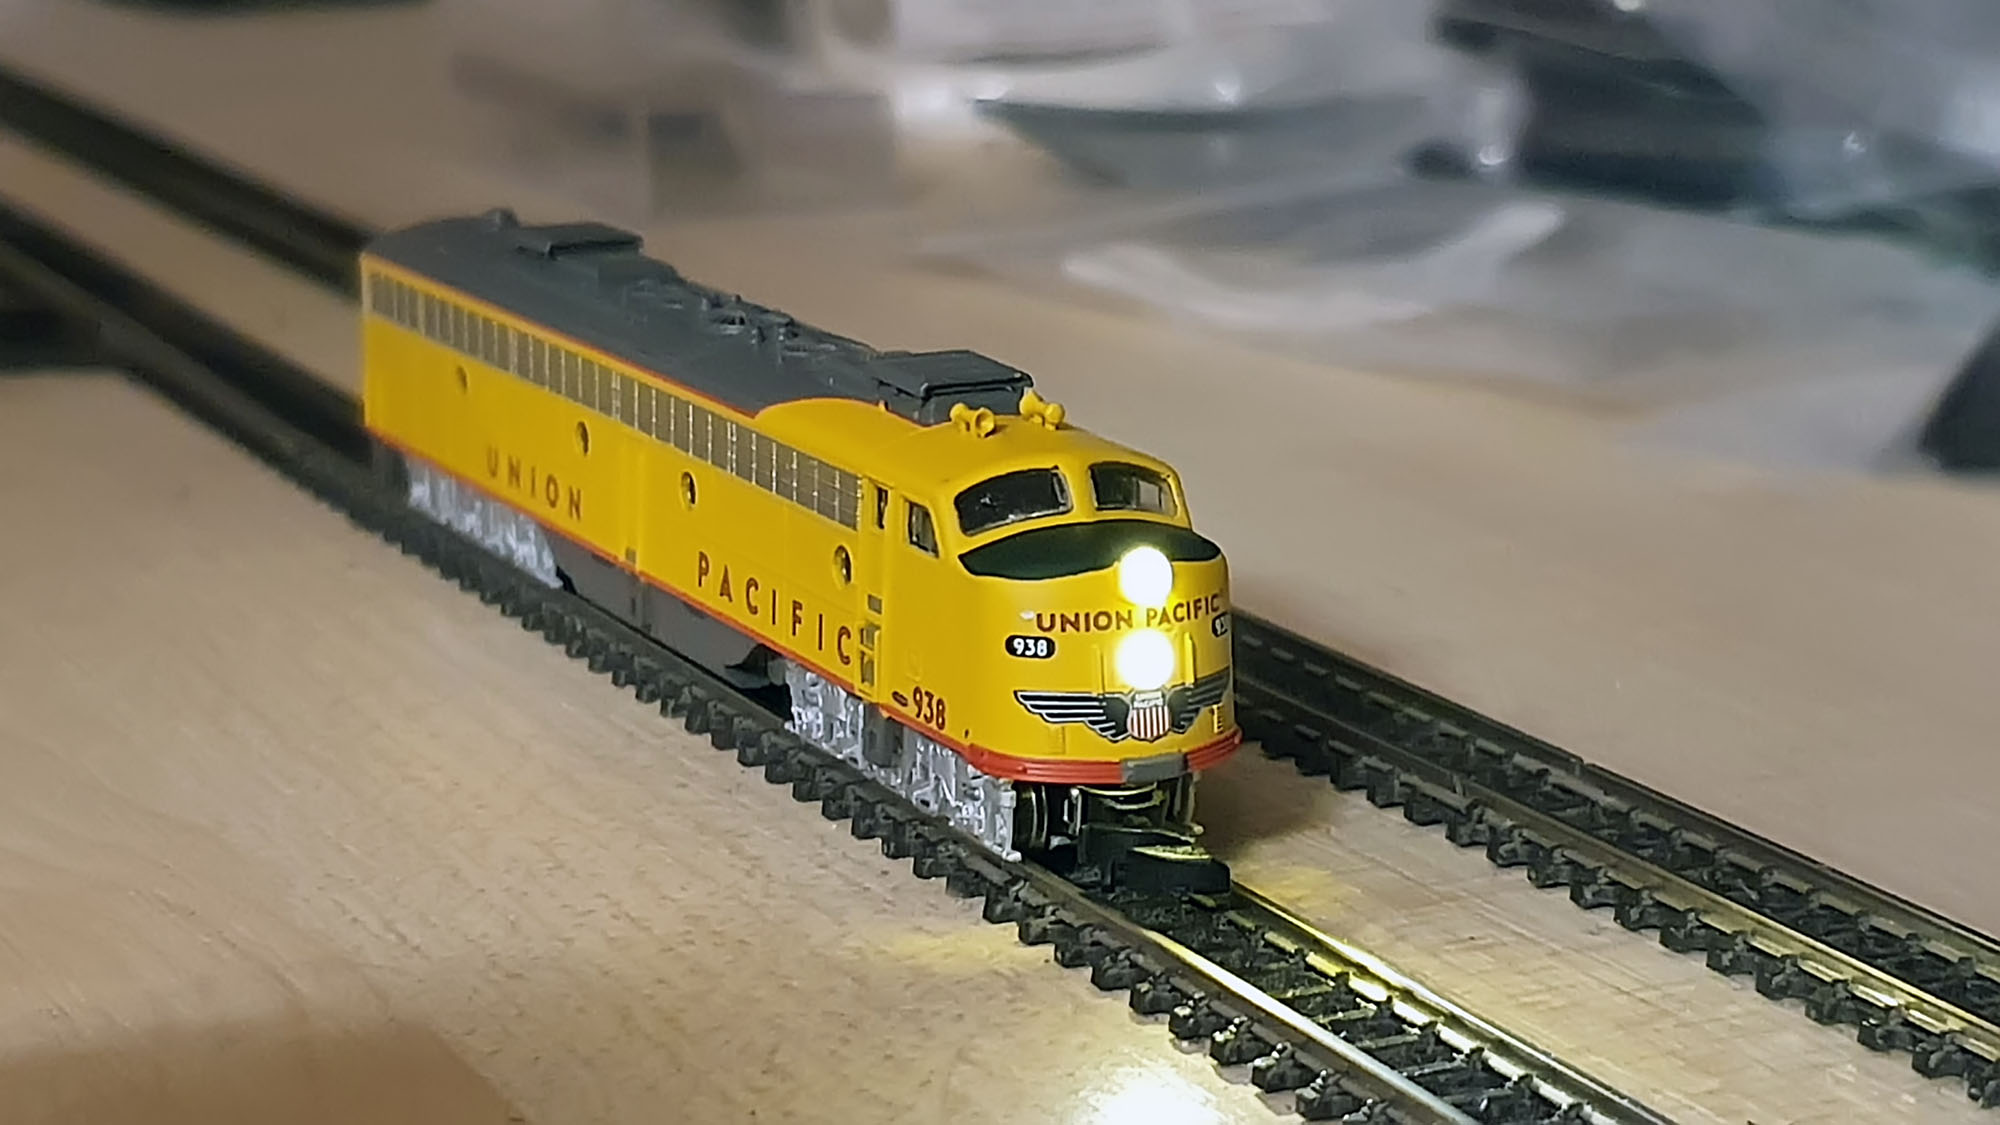
I developed one more accessory that will be very useful to those who would like to digitize Märklin EMD E8A/E9A diesel locomotives (88627, 88628, 88629). In my opinion, Märklin’s approach to making headlights for this locomotive is better – the LED is allocated directly behind the headlight hole, so that all light comes out at full extent. In my opinion, AZL’s solution is less optimal, as the light from the LED on the circuit board has to travel a long way through the curved lightguide – unfortunately, a lot of light is lost this way; as a result, headlight is quite dull.
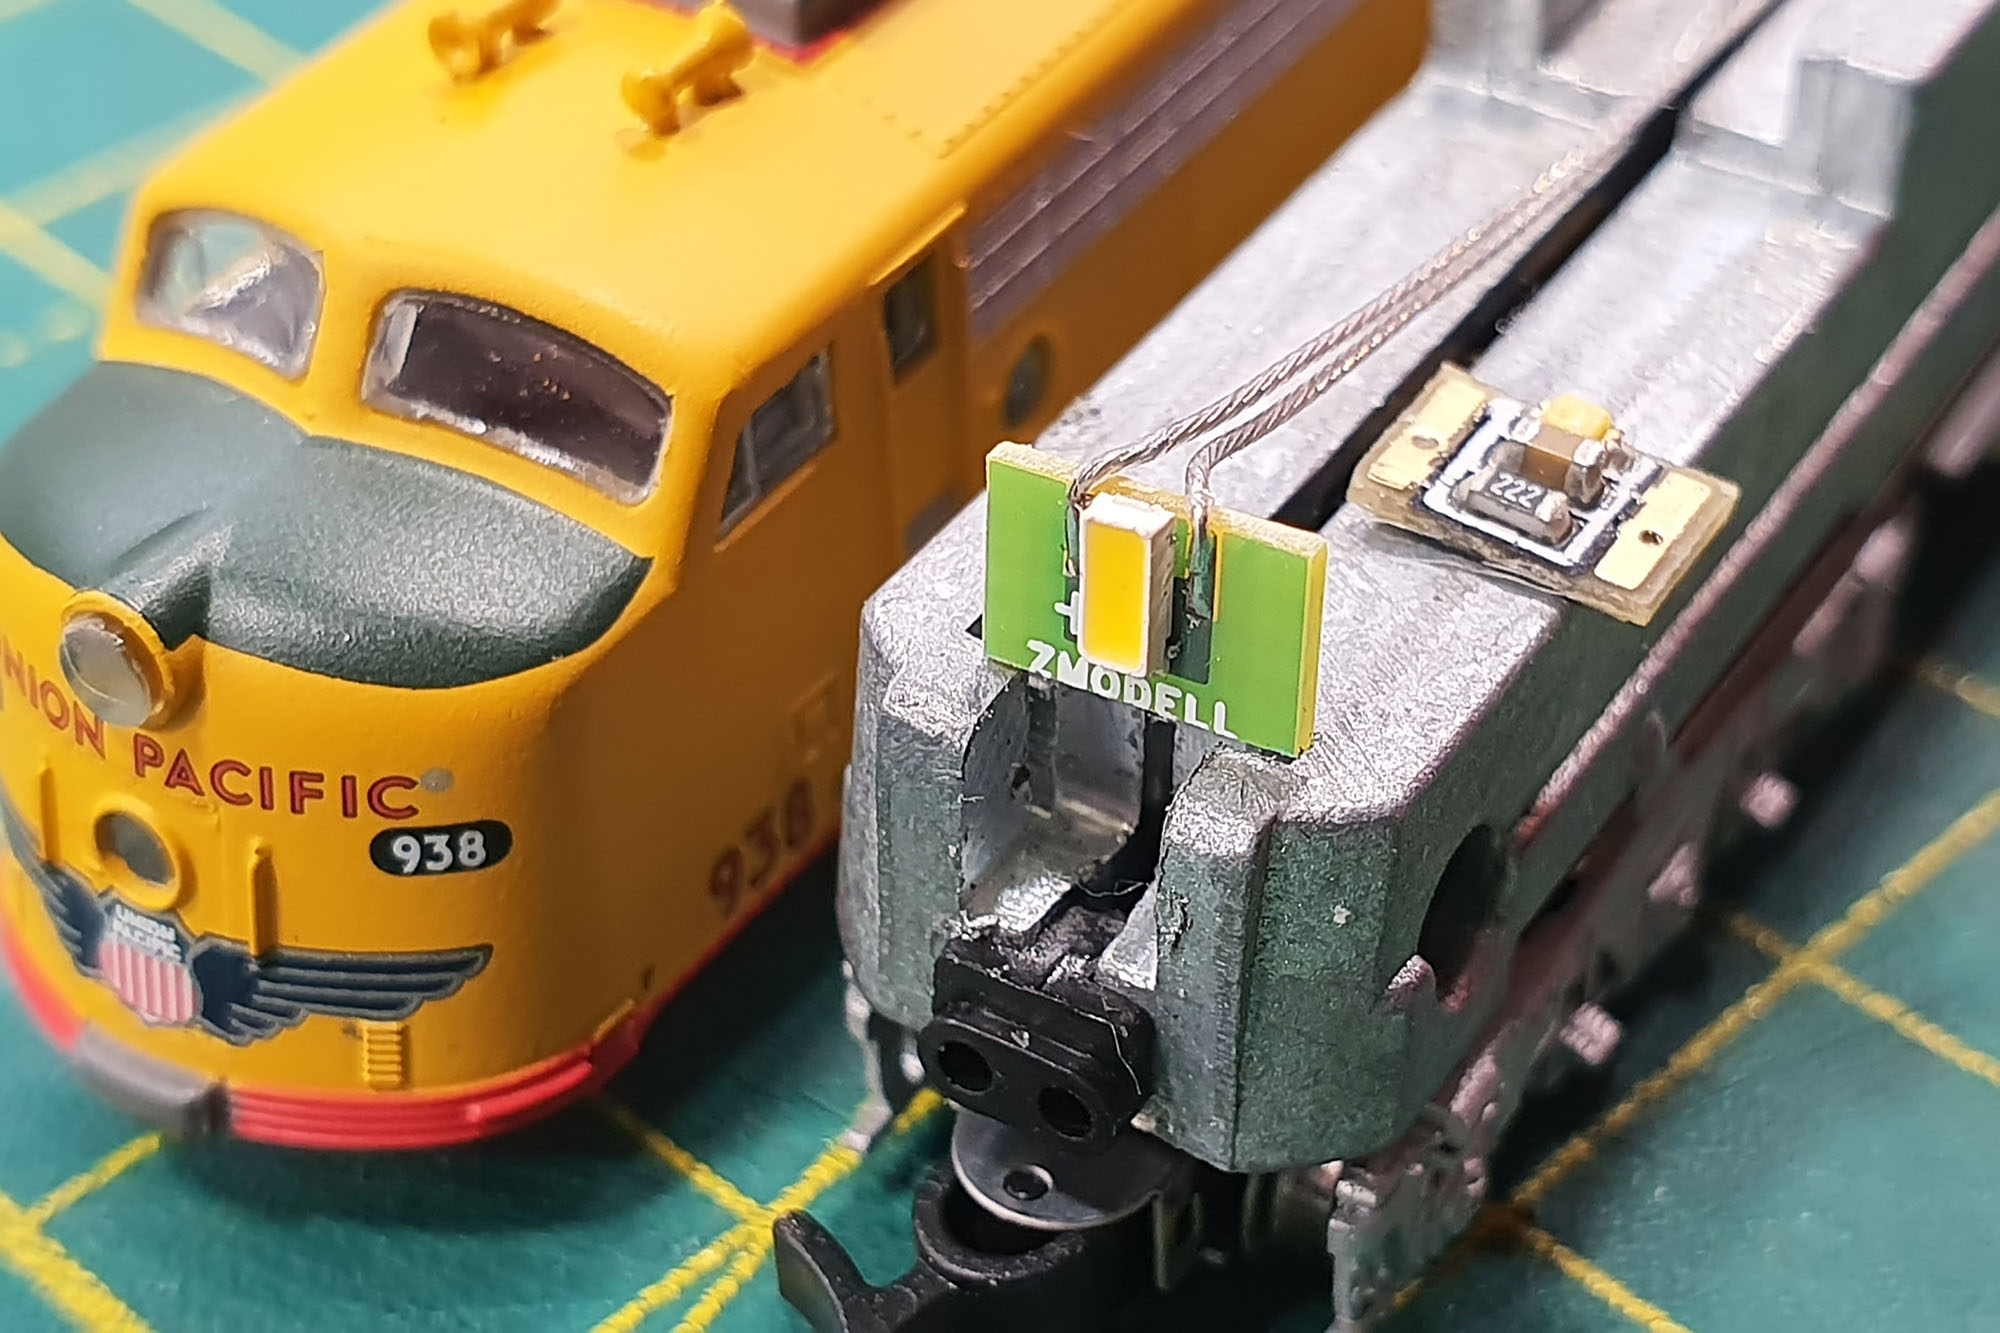
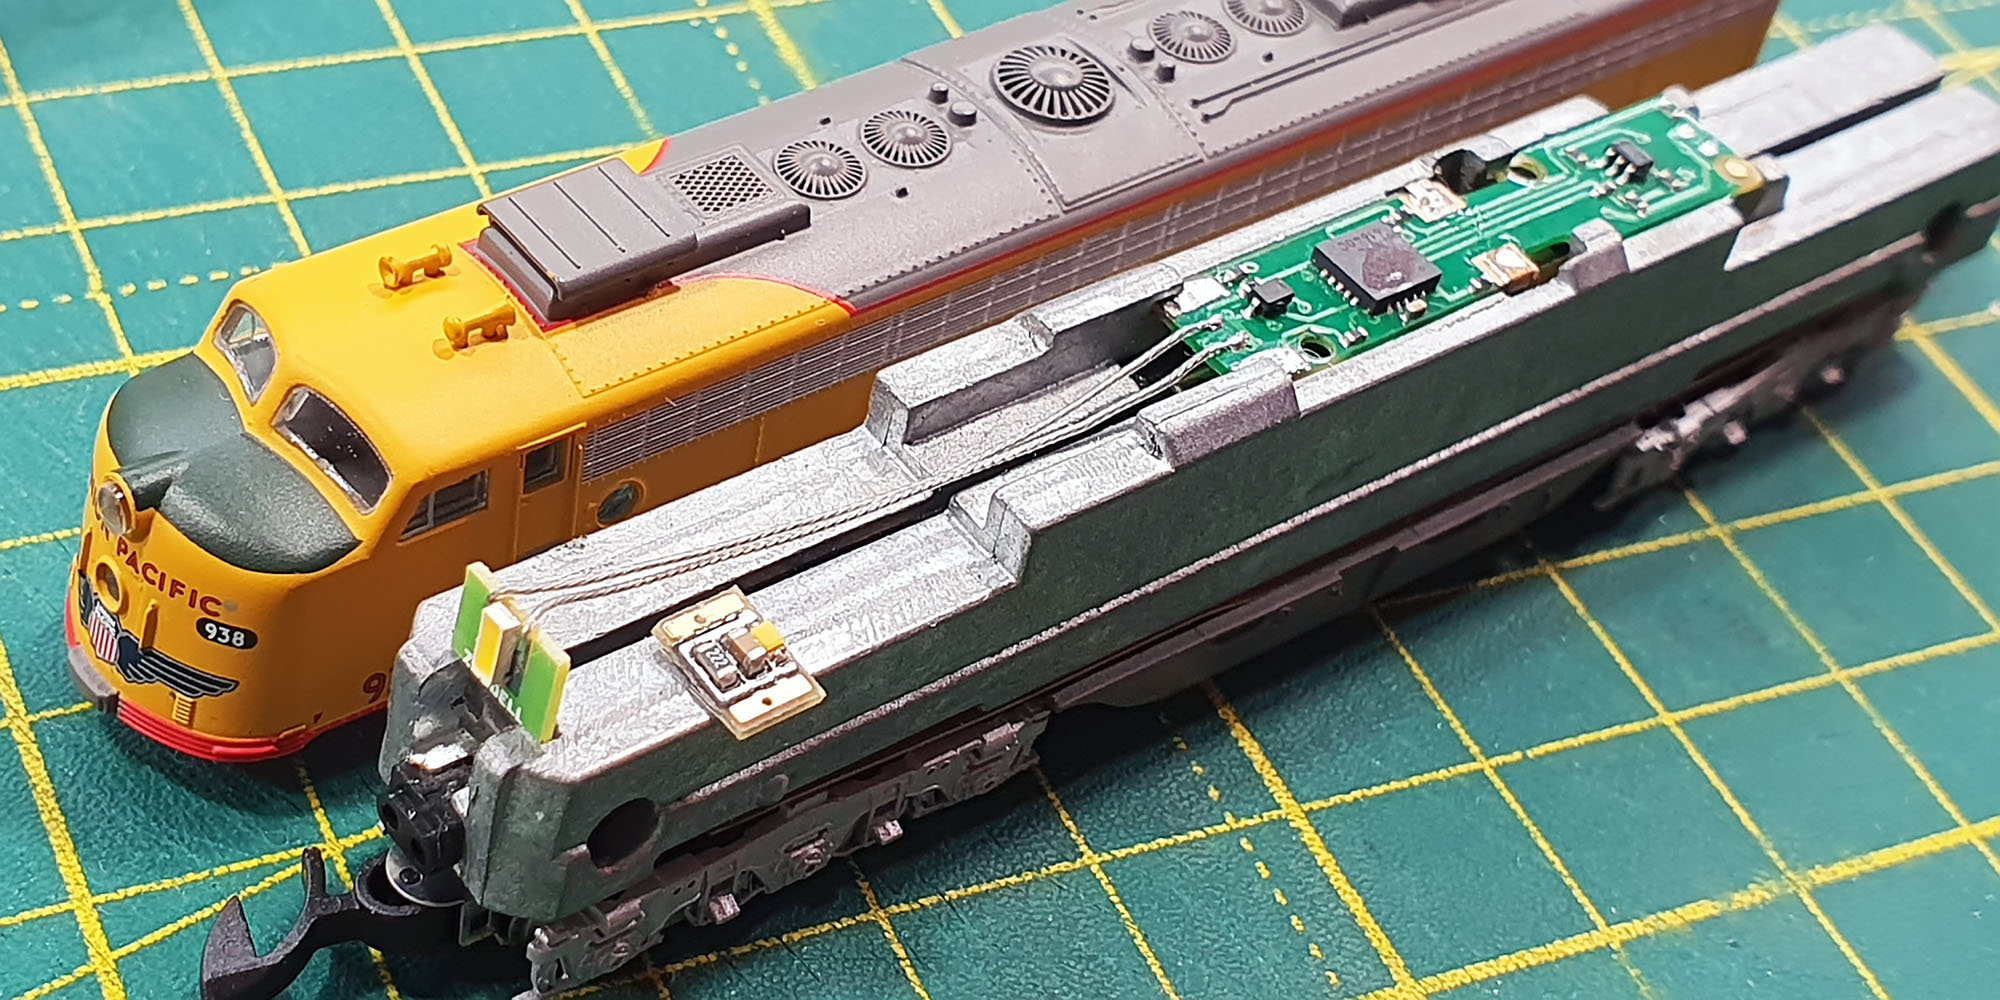
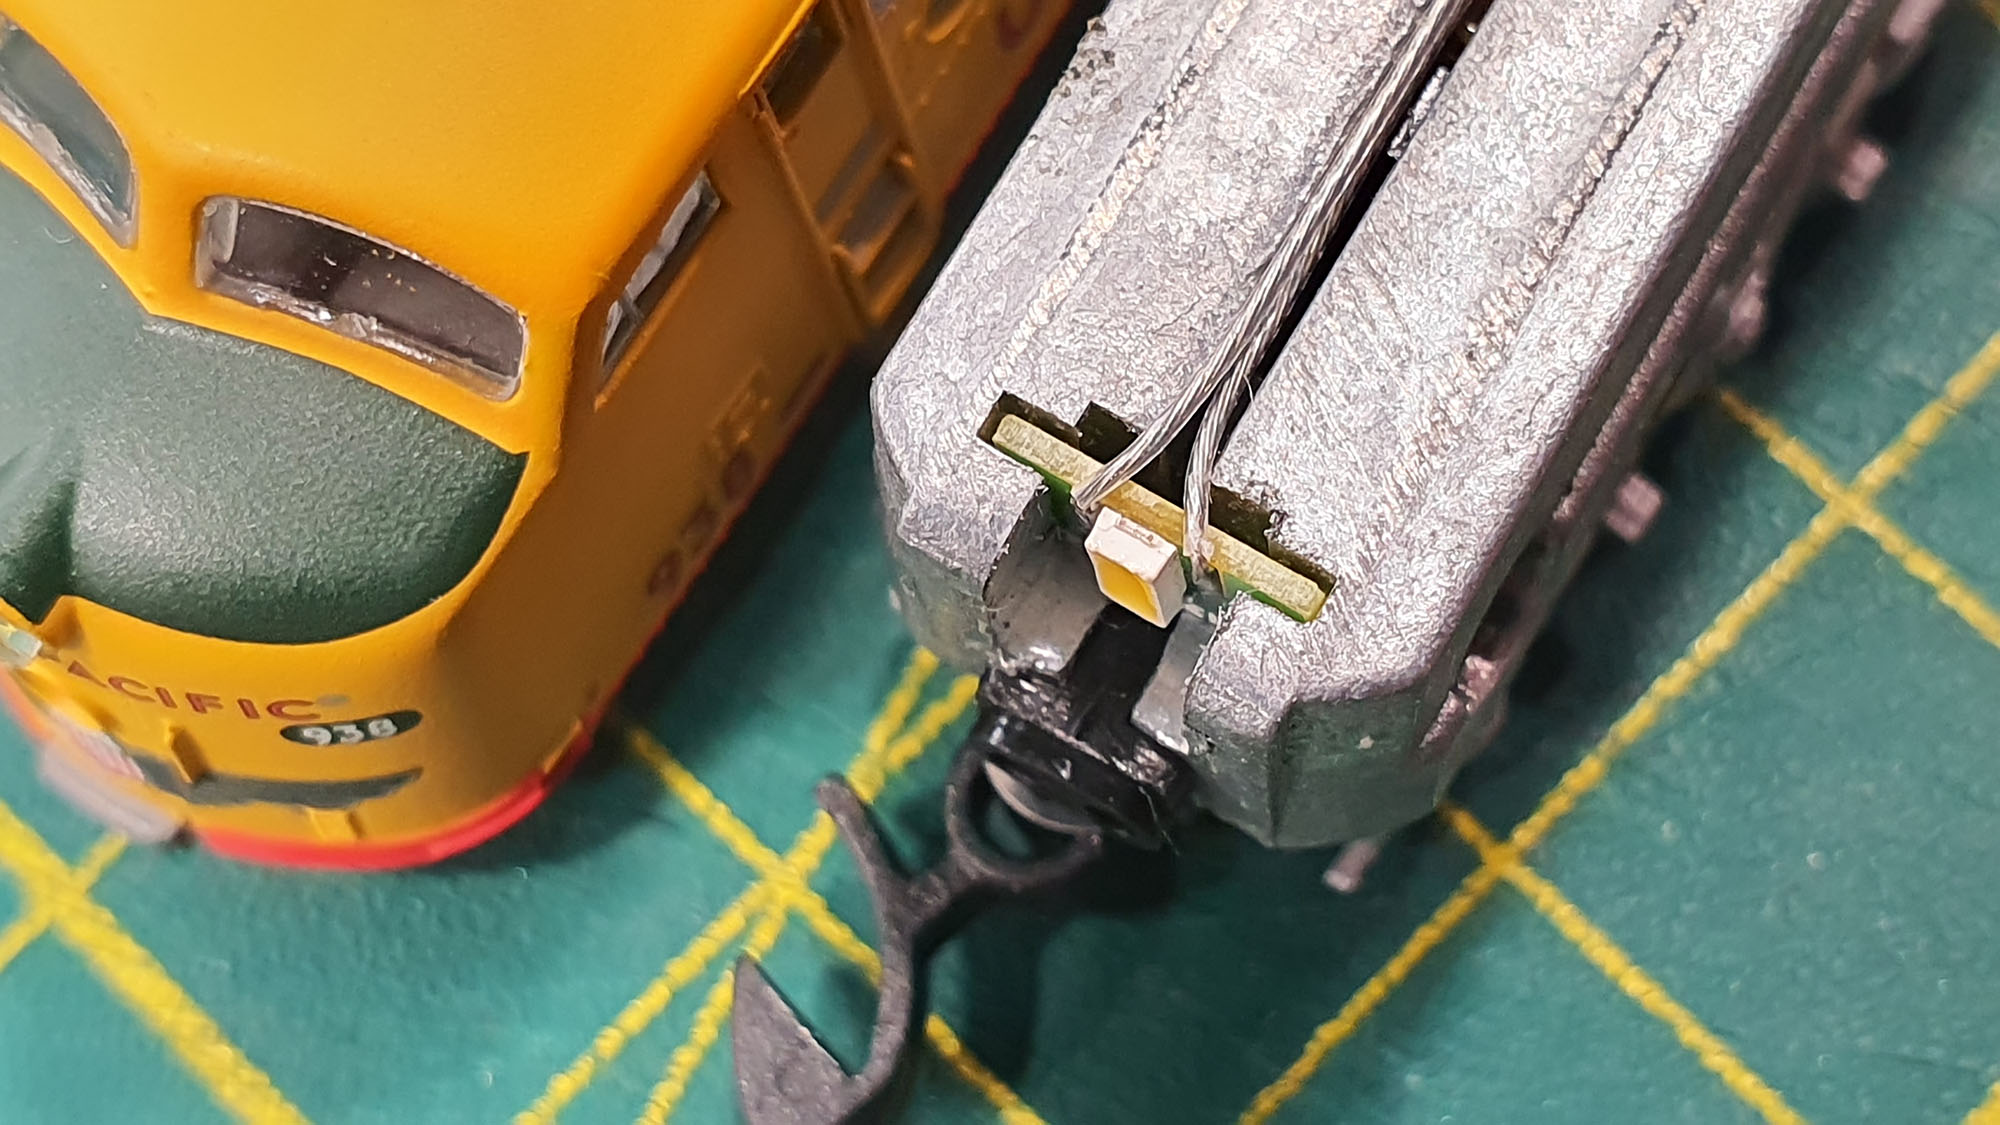
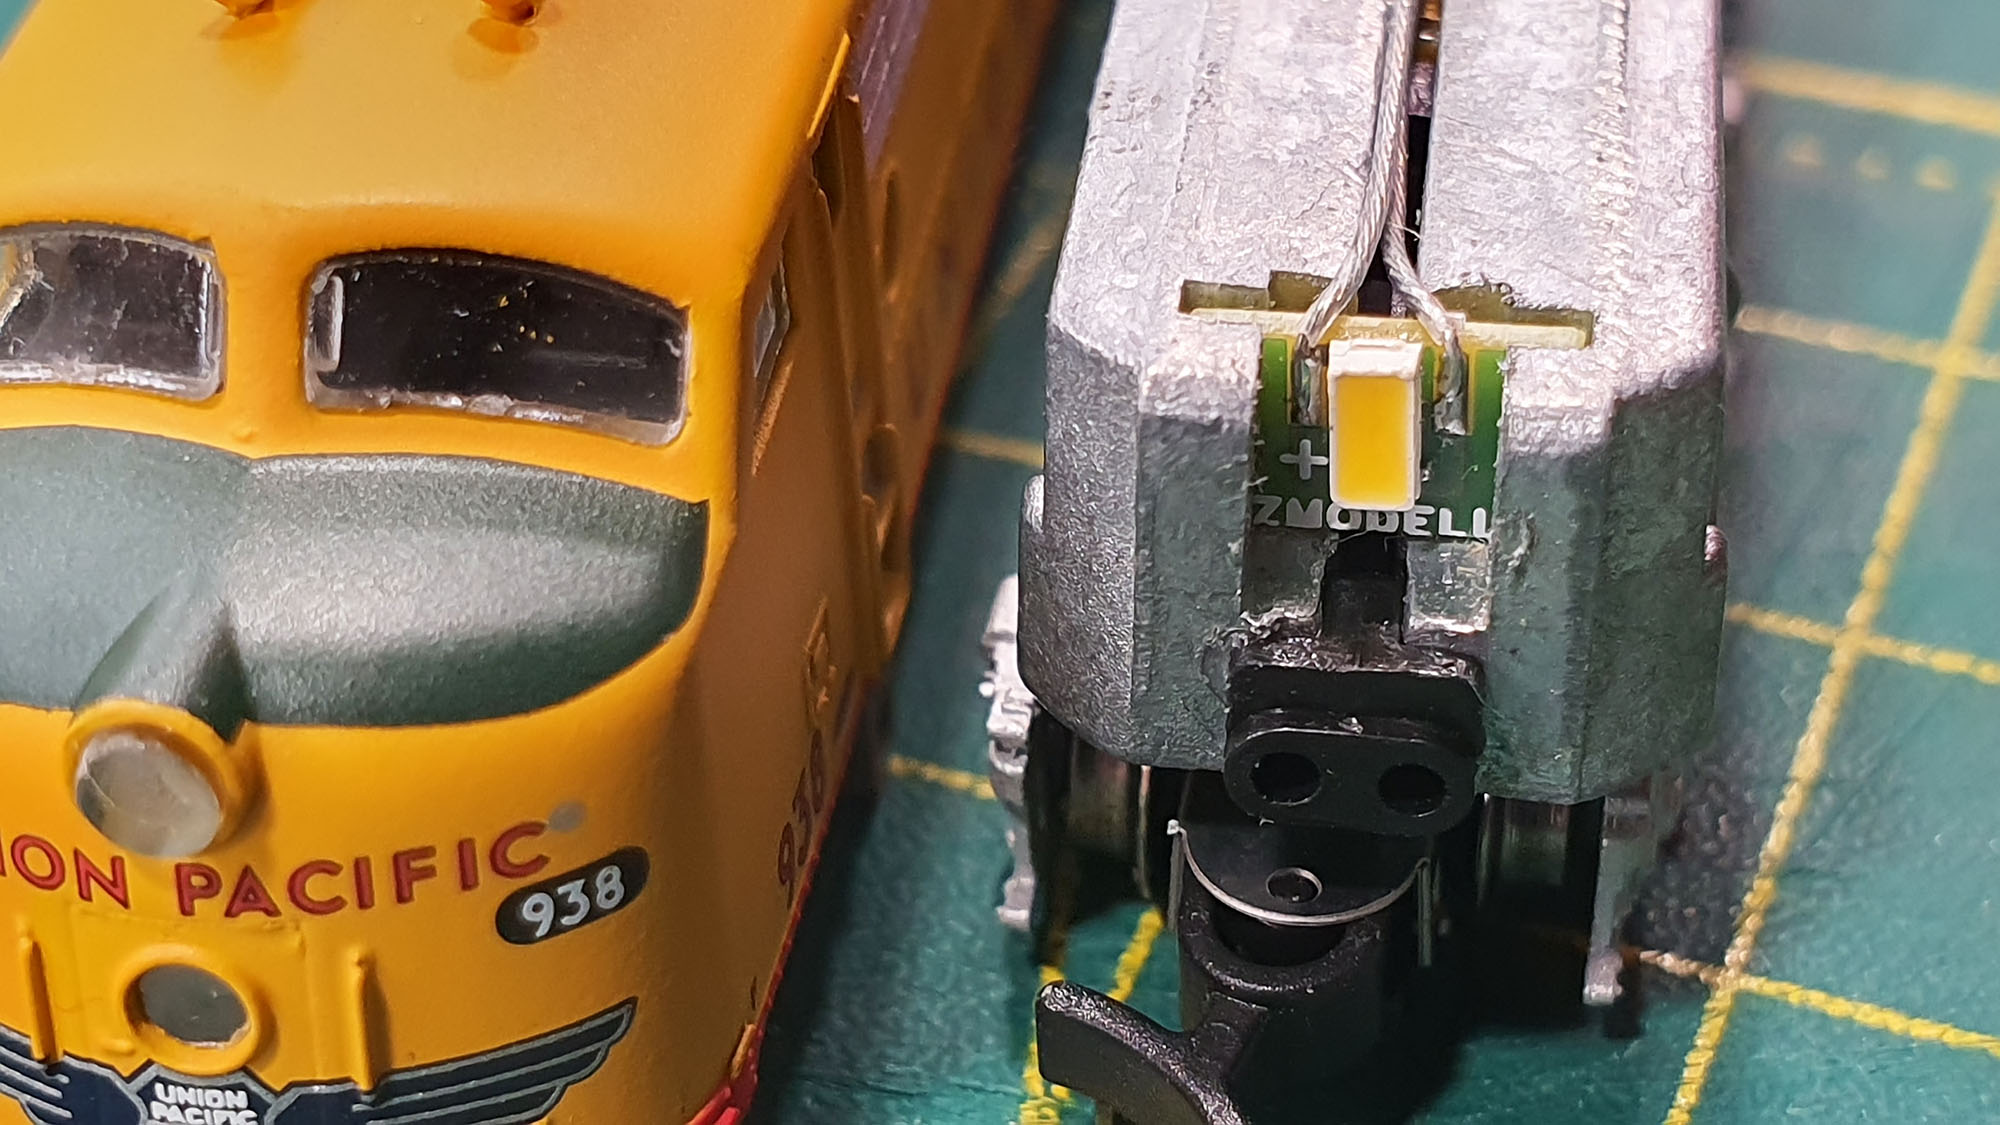
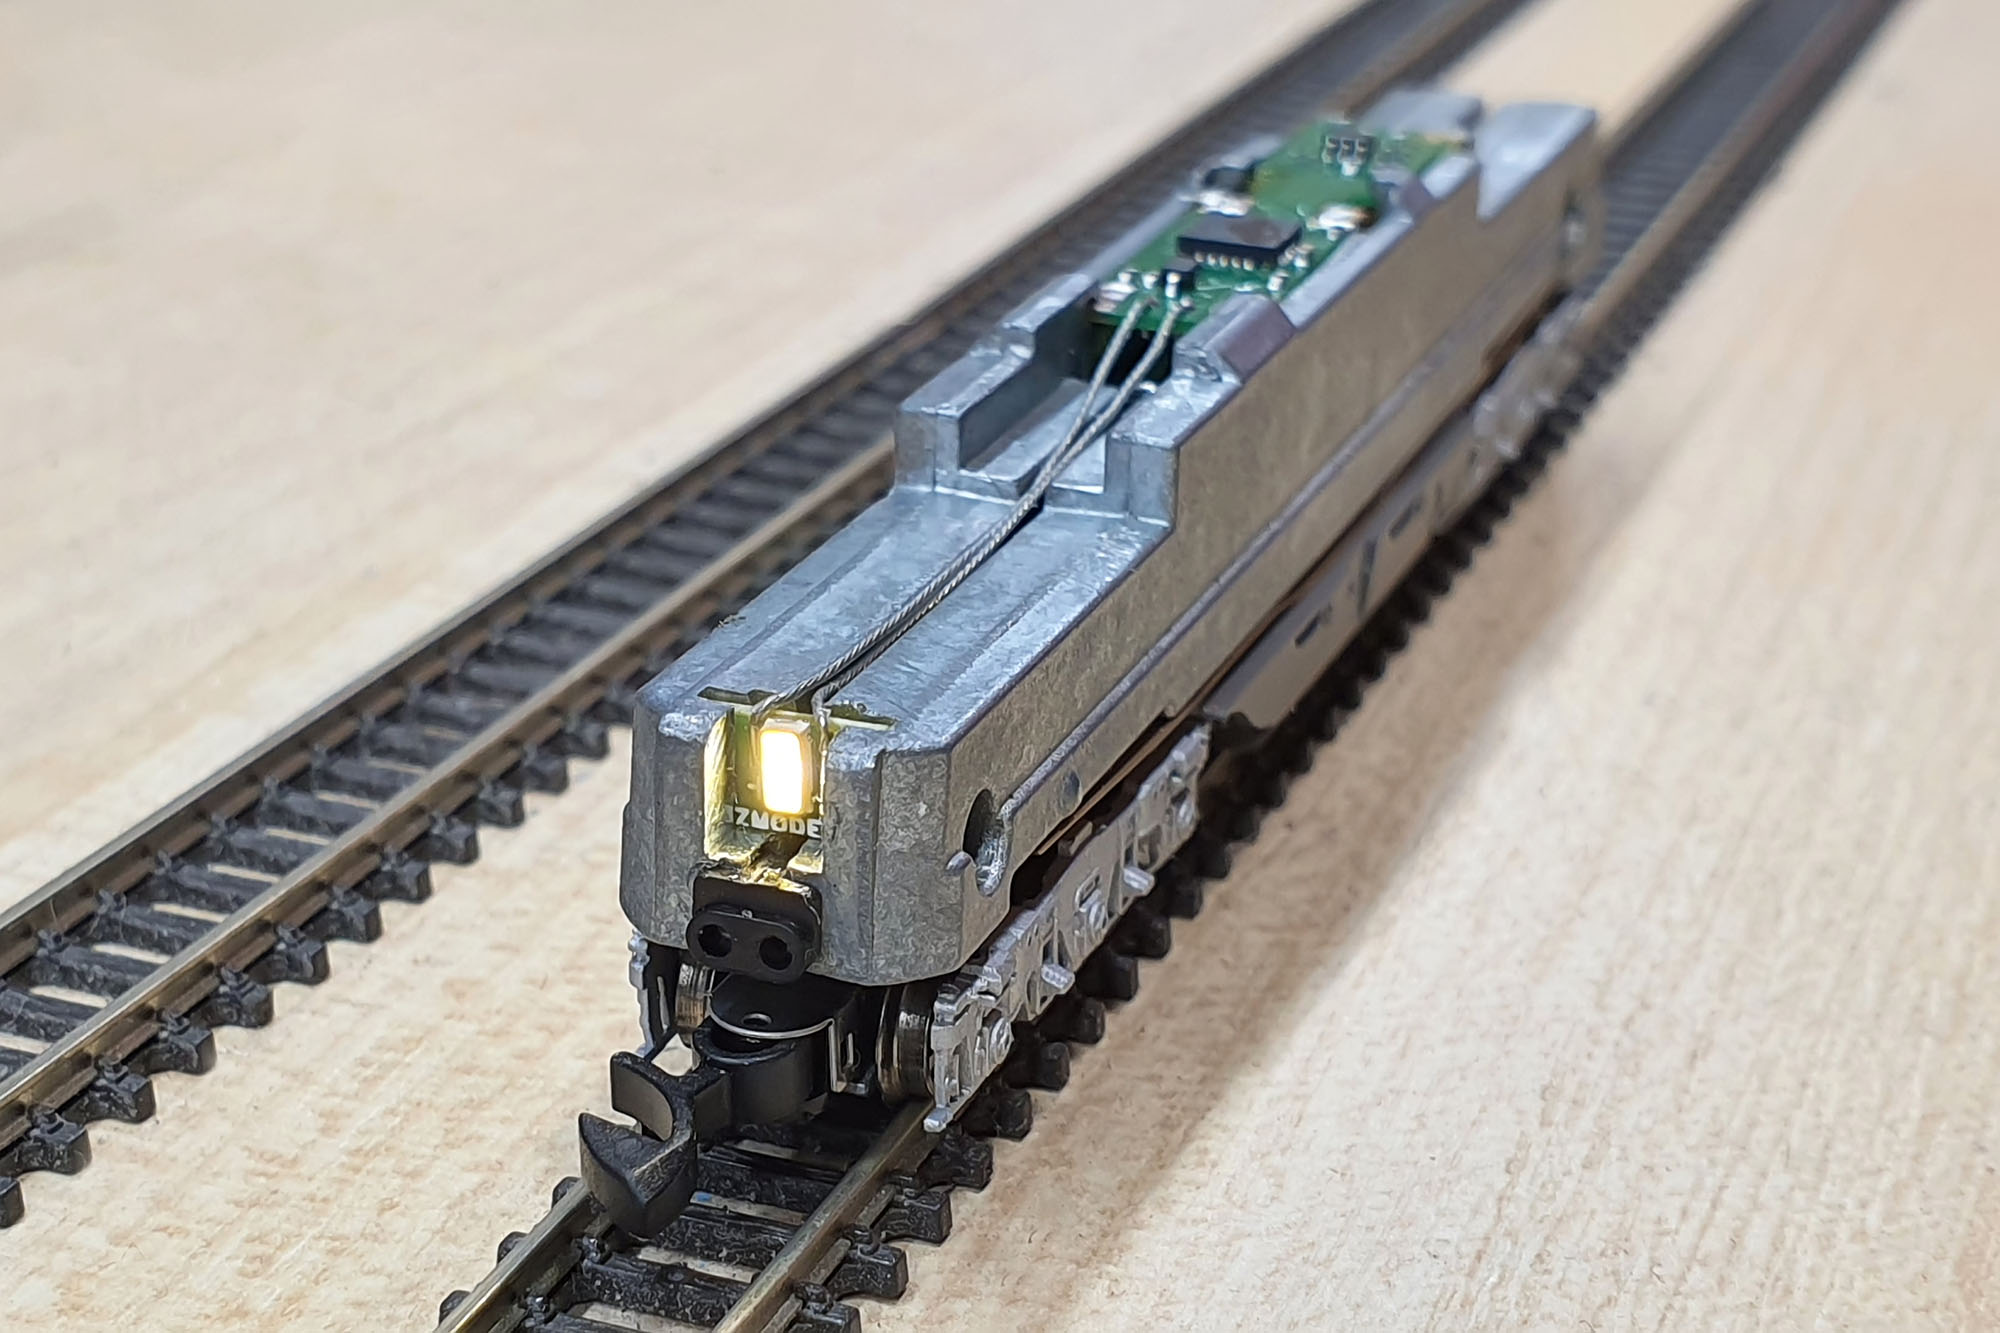
However, Märklin’s variant has a downside – it is difficult to digitize these locos using drop-in boards from Digitrax and TCS. I developed a perfect solution for this – a small separate circuit board with warm white LED and flexible wire outputs.
I tried to use different sizes of LEDs; I chose SMD 3014 warm white LED as the best suitable option. There is no need to write a long story; I just post a number of detailed pictures that speak for themselves (Digitrax DZ123Z0 digital decoder used here). It is only worth mentioning that the circuit board isolated from the chassis very reliably; short circuit is not possible:

Installation instructions:
ZM-LD-001.pdf
One more item is already available since 2017 - additional weight for PRR GG-1 electric locomotive. I already posted a report about it some time ago:
Upgrading Märklin PRR GG1 electric locos
I only add the download link for installation manual here:
ZM-MW-001.pdf
Other articles
For info, a big number of other articles available here, at one of the biggest Z scale dealers in Europe:
Accessories: www.1zu220-shop.de/Zmodell/Zubehoer:::1100105_1100247.html
Loads: www.1zu220-shop.de/Zmodell/Ladegut:::1100105_1100246.html
If someone needs anything, please let me know, and I include it into the next shipment to my US dealers.
Best regards,
Alex
I would like to announce availability of selected products from my lineup at dealers in the USA:
zscalehobo.com/zmodell/zmodell.html
www.zscalemonster.com/zmodell/
More products to come later; now let's start from small but useful accessories for Z scale layouts – temporary outdoor barrier structures. Currently this category counts two types of crowd control barriers, or simply, fences, and two different kinds of temporary bridges or pedestrian walkways.
All kinds of barriers and bridges are compatible with each other and can be connected together in any combinations. Possible usage scenarios are very wide: these temporary structures are widely used for road works, for protecting various outdoor restoration facilities, as well as sport and cultural events.
Such bridges often used to organize pedestrian traffic over trenches and pits, as well as the entrance checkpoints for outdoor events or certain restricted areas.
All items are made of 0.2 mm etched nickel silver and airbrushed with high quality flat aluminum lacquer paint at the both sides for imitation of zinc-anodized surface. They all come unassembled. I prepared detailed instructions and included printed versions to all of them.
For fixing the barriers and bridges on the layout, I recommend using non-destructive glue, such as Faller Expert Lasercut (No. 170494) or similar. Using polystyrene or cyanoacrylate glues not recommended, as they can damage paint coating.
Both variants of fences arranged into 9-piece sets. To assemble them, you will need only a cutter or small scissors capable of cutting thin metal and precise tweezers. Each fence section has a size of 12 x 5.25 mm (without hinges and hooks) which equals to the real-life size of 2.5 x 1 m.
Important: nickel silver is a good material for making many models and accessories; however, it is relatively brittle. What does it mean? If you fold a piece of nickel silver several times back and forth, it will break very quickly. That’s why I ask to assemble these tiny parts very carefully. I intentionally made them very thin in order to achieve realistic look in such a small scale as much as possible. Nevertheless, they are strong enough if assembled correctly.
Crowd control barriers, set #1


Prototypes:


Assembly instructions:
ZM-MS-008.pdf
Crowd control barriers with warning stripes, set #2
Red and white color stripes were printed directly onto the surface using UV-printing technology:


Prototype (the colors of warning stripes are different):

Assembly instructions:
ZM-MS-009.pdf
Bridges
Now let me show the bridges. The size of the side railings is equal to the size of barriers – 12 x 5.25 mm (equals to 2.5 x 1 m in 1:1 scale). The width of the walkway is 4.5 mm that equals to nearly 1 meter in the real life. Note the typical metal texture reproduced on the walkway’s floors.
Important: a special bending tool is required for assembly of these bridges. It is impossible to bend them correctly using only tweezers or any other universal tool – the bridges will definitely be damaged! I will not accept any complaints in this case. Please I kindly ask for understanding.
A big number of different variants of this tool is available on the market; here is a sample of what is needed:

This one is available here:
www.zscalemonster.com/the_small_shop/
Temporary pedestrian walkway bridge, variant #1


Prototype:

Assembly instructions:
ZM-MS-010.pdf
Double temporary pedestrian walkway bridge, variant #2
Dimensions of each walkway section are similar to the variant #1. Total width is 13.5 mm.


Prototype:

Assembly instructions:
ZM-MS-011.pdf
Here is a couple of usage samples for barriers and bridges together:


Note: Airbrushed flat aluminum lacquer coating is strong enough even to withstand deformations like bending. Nevertheless, sometimes, minor scratching of the lacquer coating may occur when using bending tool. To fix possible scratches, use Tamiya LP-38 “Flat Aluminum” lacquer paint. It can be applied manually using thin paintbrush either airbrushed. For airbrushing, it is recommended to mix Tamiya LP-38 paint with Tamiya Lacquer Thinner (Retarder Type, Art. #87194) by 50/50 proportion.
Replacement LEDs for digitizing Märklin EMD E8A/E9A diesel locomotives
I developed one more accessory that will be very useful to those who would like to digitize Märklin EMD E8A/E9A diesel locomotives (88627, 88628, 88629). In my opinion, Märklin’s approach to making headlights for this locomotive is better – the LED is allocated directly behind the headlight hole, so that all light comes out at full extent. In my opinion, AZL’s solution is less optimal, as the light from the LED on the circuit board has to travel a long way through the curved lightguide – unfortunately, a lot of light is lost this way; as a result, headlight is quite dull.
However, Märklin’s variant has a downside – it is difficult to digitize these locos using drop-in boards from Digitrax and TCS. I developed a perfect solution for this – a small separate circuit board with warm white LED and flexible wire outputs.
I tried to use different sizes of LEDs; I chose SMD 3014 warm white LED as the best suitable option. There is no need to write a long story; I just post a number of detailed pictures that speak for themselves (Digitrax DZ123Z0 digital decoder used here). It is only worth mentioning that the circuit board isolated from the chassis very reliably; short circuit is not possible:


Installation instructions:
ZM-LD-001.pdf
One more item is already available since 2017 - additional weight for PRR GG-1 electric locomotive. I already posted a report about it some time ago:
Upgrading Märklin PRR GG1 electric locos
I only add the download link for installation manual here:
ZM-MW-001.pdf
Other articles
For info, a big number of other articles available here, at one of the biggest Z scale dealers in Europe:
Accessories: www.1zu220-shop.de/Zmodell/Zubehoer:::1100105_1100247.html
Loads: www.1zu220-shop.de/Zmodell/Ladegut:::1100105_1100246.html
If someone needs anything, please let me know, and I include it into the next shipment to my US dealers.
Best regards,
Alex







 already in my to buy list