

Post by scanrail on Apr 21, 2020 7:04:48 GMT -5
Hi friends,
2020 is an unusual year. It has a beautiful number, but it started not so beautifully. All major railroad modeling events were canceled, and everything ended up in that way that we all are at home now. On March 28-29 I planned to take part in exhibition in Altenbeken, Germany, that is dedicated solely to Z scale, and I planned to present some novelties there. Since this important event was also canceled, I decided to prepare a detailed online report. Here is it: Volvo 9700 – the most detailed bus in Z scale ever:
Despite I finished it only now, this is my first model from which I started my own 3D modeling for Z scale about 4 years ago. It took too much time to finish this project, since I switched many times to other models of rolling stock, but recently I got more time for modeling during worldwide quarantine, so I finally decided to make this project alive.
Cars and trucks is a weakest ever category in Z scale. Even a neighboring N scale has nearly everything here! In Z scale, we have actually only one bus model that is relatively popular – Setra from Noch. Let’s be honest – it is a very old and ugly model in terms of quality and details. In addition, it has not been produced for a long time. There are also some bus models from European manufacturers HUG and MO Miniatur, but they are rare and not produced now too. So, given all this, I decided to fill this gap somehow.
Here are some words about technology. The model is printed at Shapeways using FXD material and then replicated in cast resin. All possible interior details are modeled too: very detailed seats, driver’s place with separate steering wheel, controls, buttons and screens, as well as a stairway to the central door:

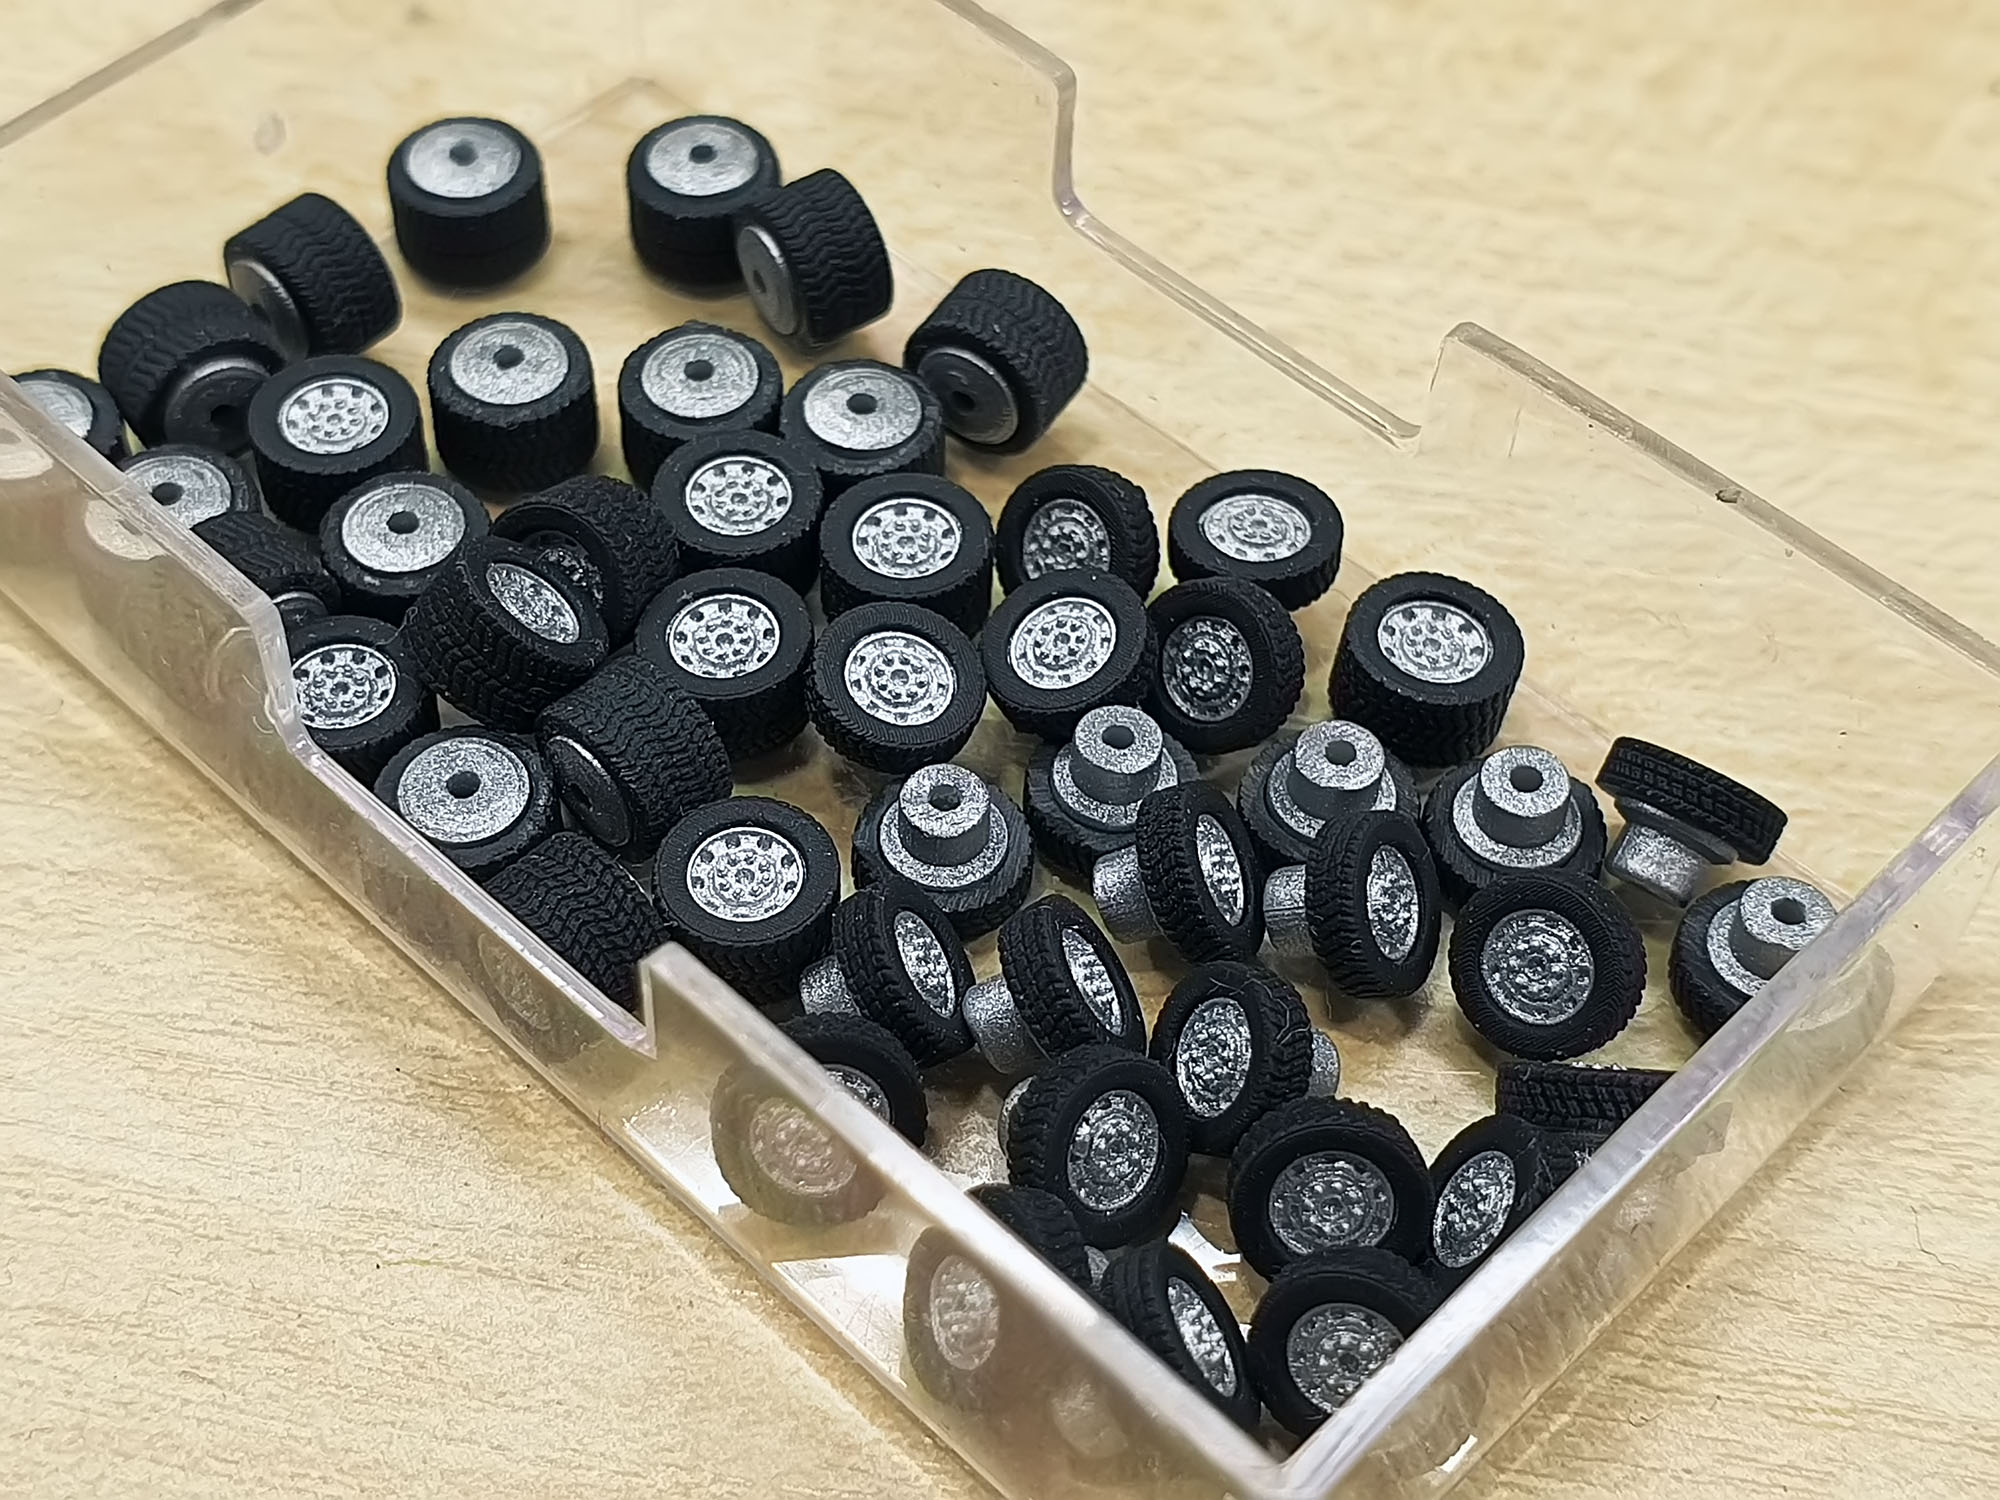
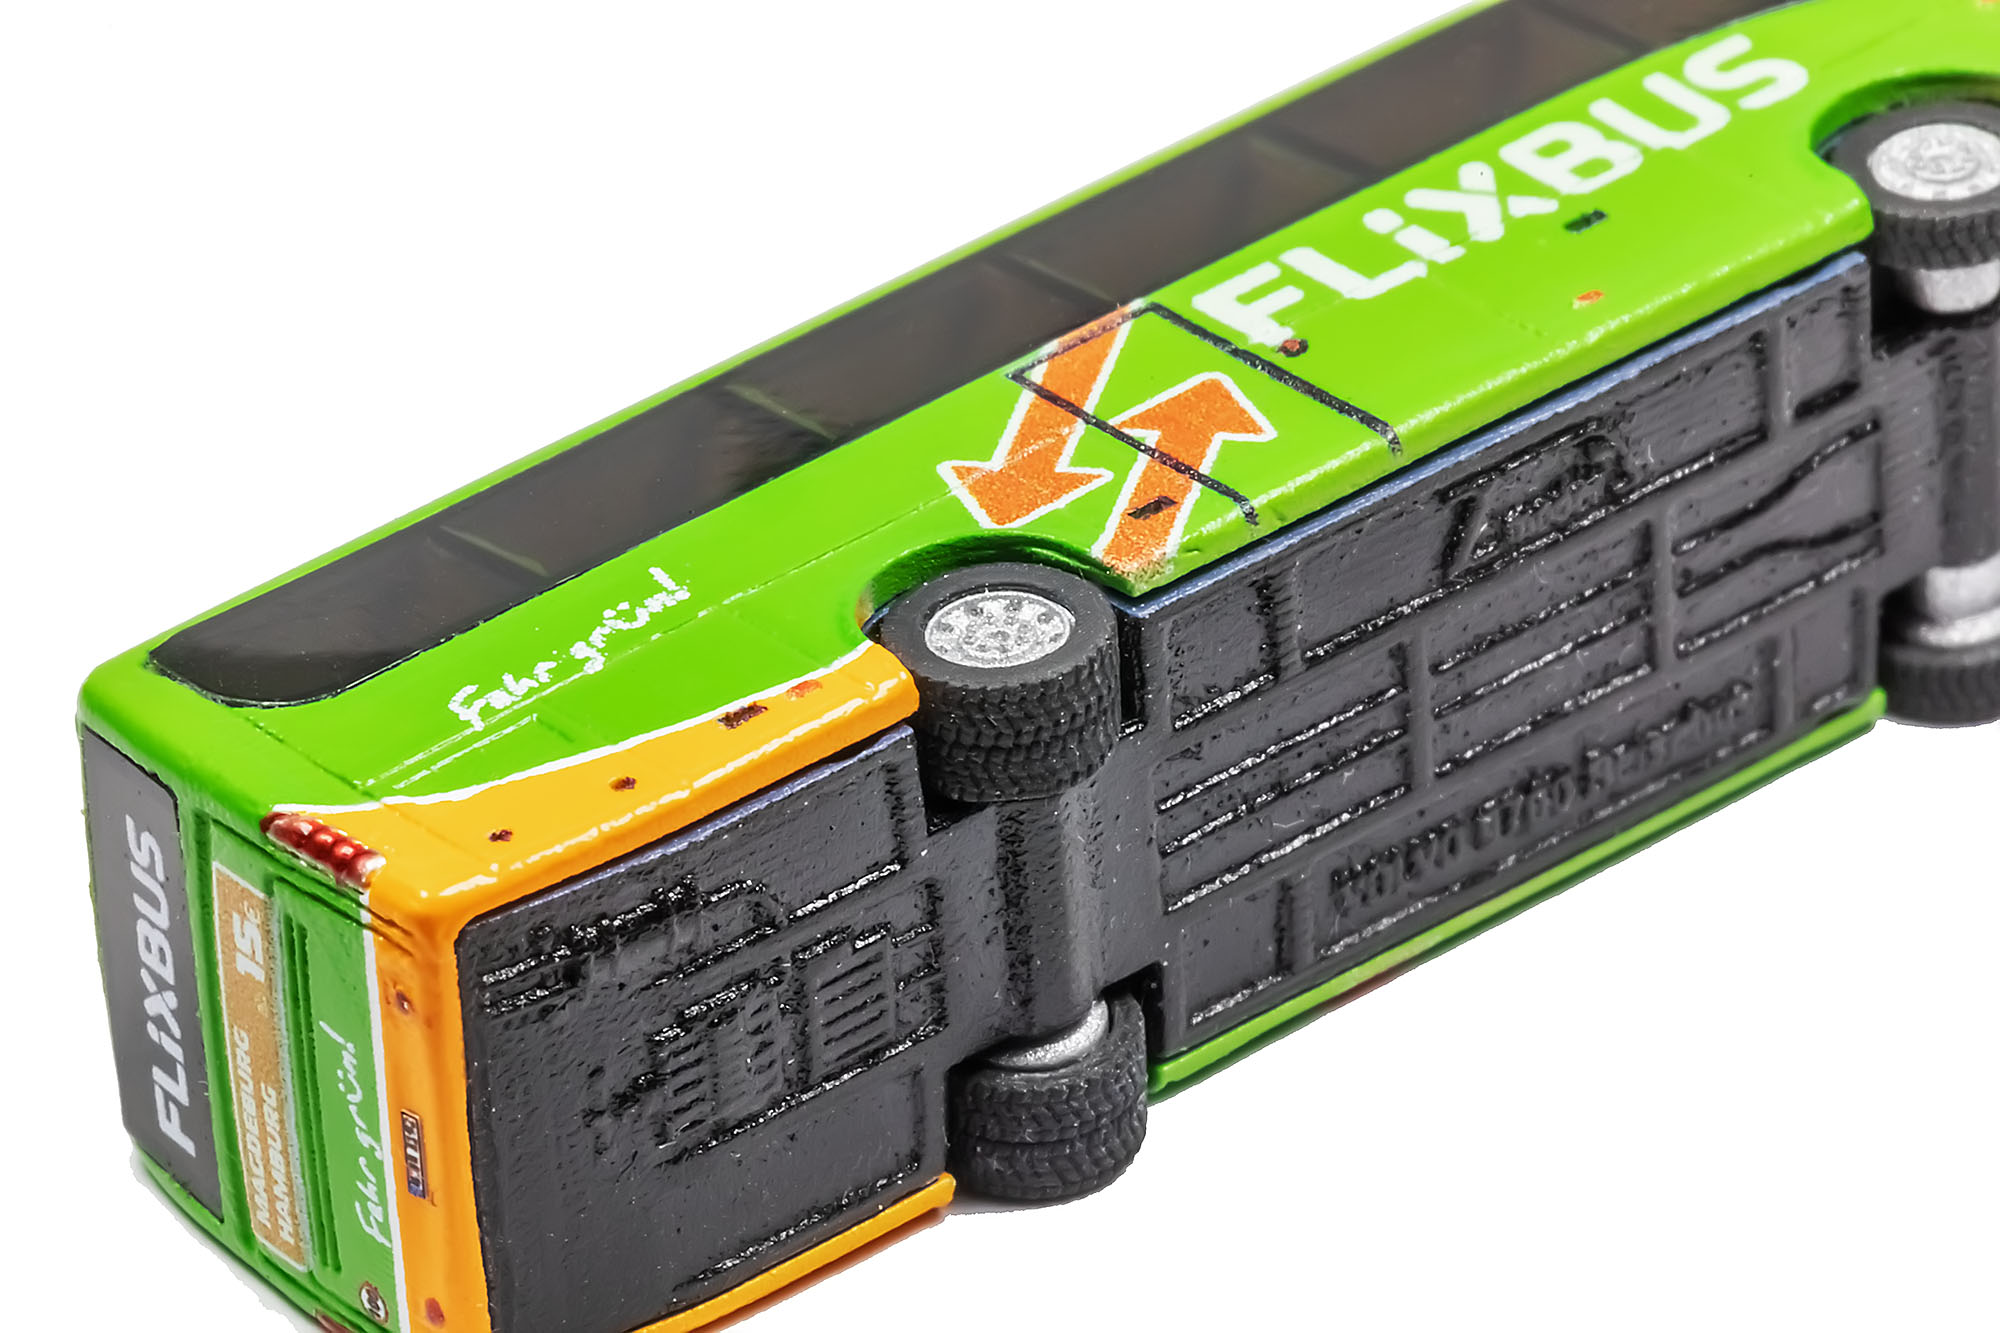
The bus has rotating wheels and is rollable. In turn, the wheels have an extreme level of details on their own – each wheel consists of two separate parts: rim and tire. Rim has a very detailed structure – all nuts, holes and screw heads are modeled. It is painted with brushed silver paint. Tires are printed using black elastic material and have clearly visible treads. Assembled wheels are connected with 0.8 mm stainless steel axles:
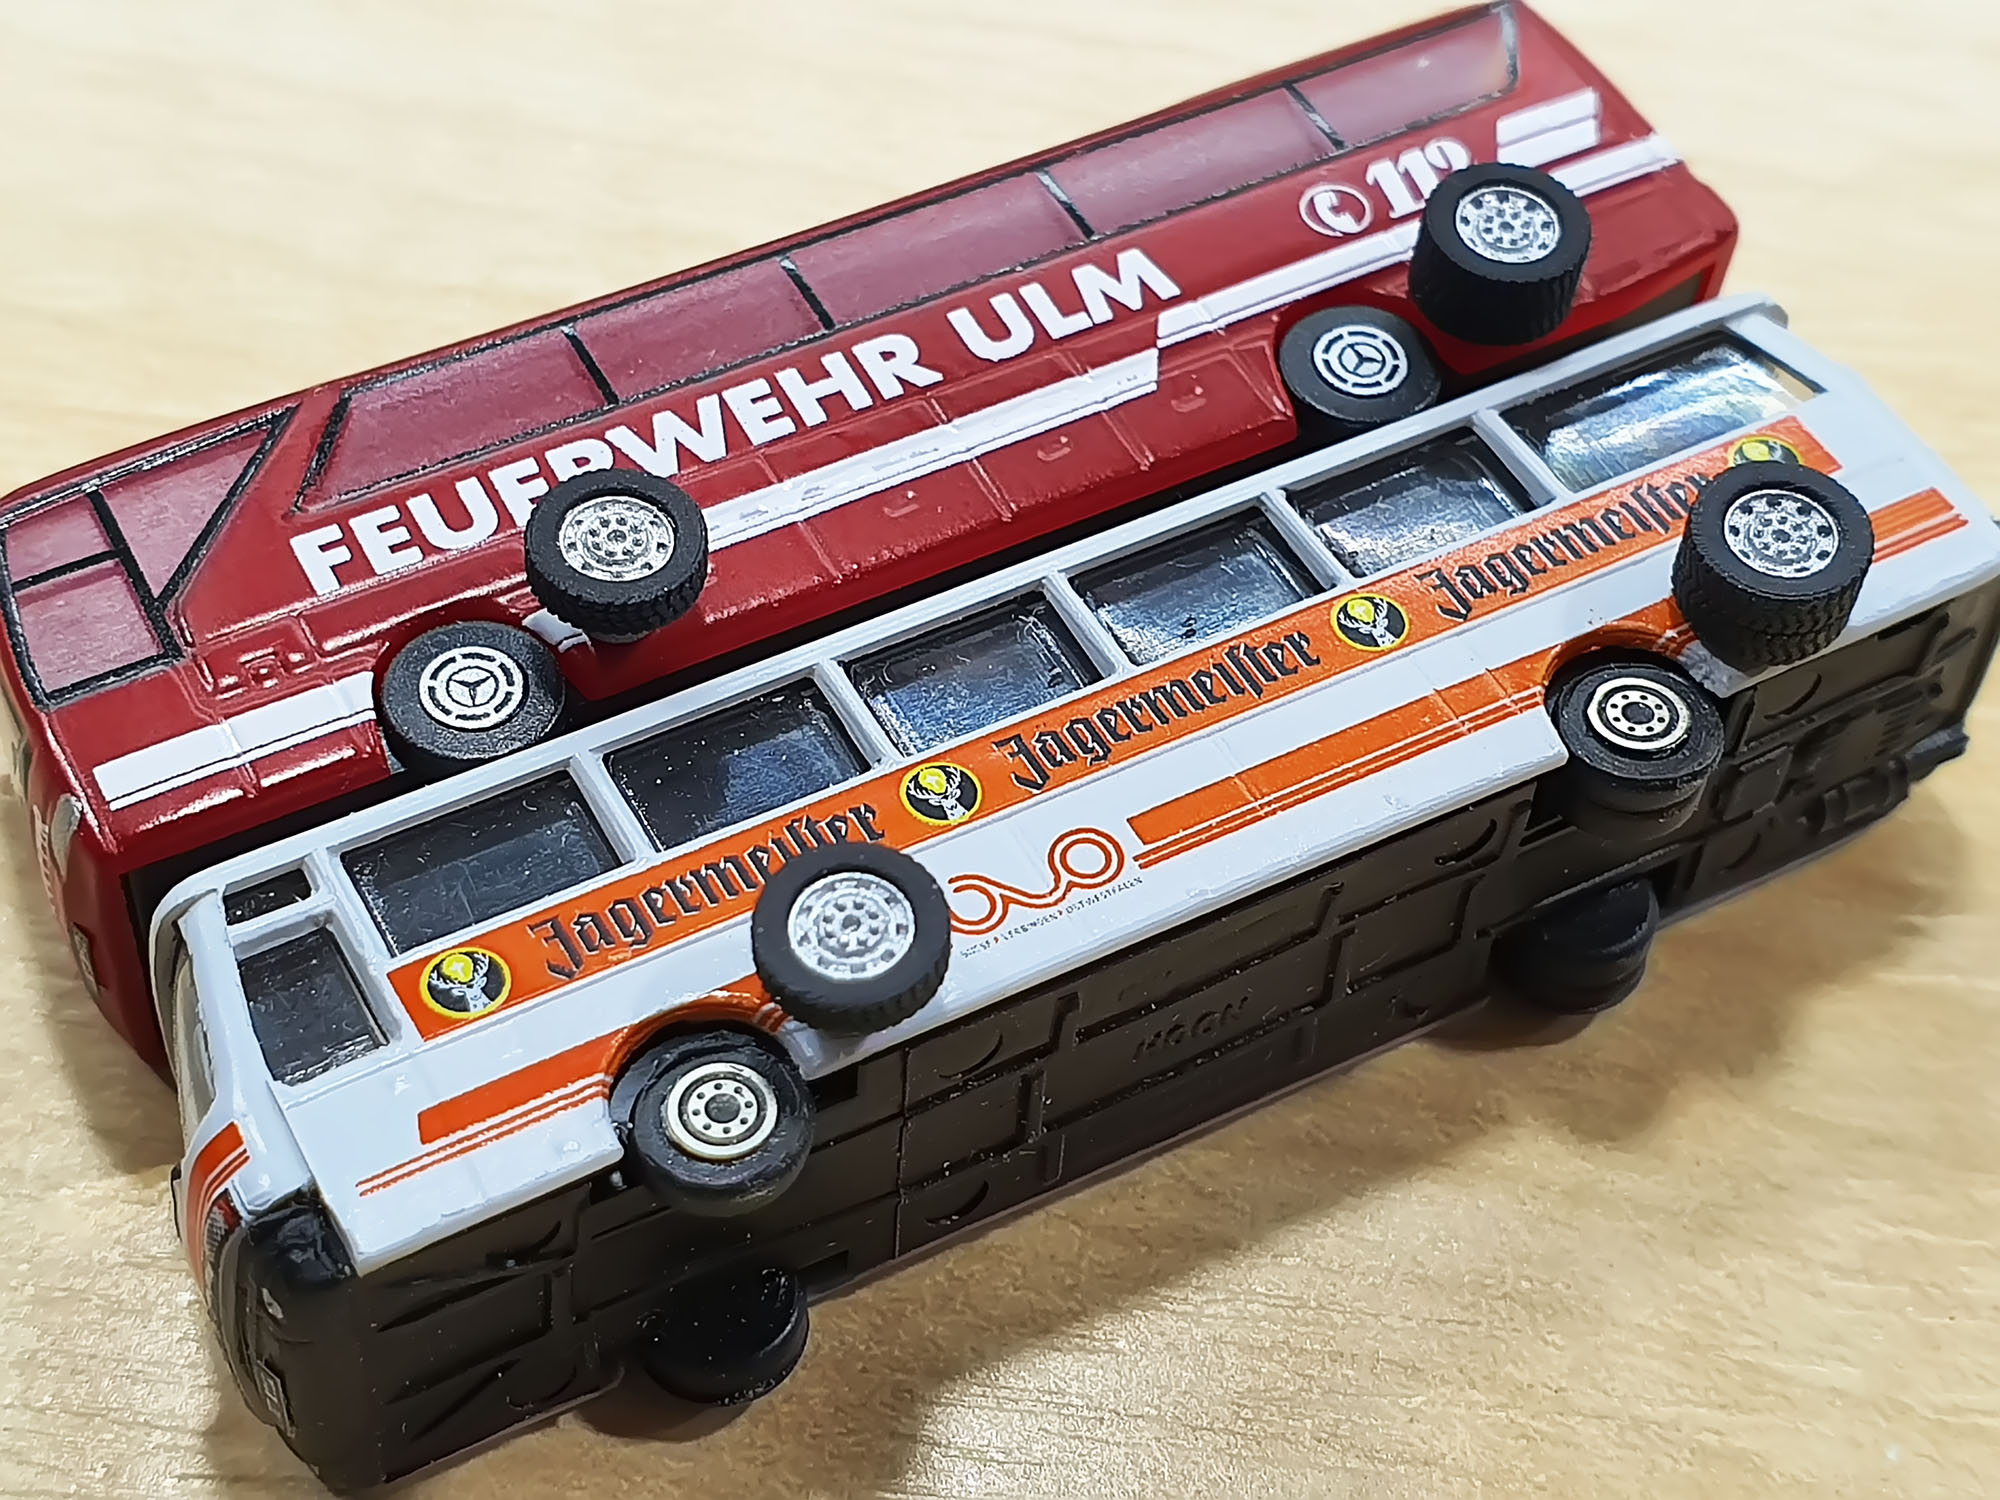
Here is a comparison of my wheels with ones from existing buses (I upgraded Noch bus with my own metal etched wheel rims):
The chassis and body are carefully painted with airbrush. Chassis has a black bottom and gray or dark blue seats (different in some versions). Steering wheel is painted in black separately in all versions.
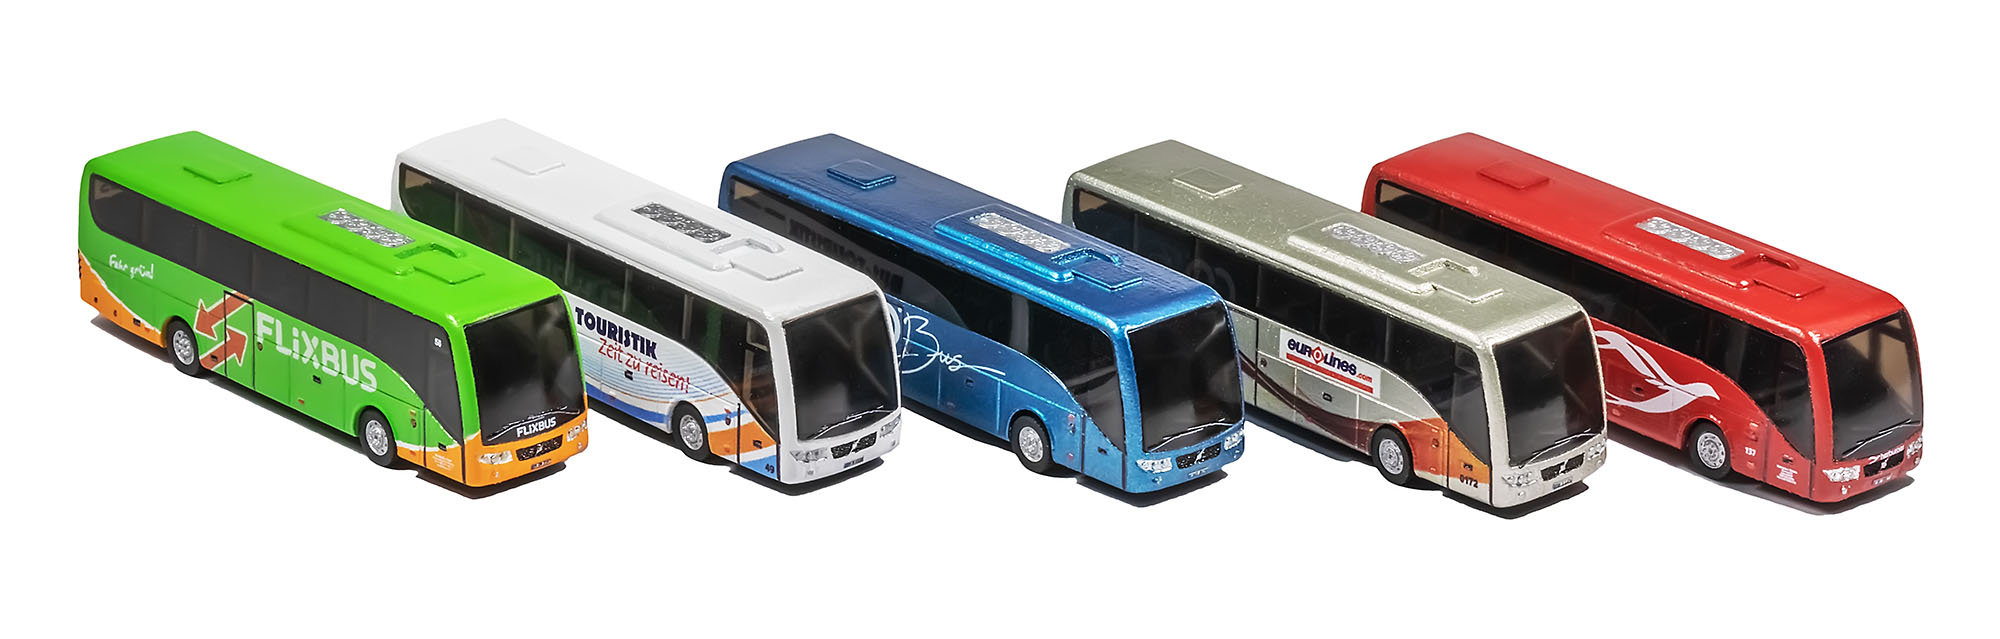
I prepared different versions:
I decided to paint some versions with metallic colors, and it was somewhat problematic to find a suitable metallic paint for such a small model. Smaller models require higher quality of paints, and it is extremely important for metallic paints: the grain should have the finest grade, and dye should be able to cover the surface very uniformly.
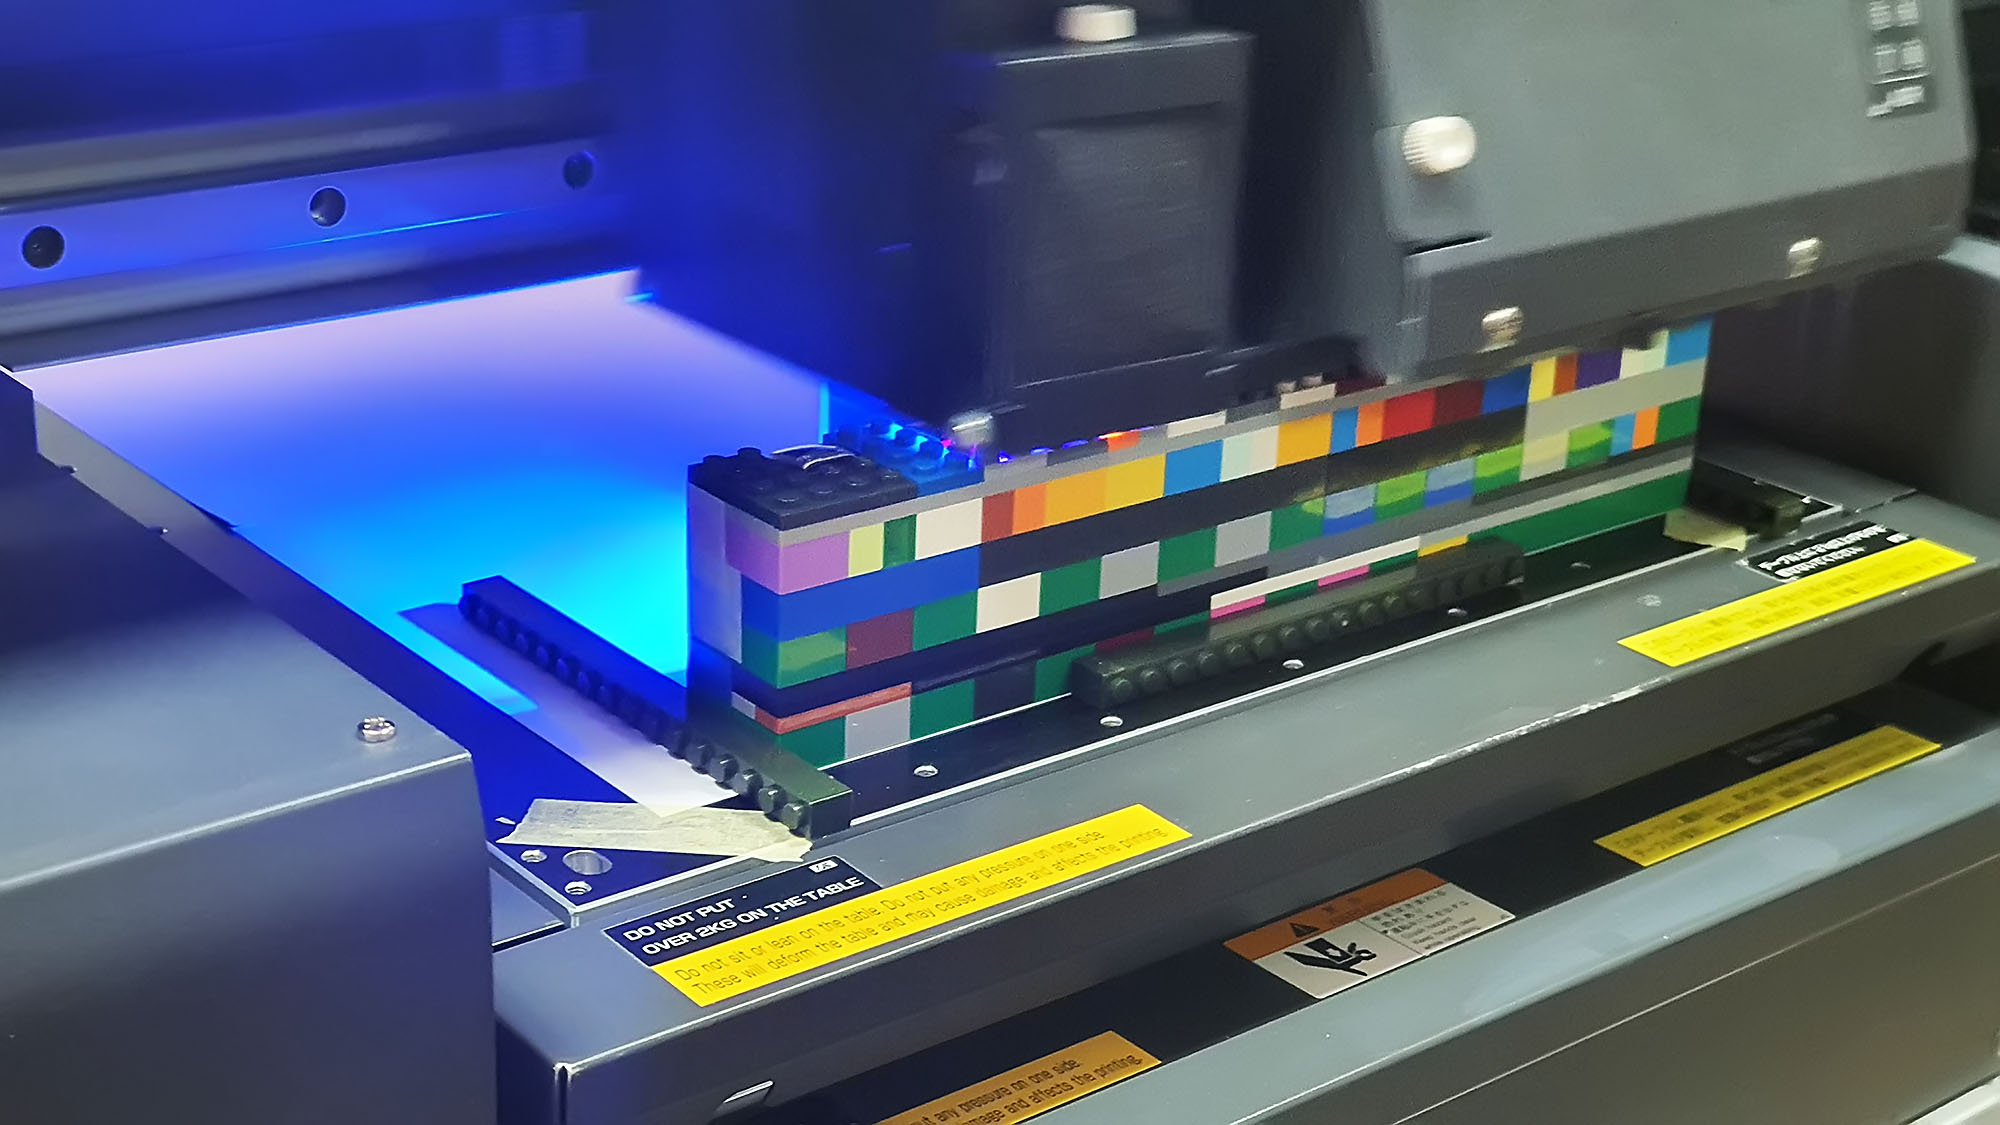
After some experiments, I chose Tamiya X series of acrylic paints. Their metallic colors revealed very good results. Then all bodies were printed on Mimaki UV printer. To fix models vertically on the printing table, I had to build this special holder from Lego bricks:

Here is how the models were printed on Mimaki UV printer:
The most problematic stage of design was finding a way to make windows, especially windshield. Most modern buses feature windows made of tinted and curved glass. It is hard to implement this in such a small scale within small series; however, after some research I found a way to do this.
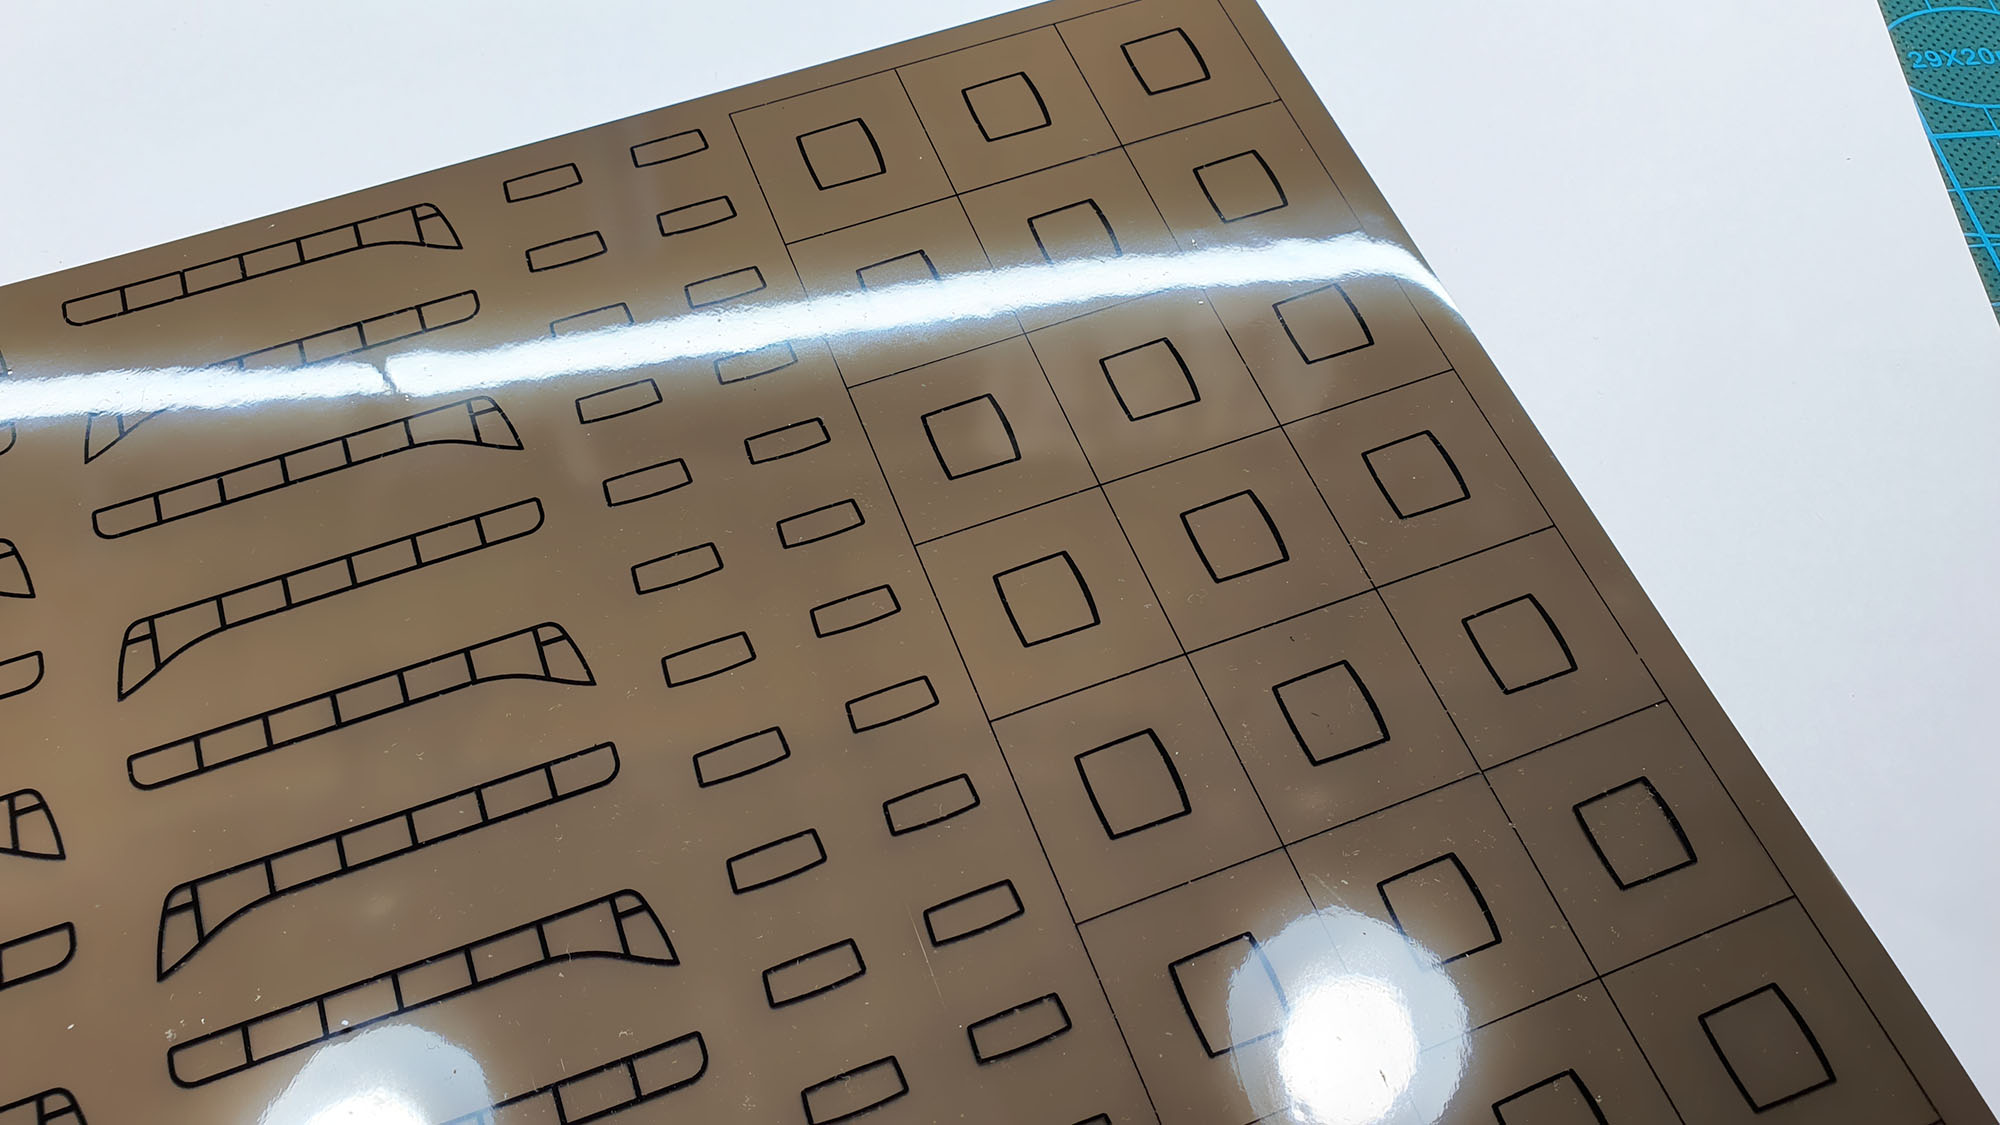
I was inspired by side windows of German ICE 3 high speed train, so I had to find a very thin material with similar properties. My local printing provider helped me with this – they got for me A4 sheets of tinted PET film – that was a perfect solution for my needs. Everything else was easy – I printed all window contours with black dye from inside and then carefully cut them out. I had to do this manually using manicure scissors, since plotter or CNC cutting seemed to be useless here due to the high risk of errors:

Now, the problem with side and rear windows was successfully solved. But the most difficult thing was still remaining – the windshield. I have to say that it became the biggest challenge in the whole project! The problem is obvious: windshields of the most modern buses are curved in both horizontal and vertical directions, and it is impossible to simplify this in model by bending the plastic only in one direction – it will look very unnatural. So, I had to search for an appropriate solution.
I tried to use different kinds of plastic. Thin transparent polystyrene was not suitable for these purposes – it began to shrink too early, even at not too high temperature. After a lot of tryouts, I have finally found a way to make perfect windshields. PET film showed much better thermal resistance than polystyrene, as well as better ability to transform into desired shape. I cut out windshield templates with a 10 mm margin around and carefully placed them between two small teaspoons. Then I heated them up with air soldering gun to 150° C and strongly pressed teaspoons together. Then I allowed them to cool down and removed ready windshields, which I carefully cut out with scissors:


I wanted to add even more details and decided to add wipers to the windshield. My first idea was to make them from etched metal, but I used a different solution – simpler and more effective: I printed wipers on UV printer. Thickness of printing layer is enough to make wipers visible enough:

So, the windshield is the most advanced part in the whole construction: frame is printed with black from inside, then it was thermally formed, cut out, carefully attached to the body and printed from outside again!
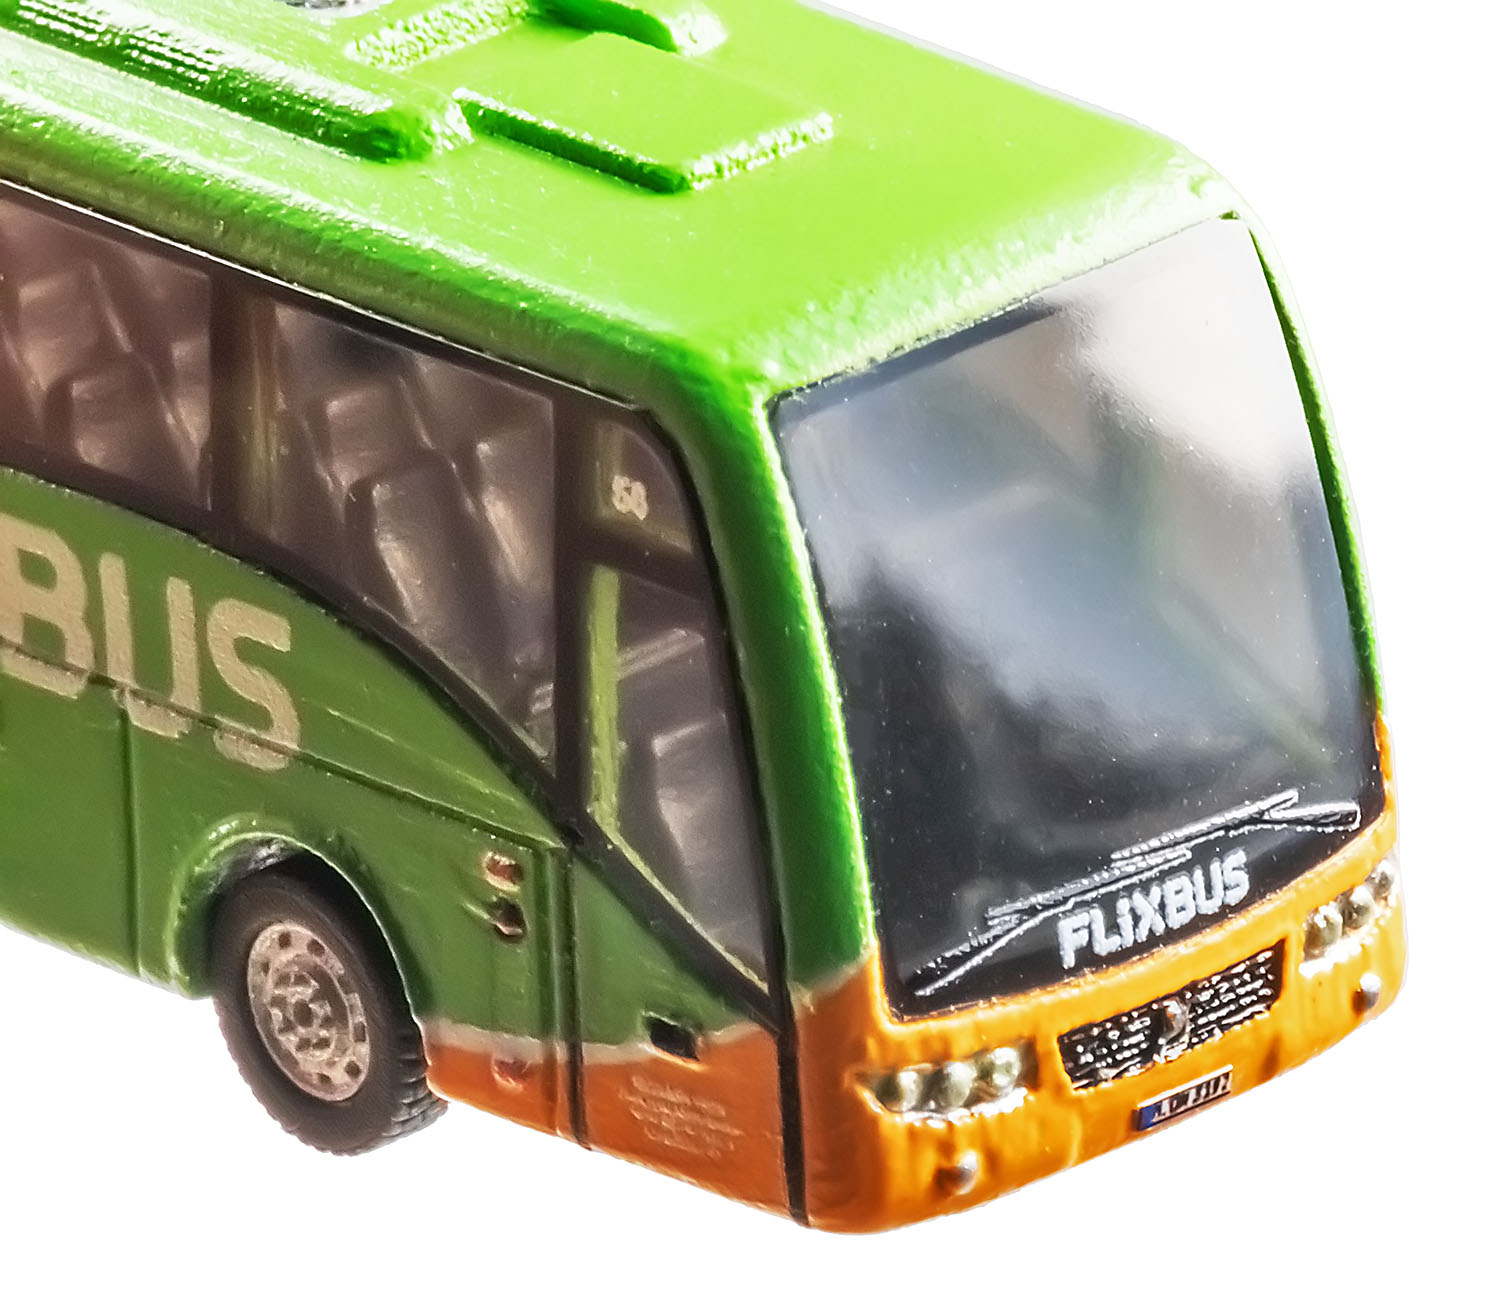
Headlights then were painted with silver, and rear lights – with silver and transparent red lacquer over it to achieve more realistic effect. I also applied country-specific readable license number plates – they were printed on plastic adhesive film using color laser printer.
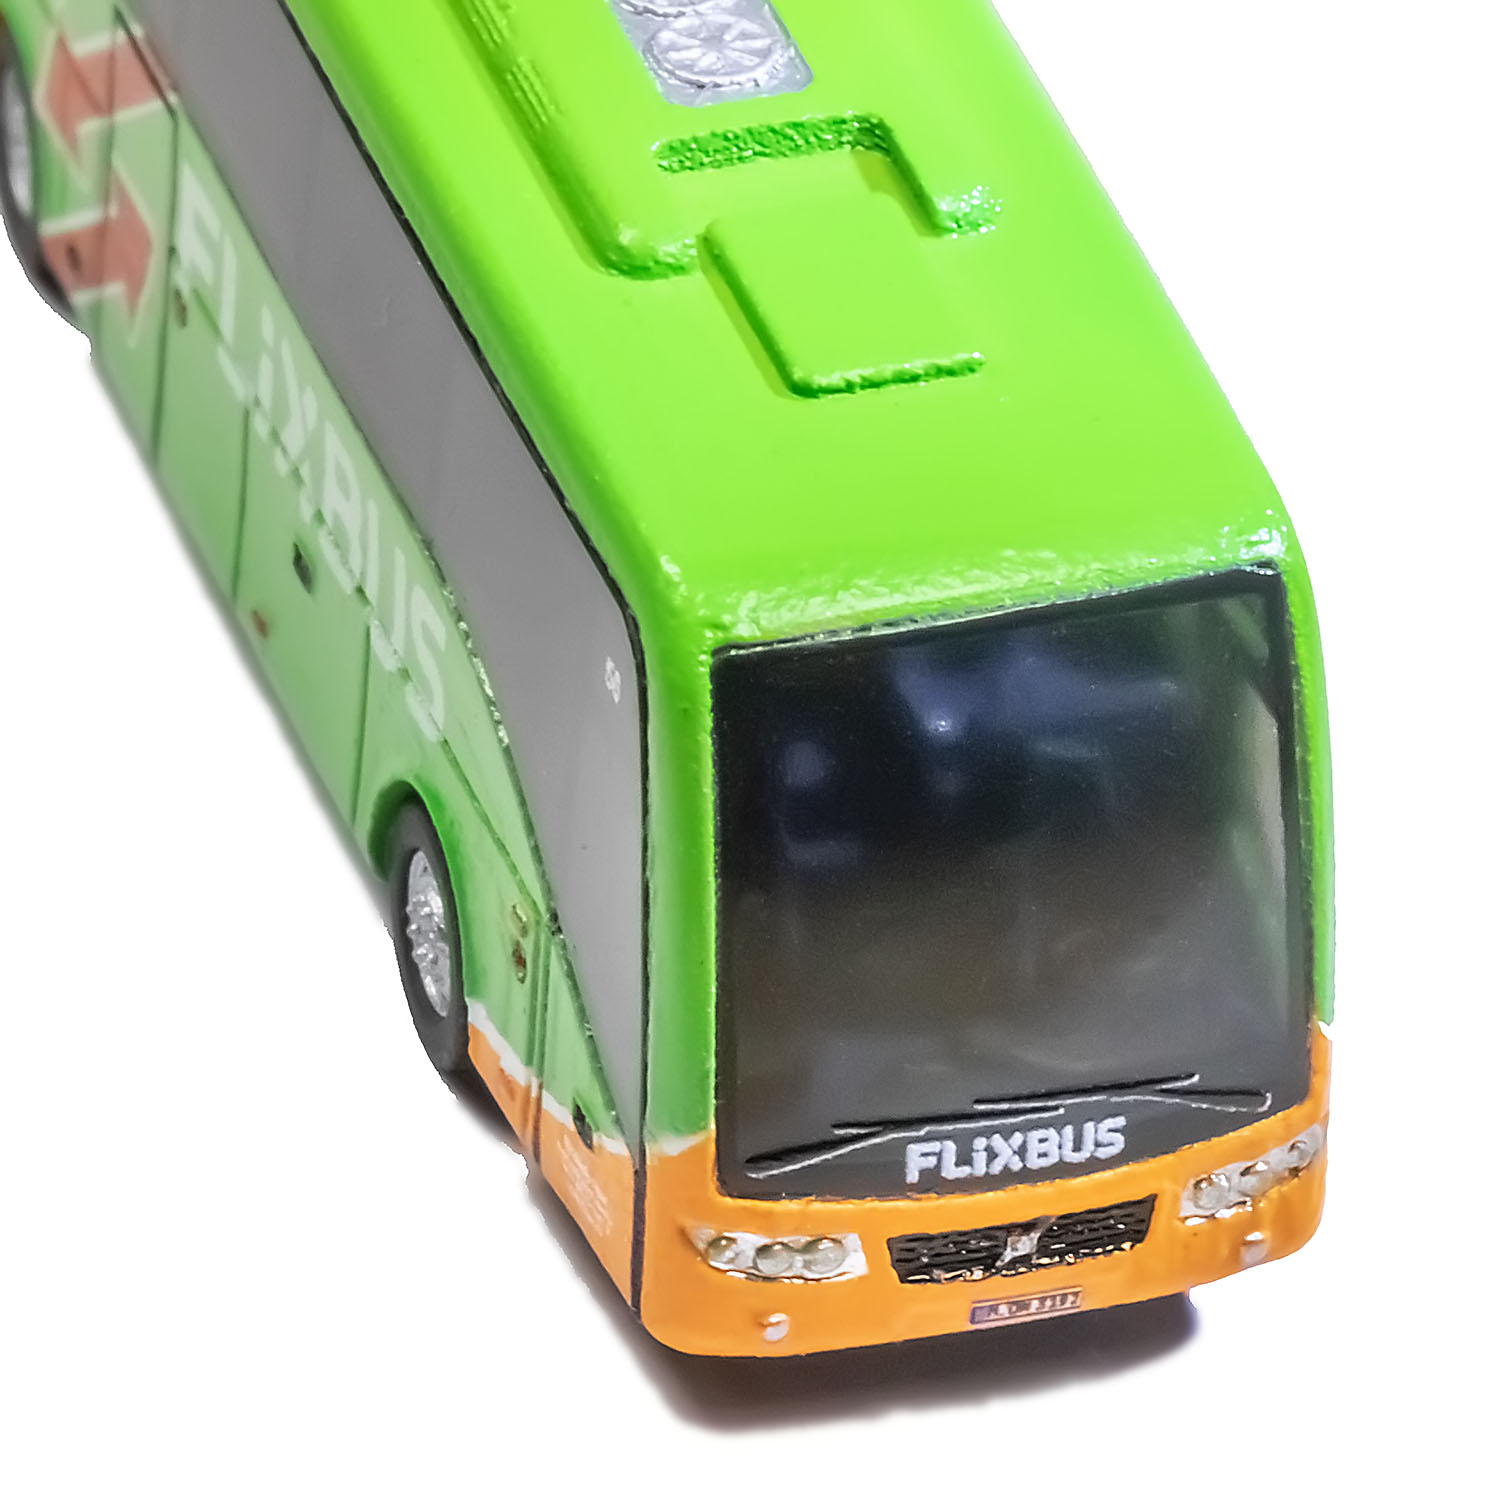
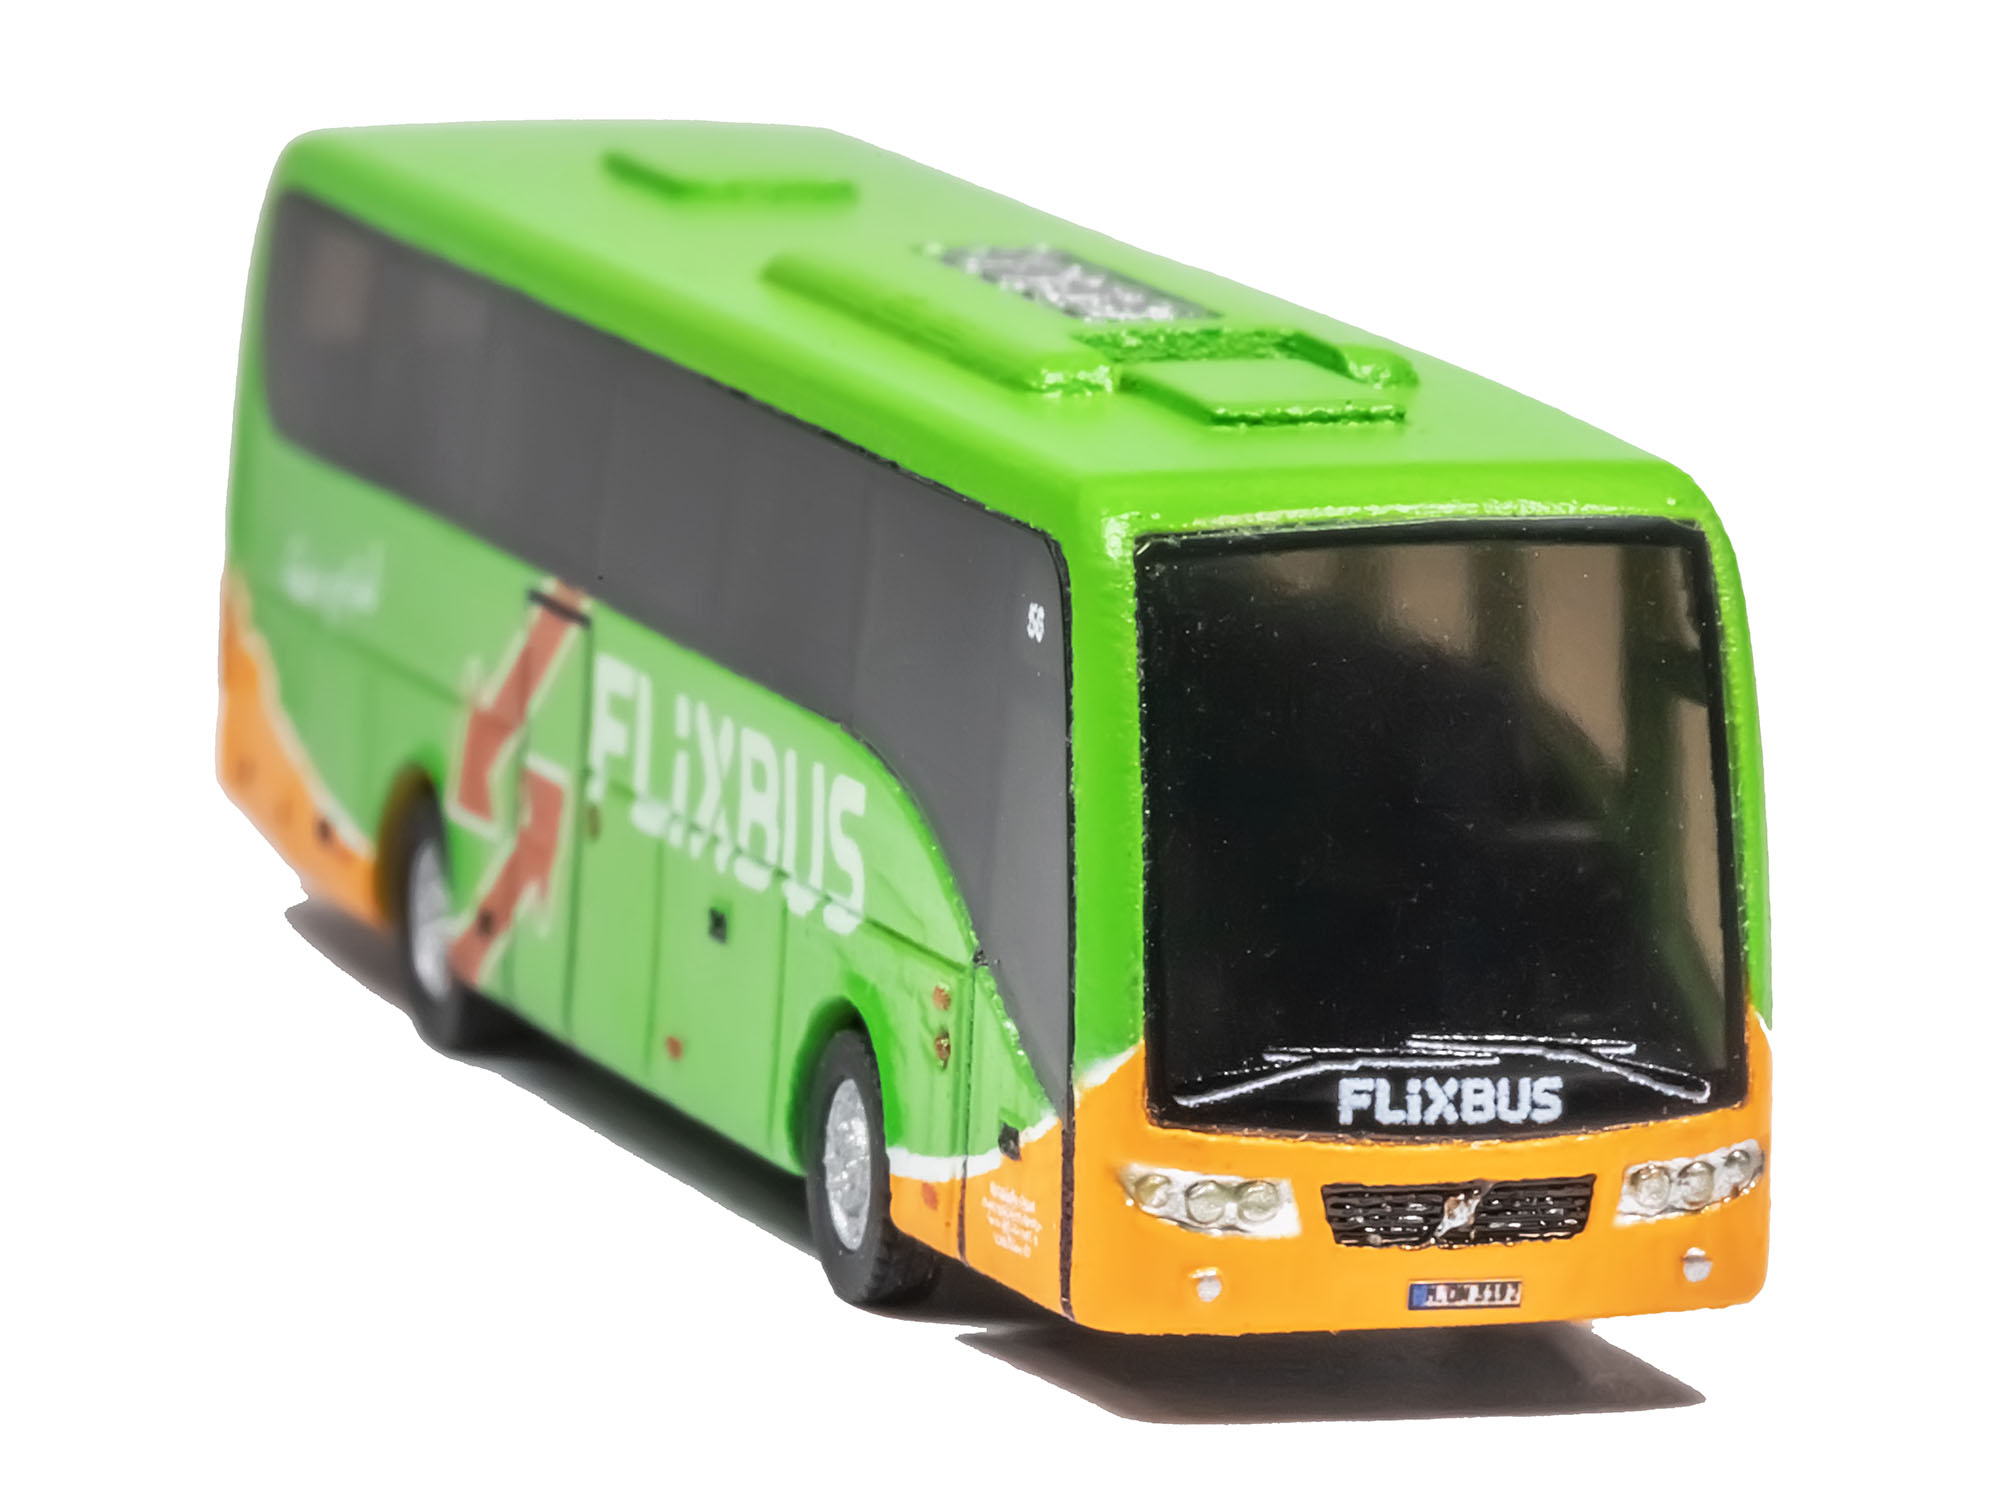
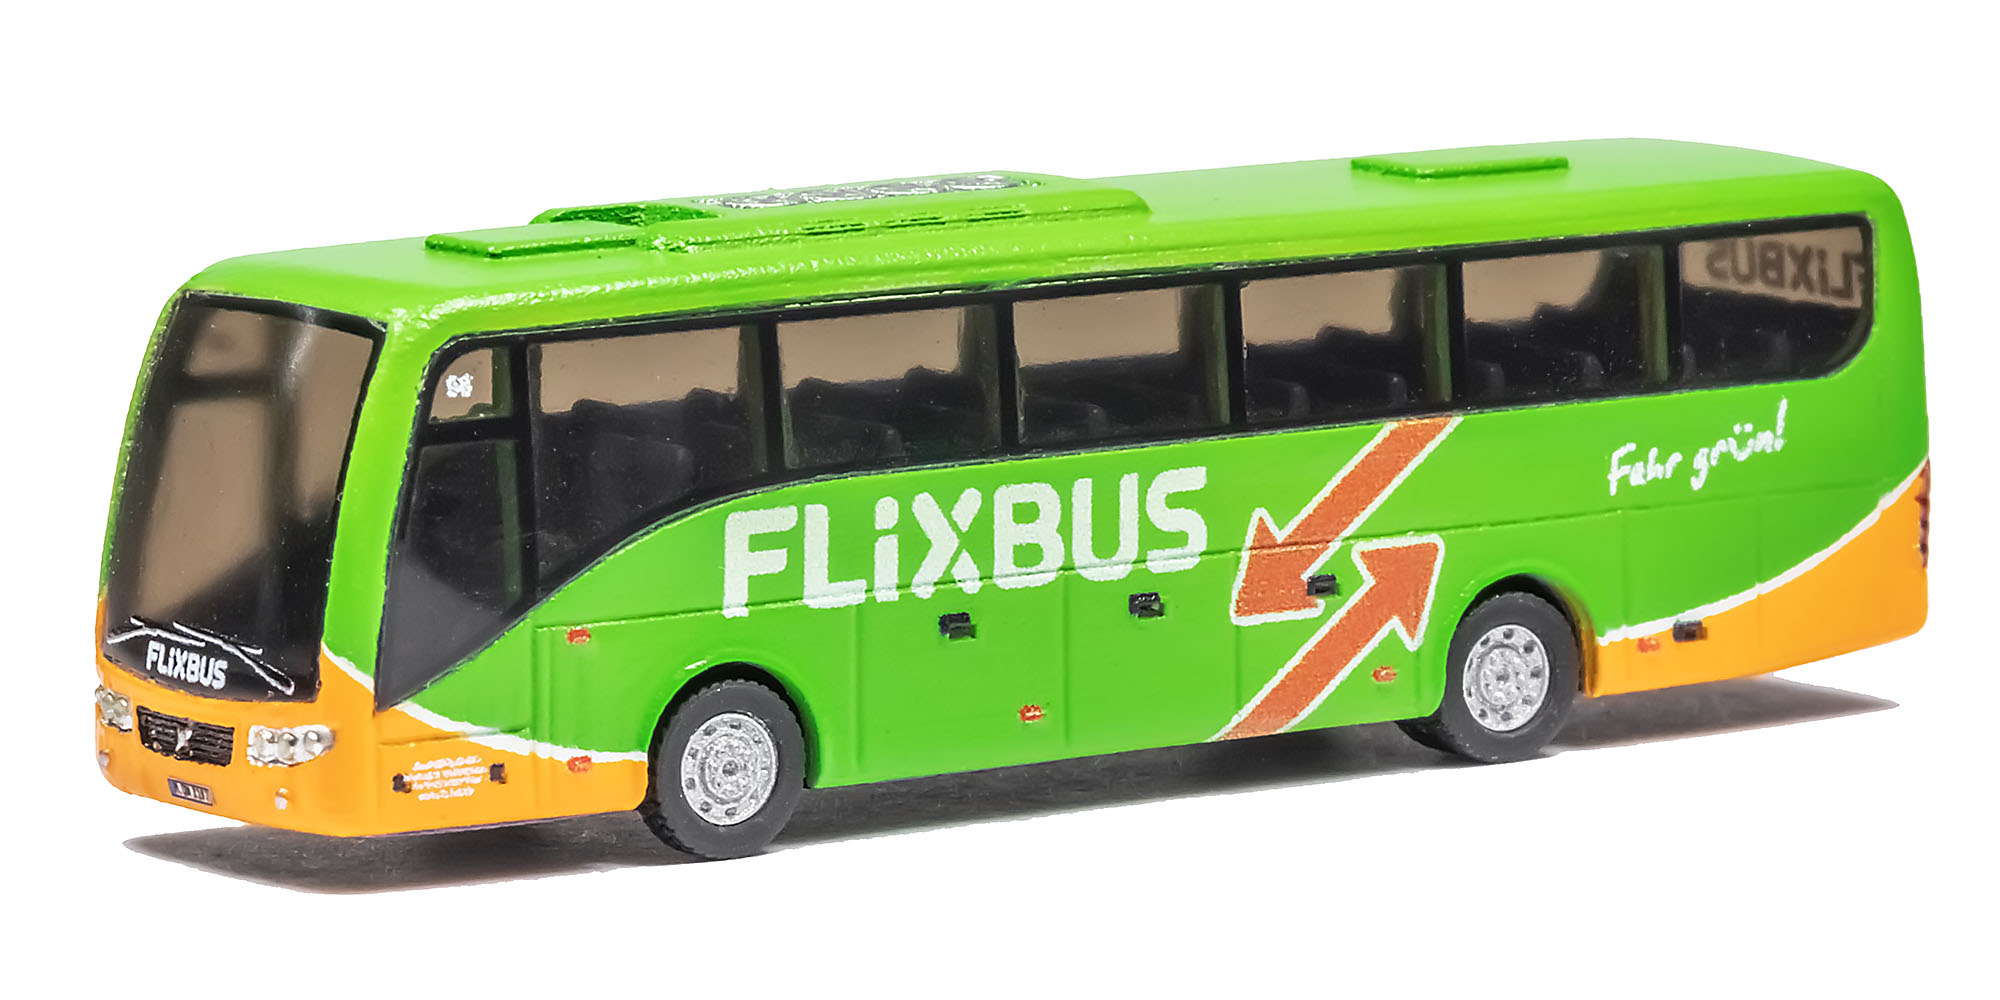
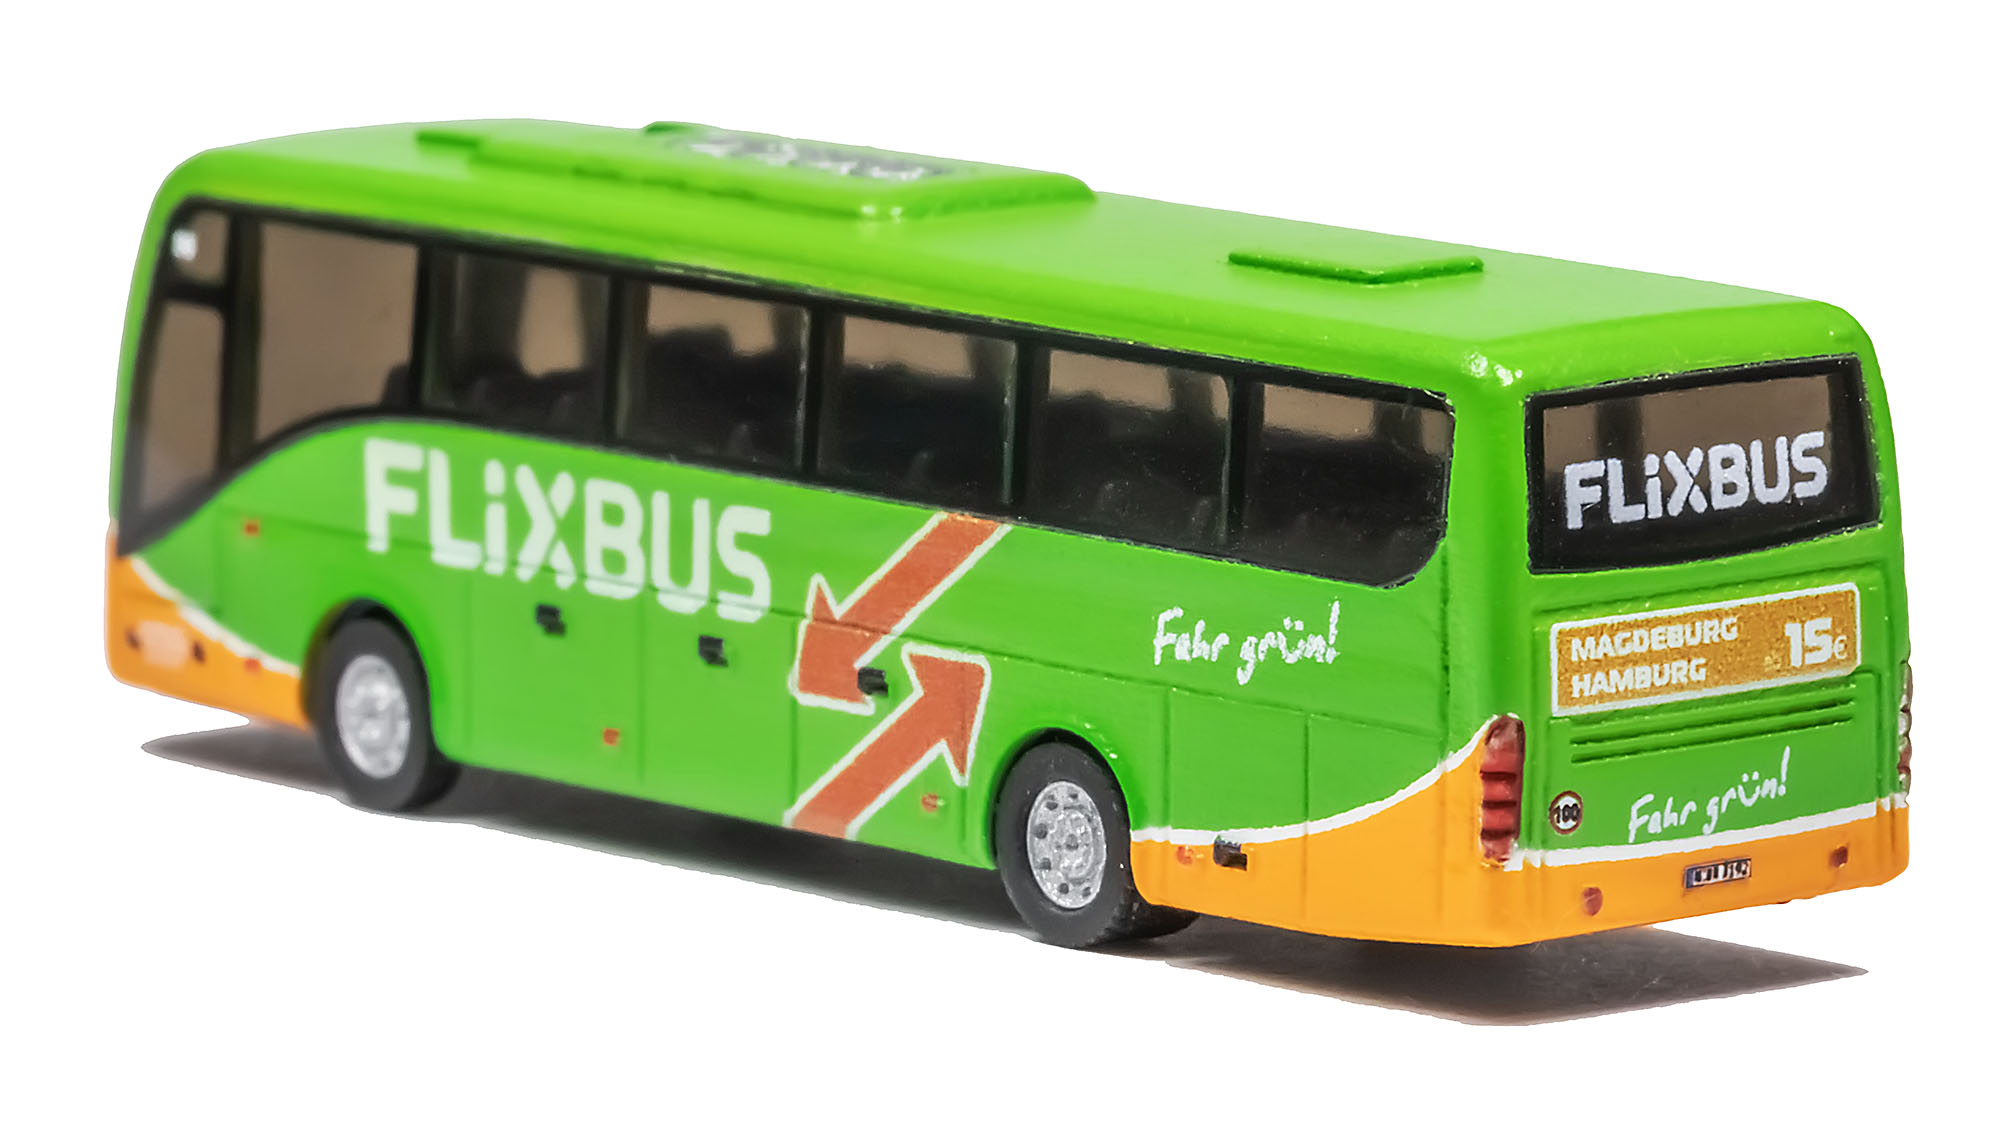
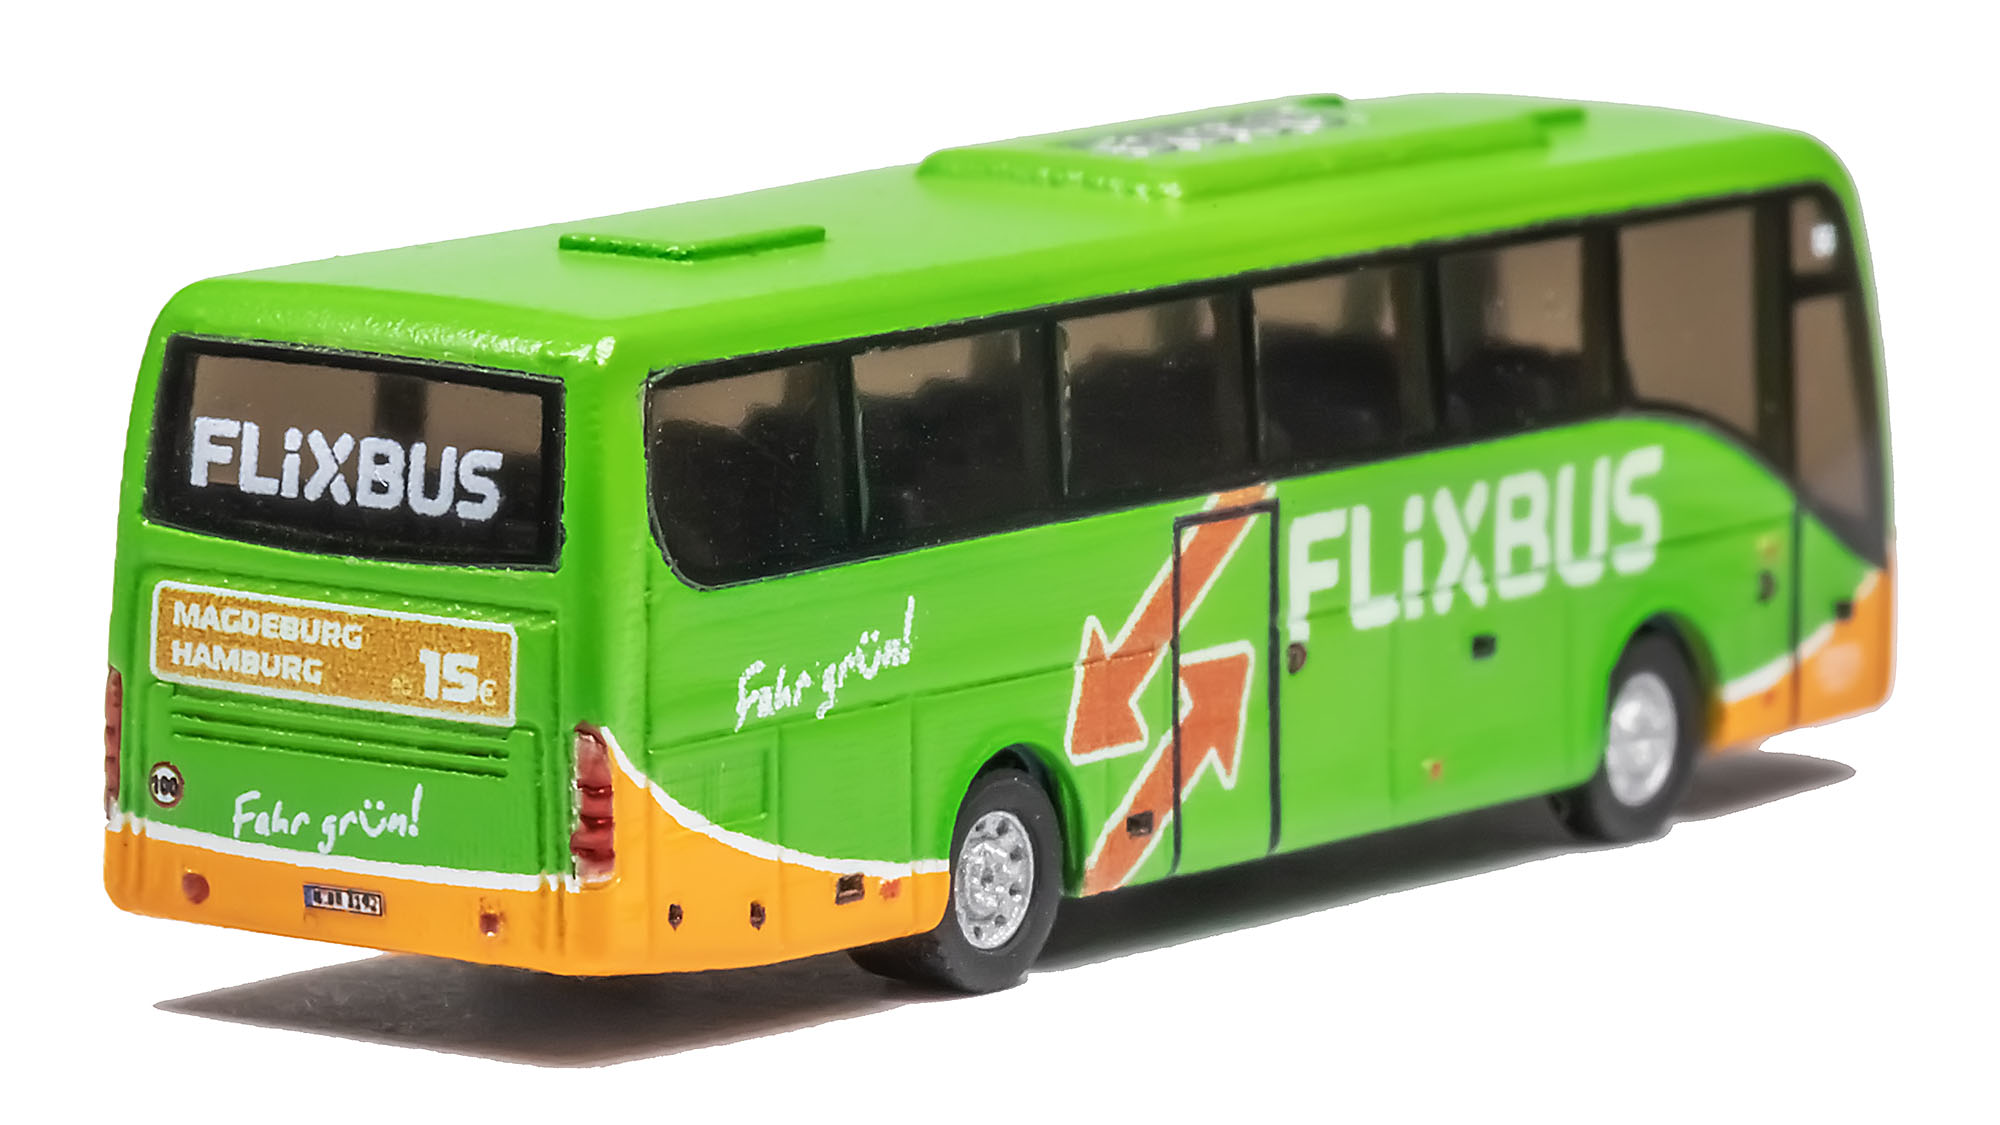
Flixbus (Germany):

Bottom side. Look at tire treads:

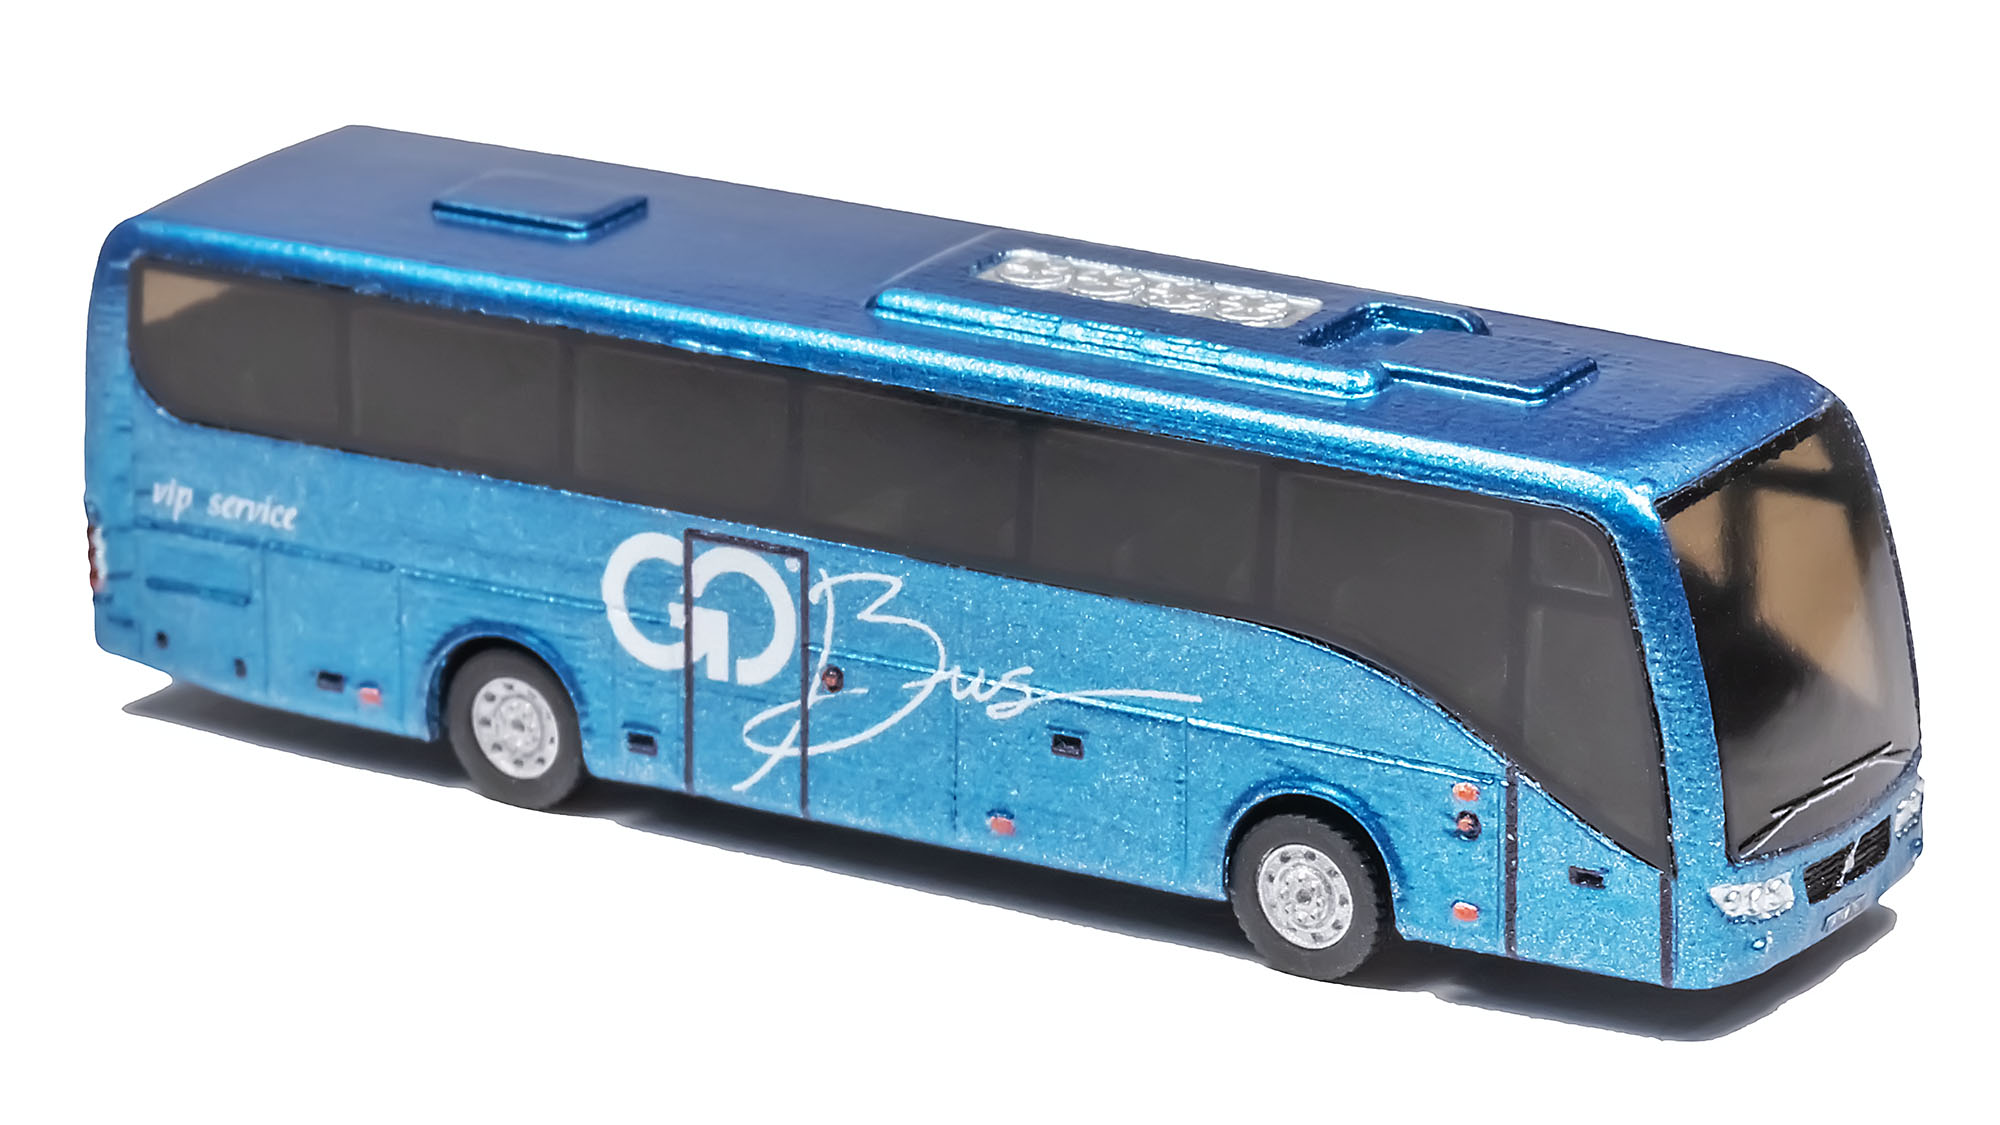
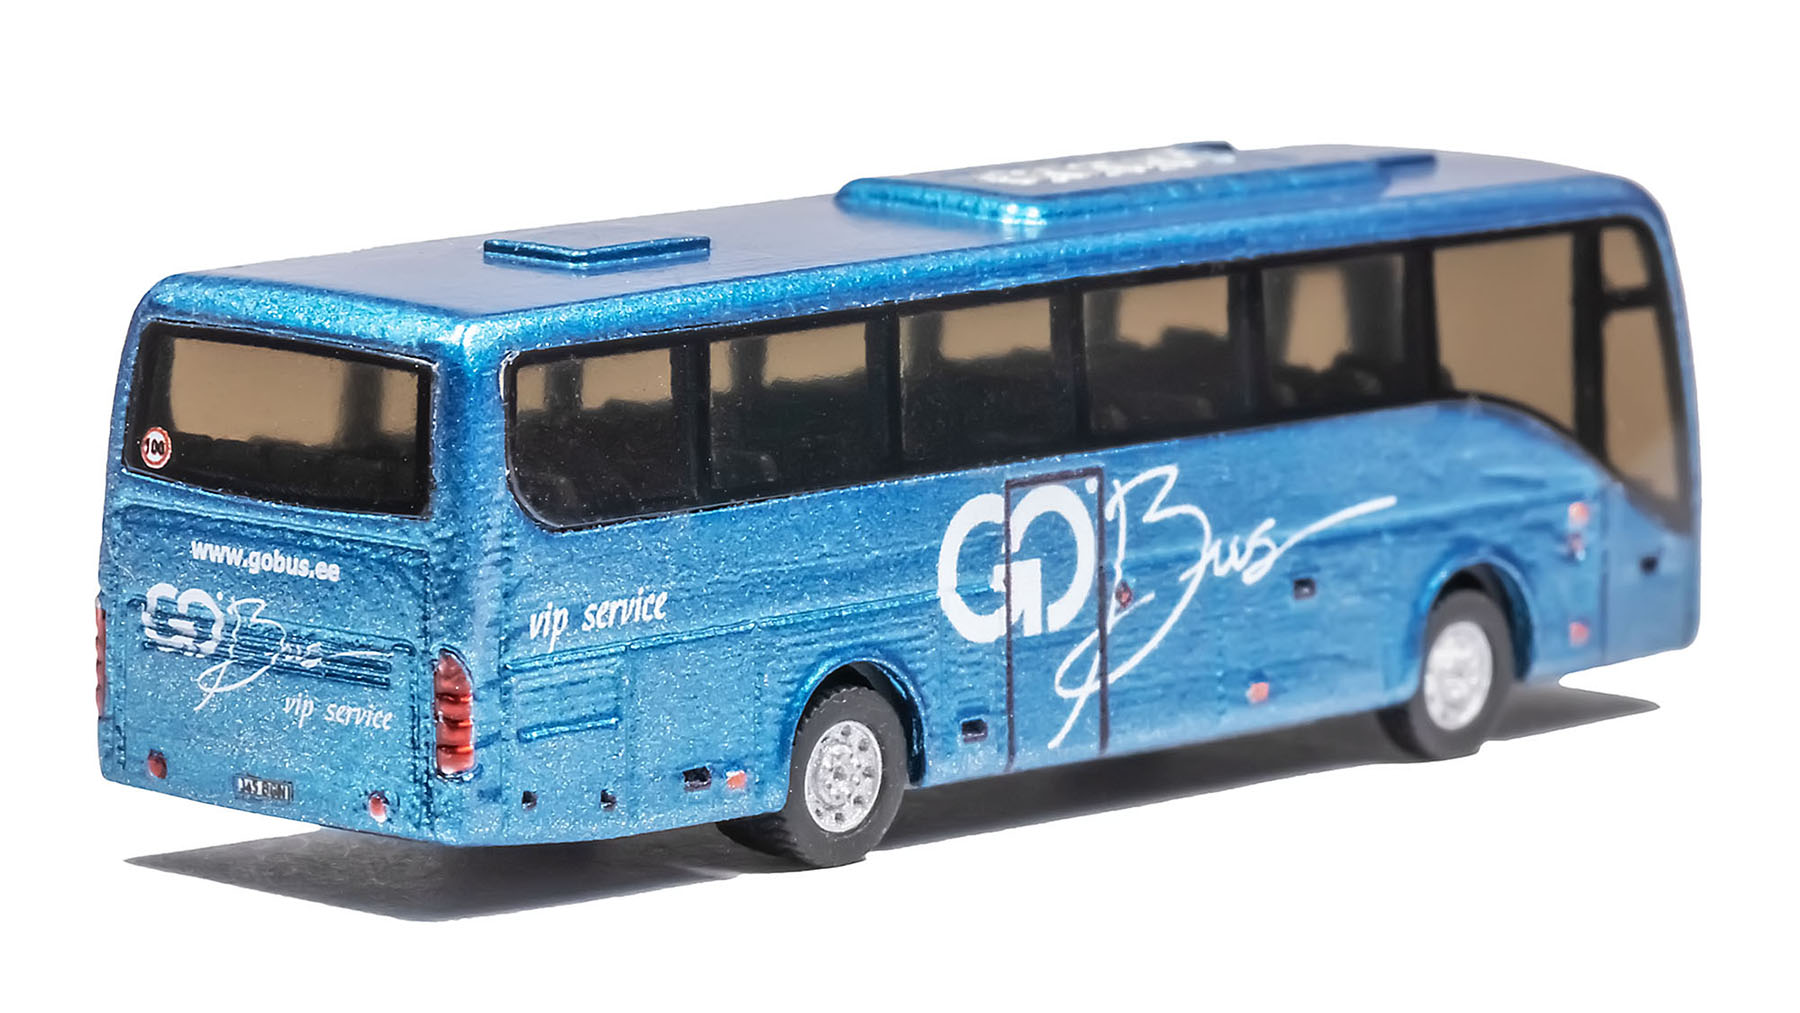
GoBus (Estonia):


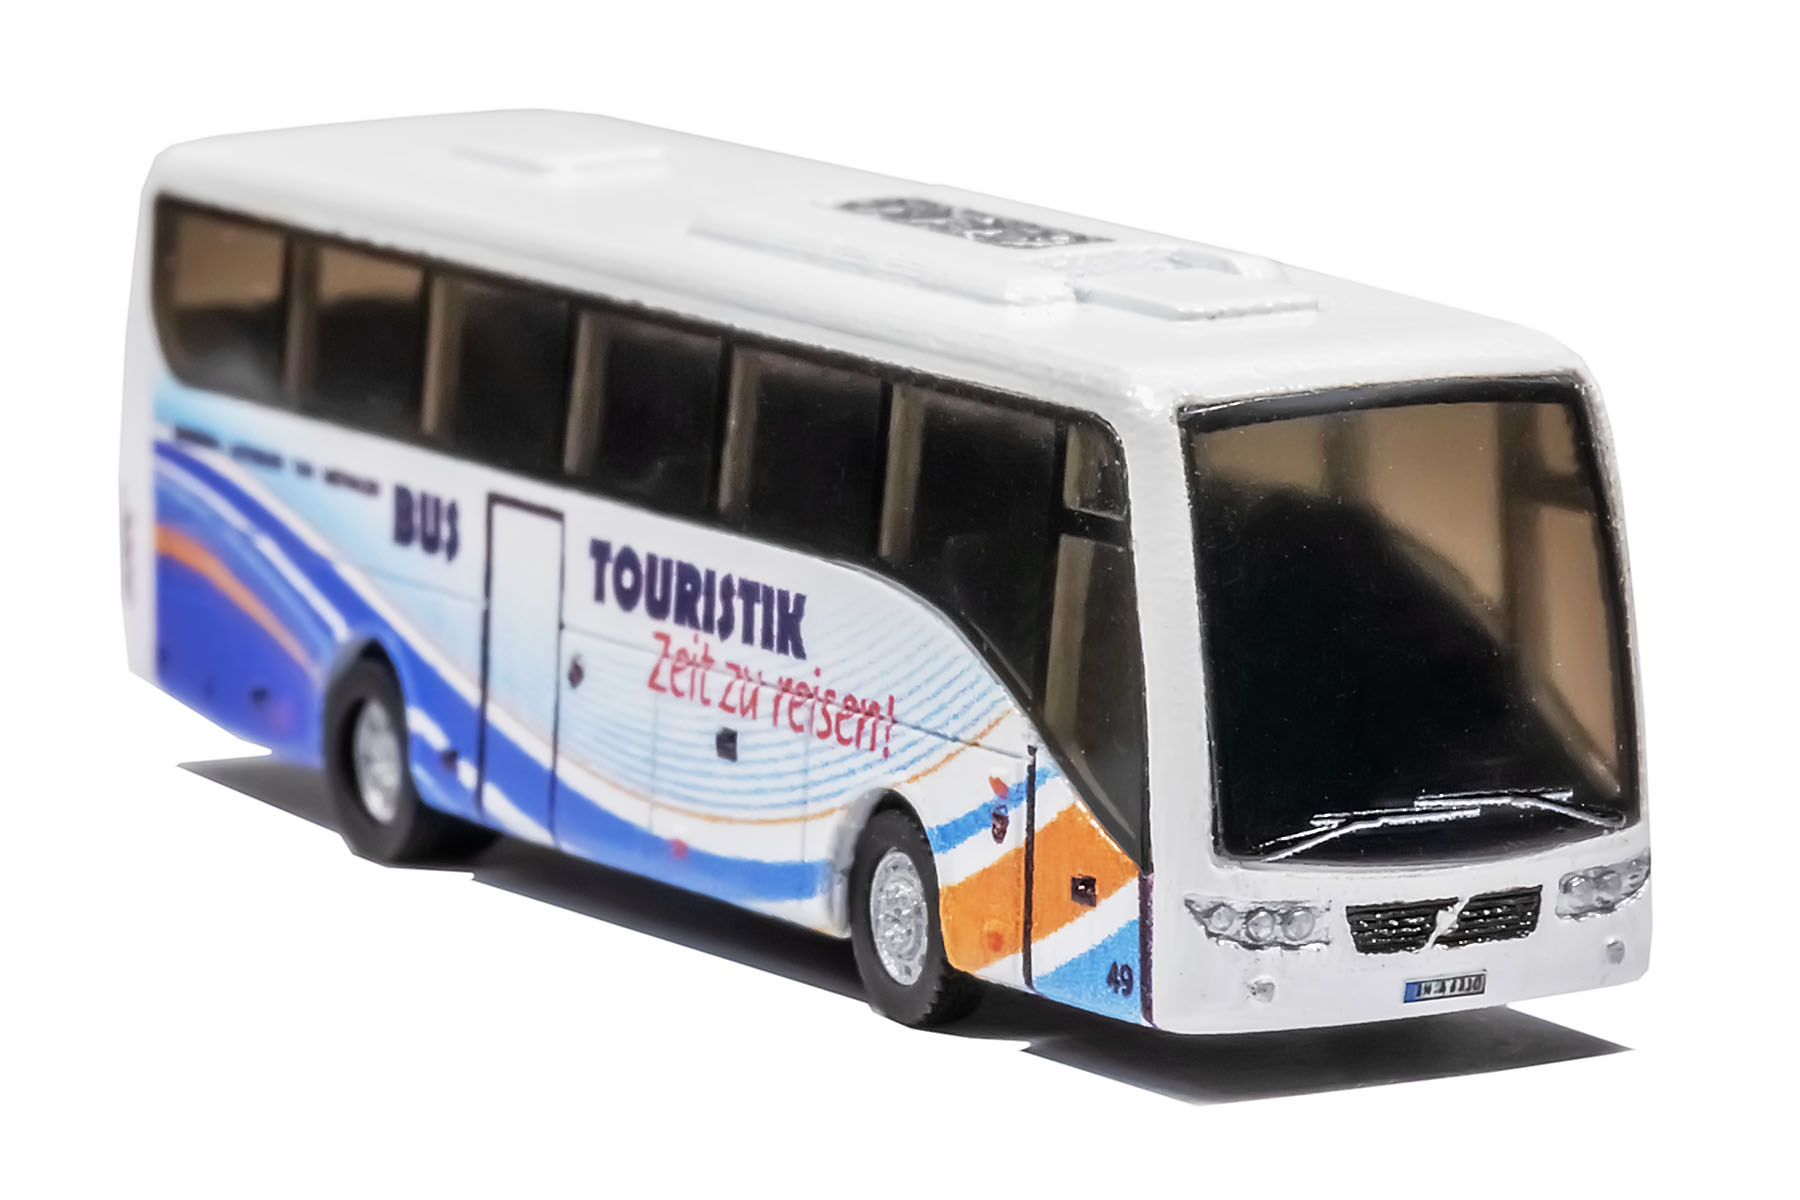
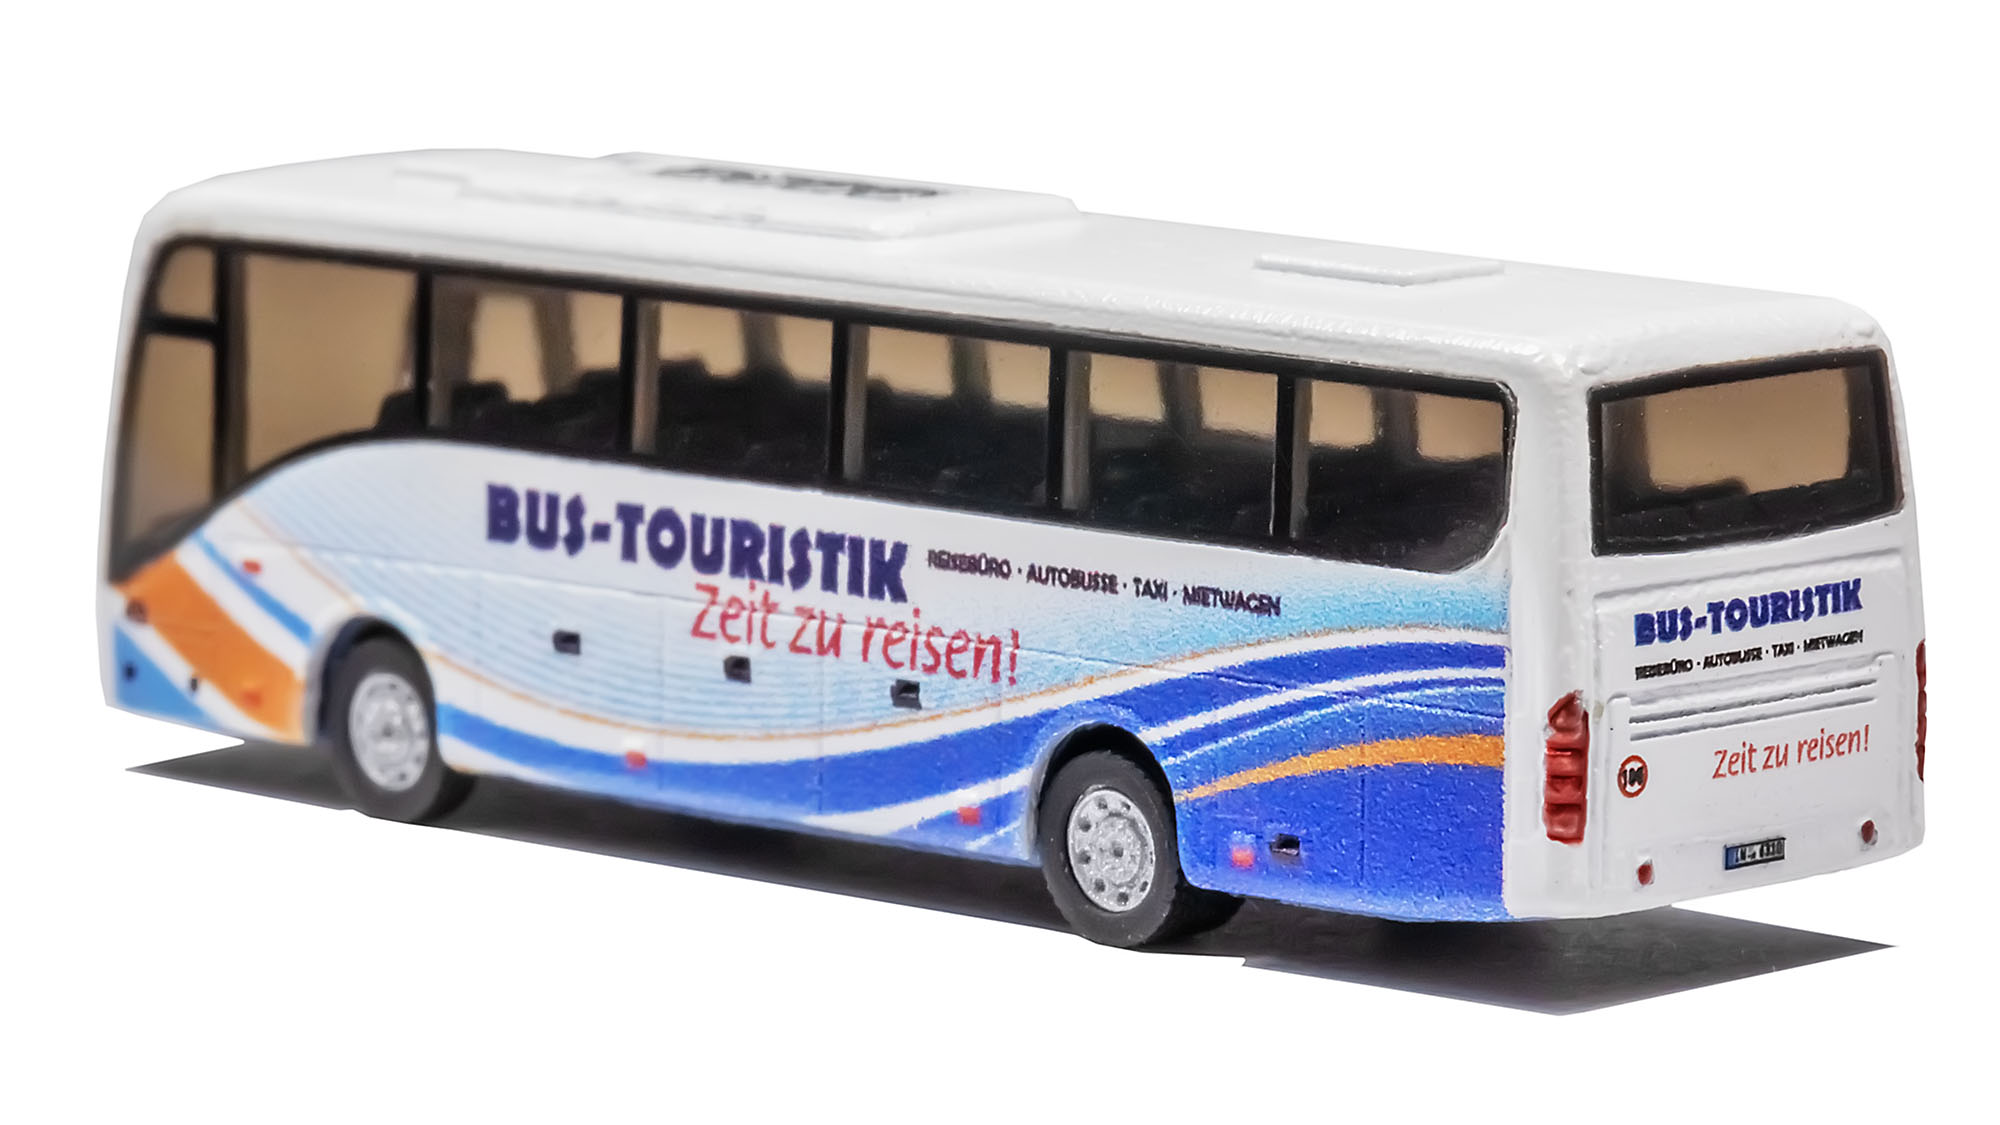
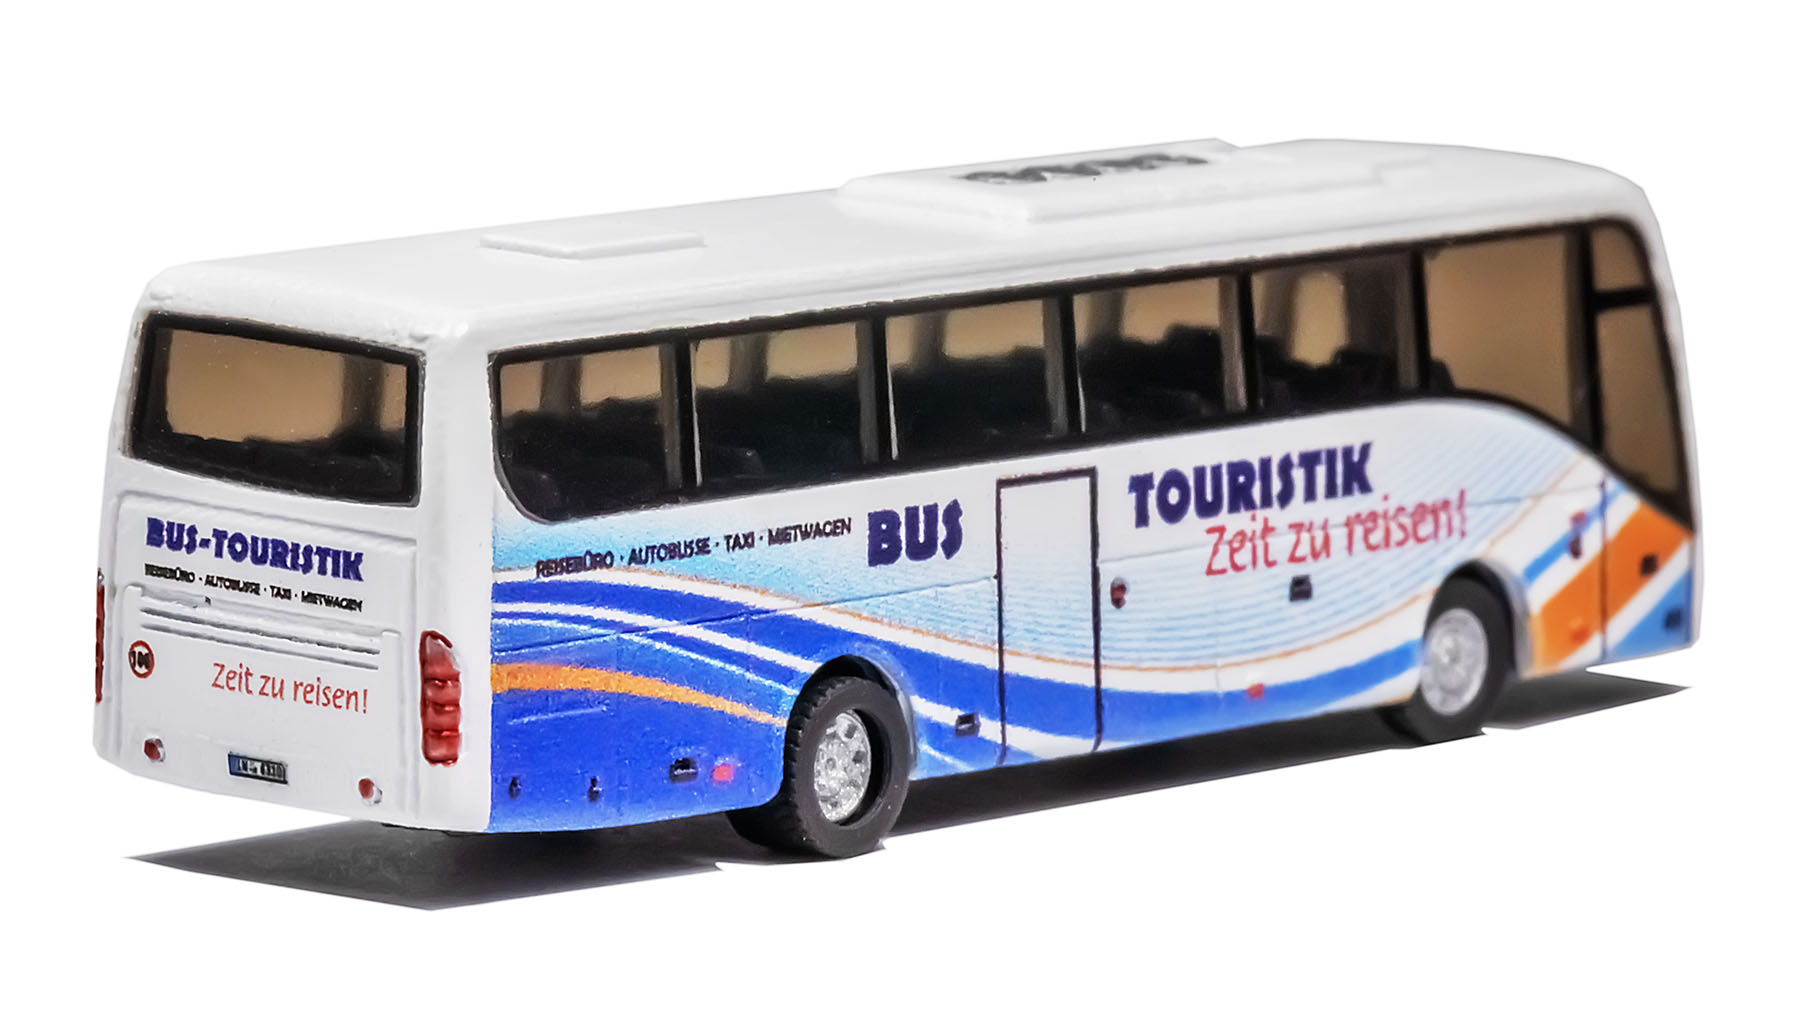
Bus Touristik (Germany):


Eurolines (Germany):


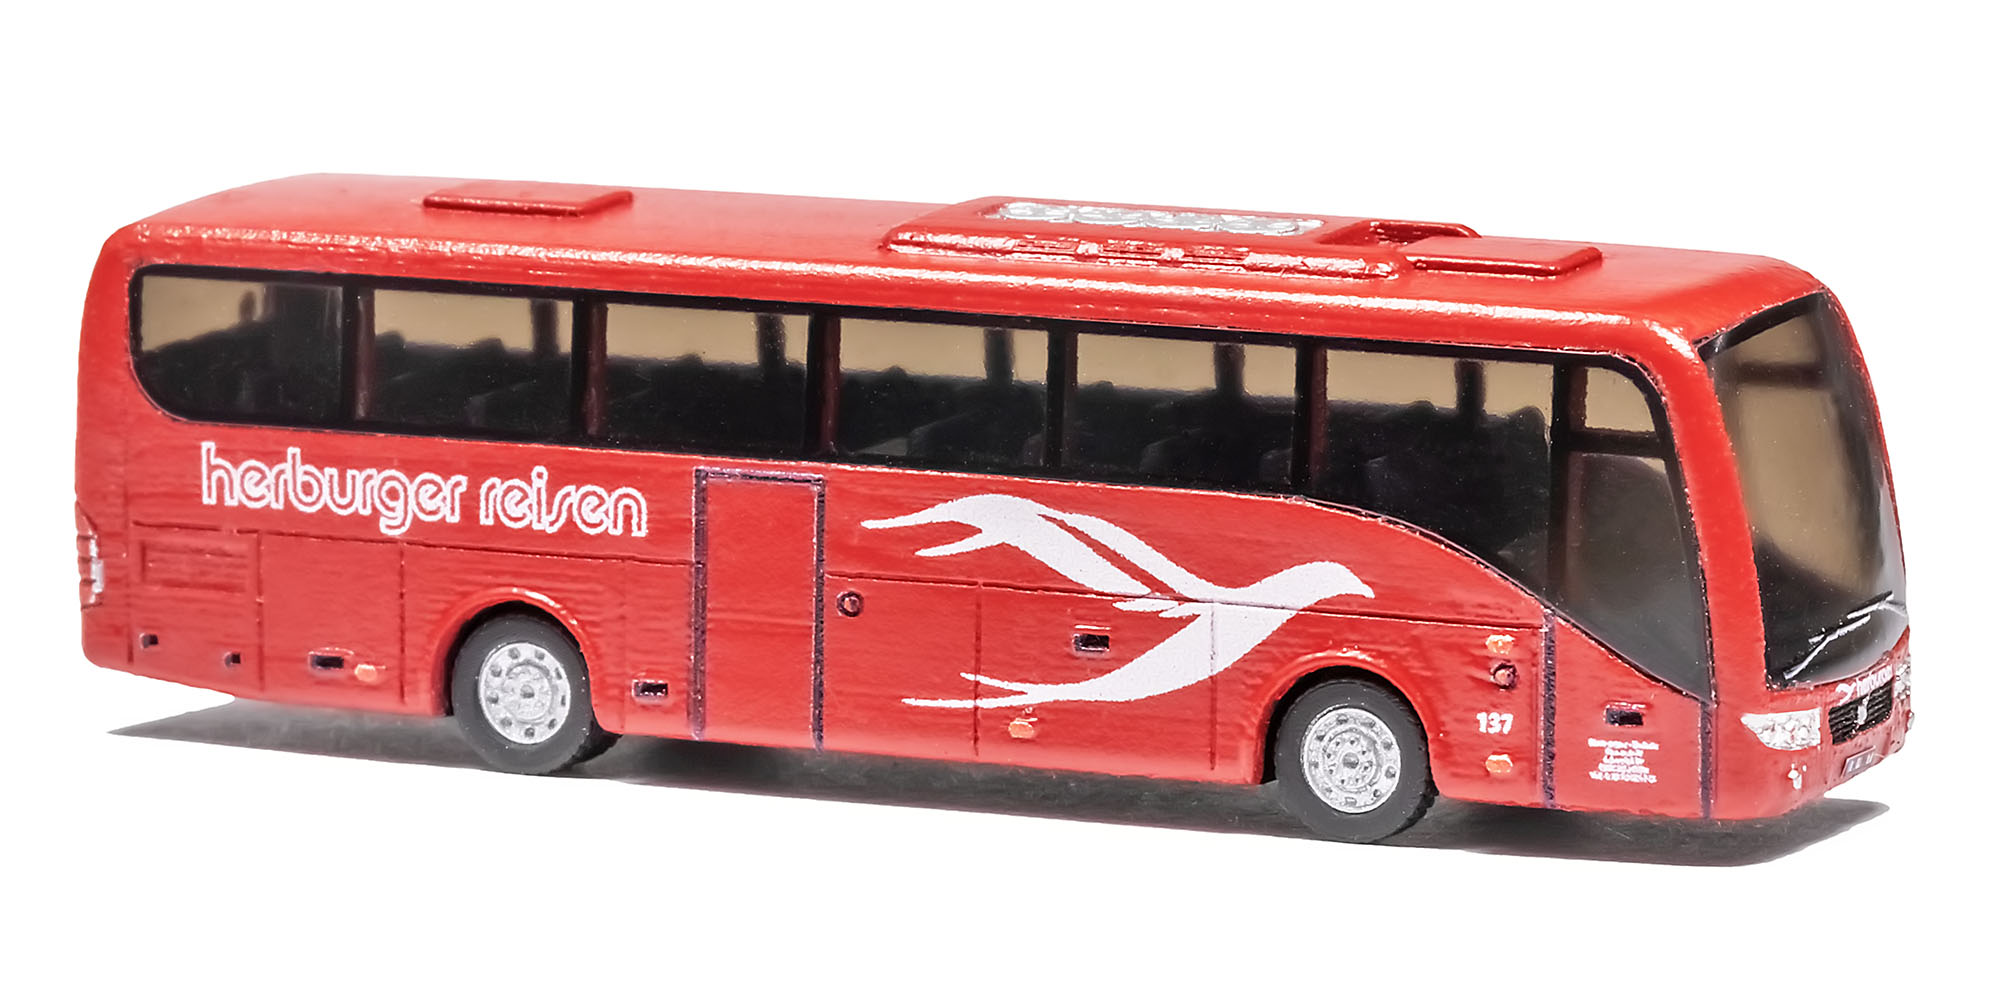
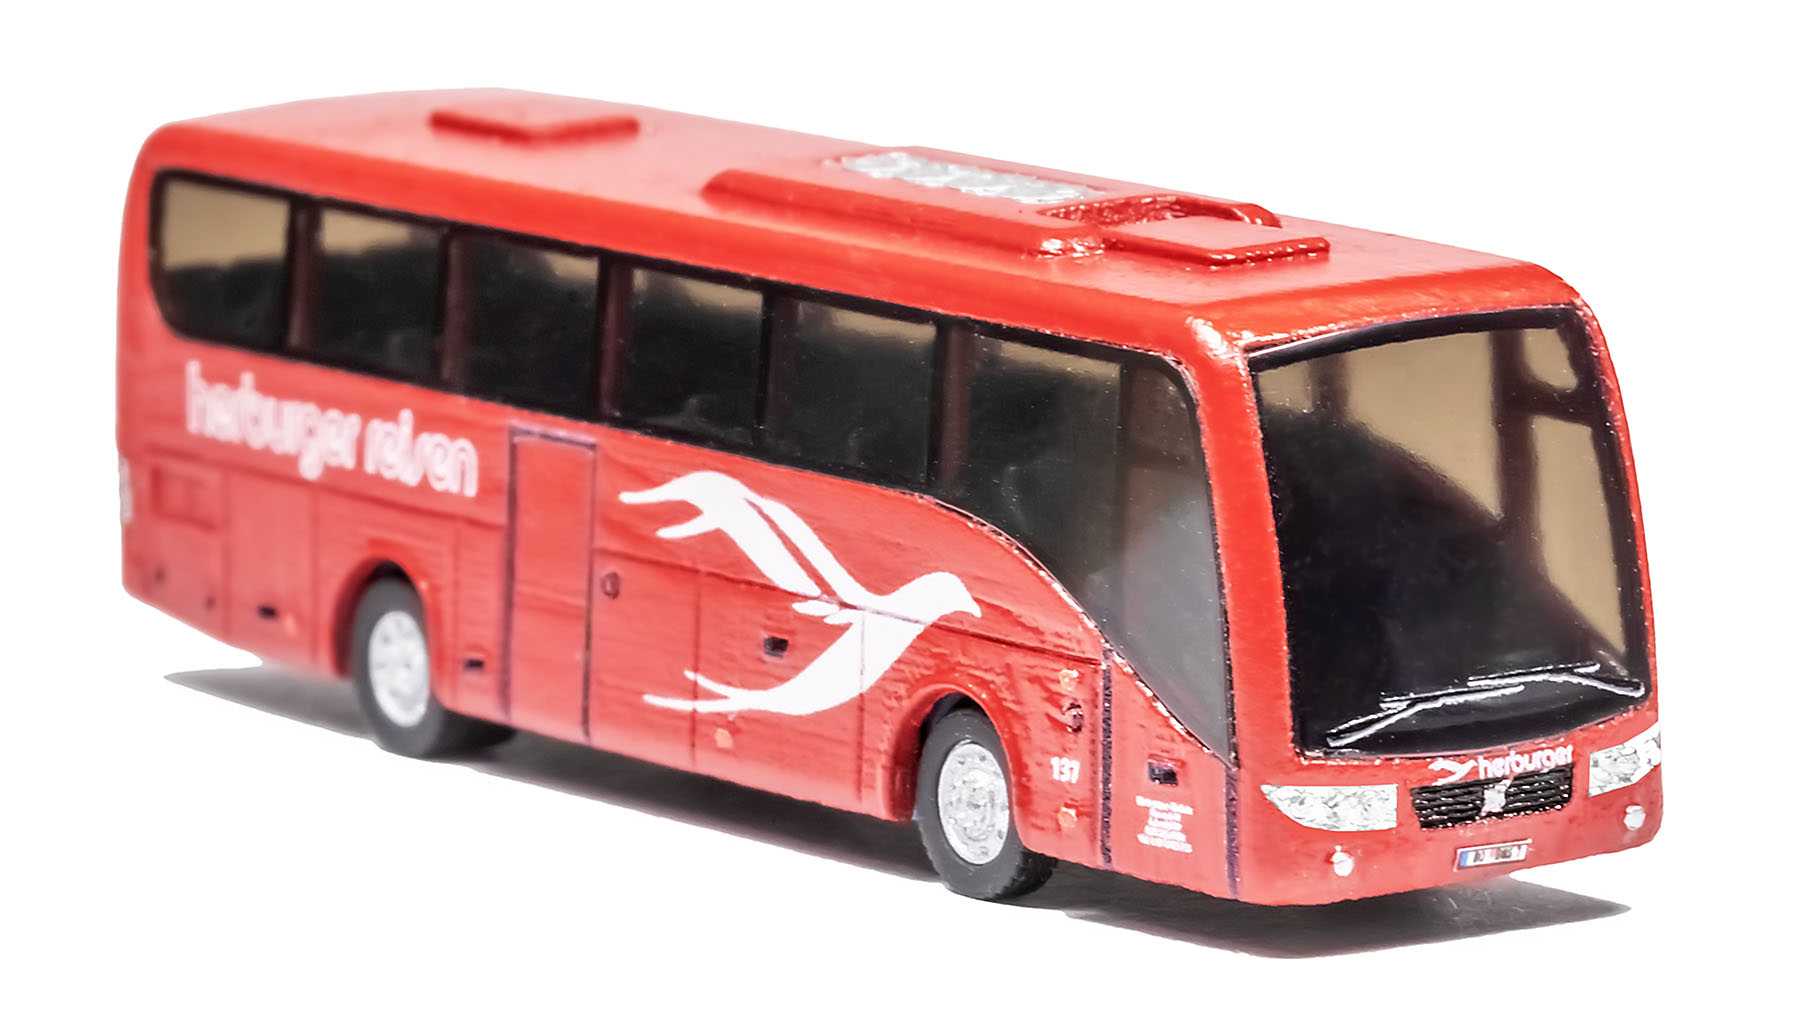
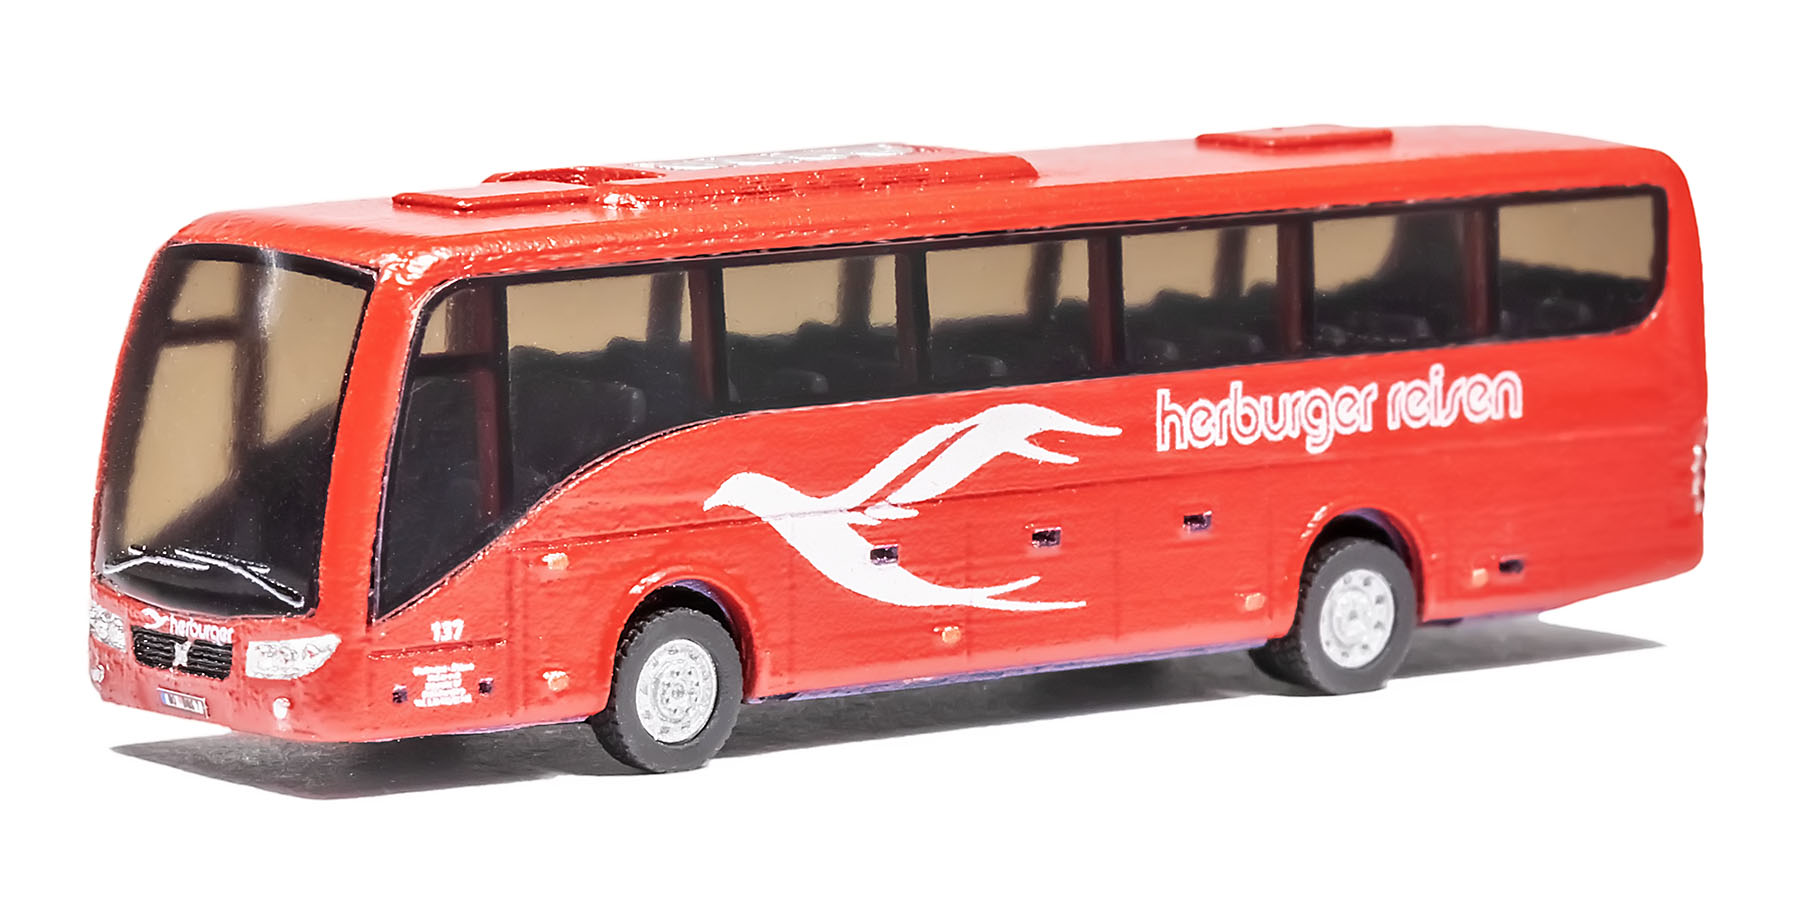
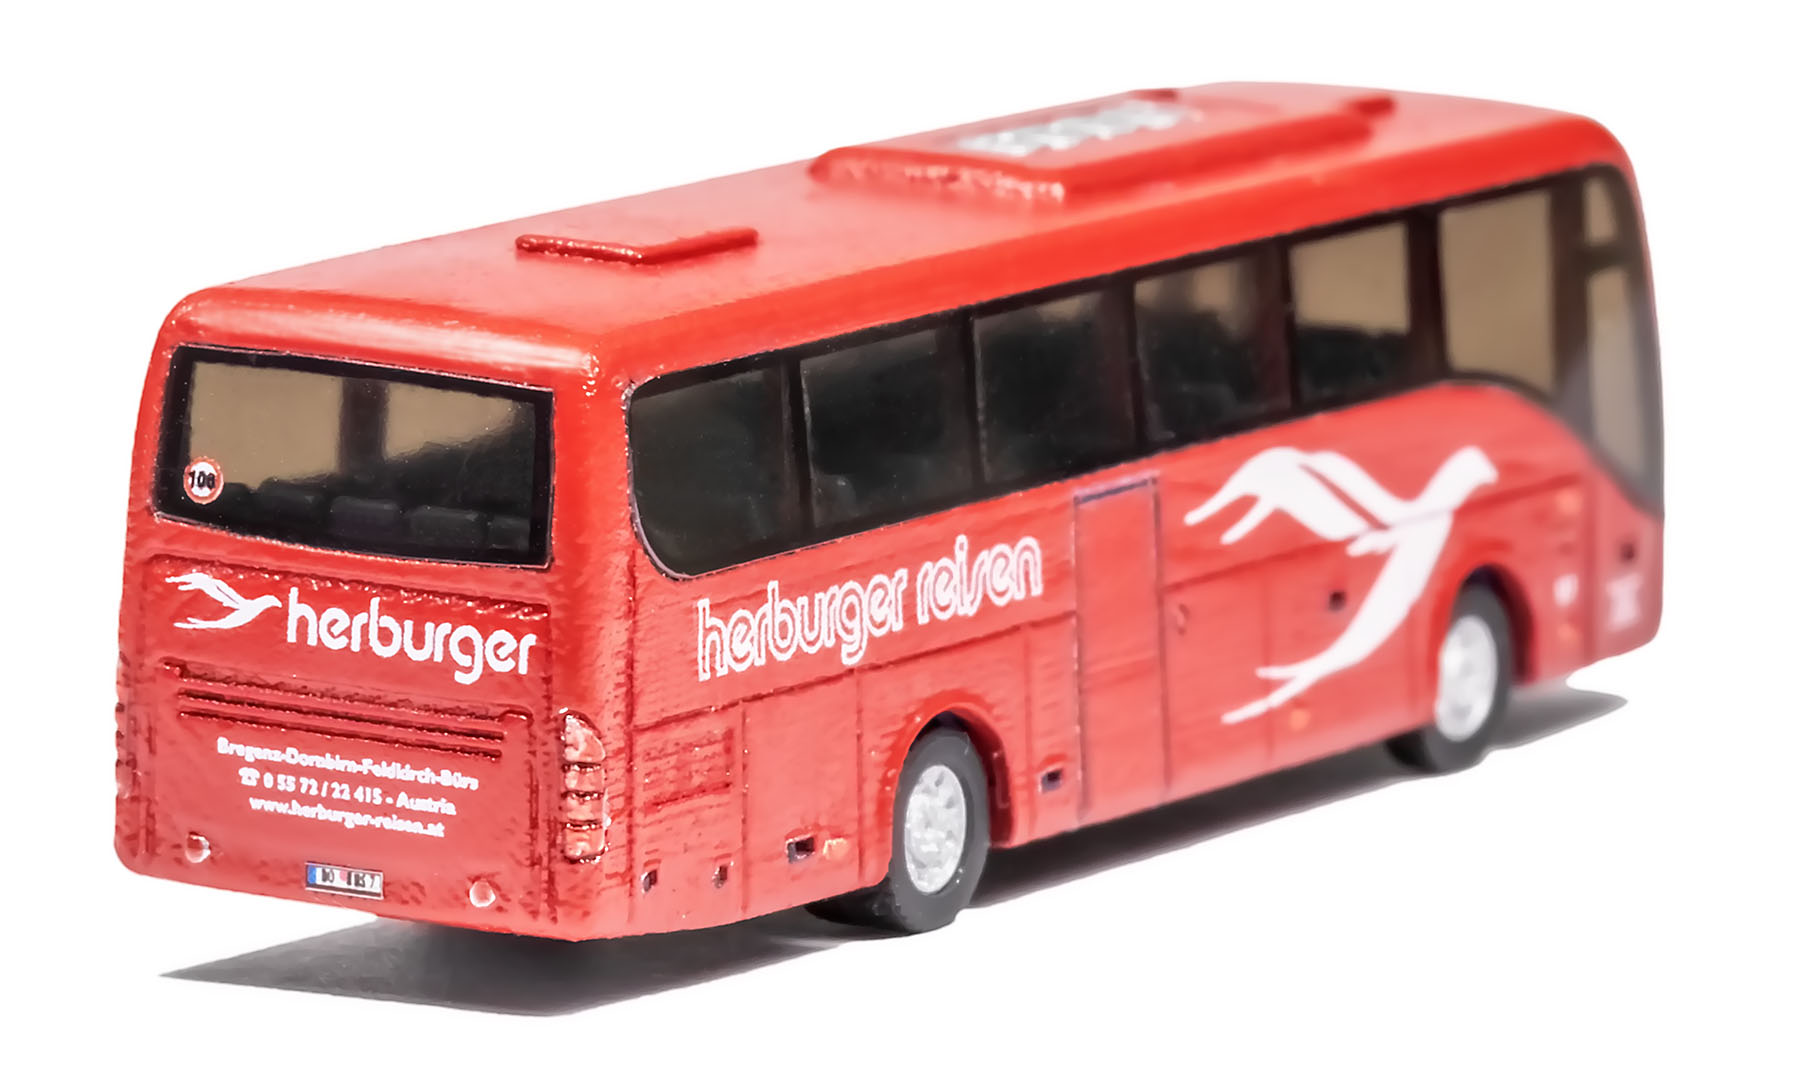
Herburger Reisen (Austria):

Now here is a small peer-to-peer comparison with other models of buses that exist in Z scale (rare model from HUG and a popular, but aged model from Noch):


All models together:

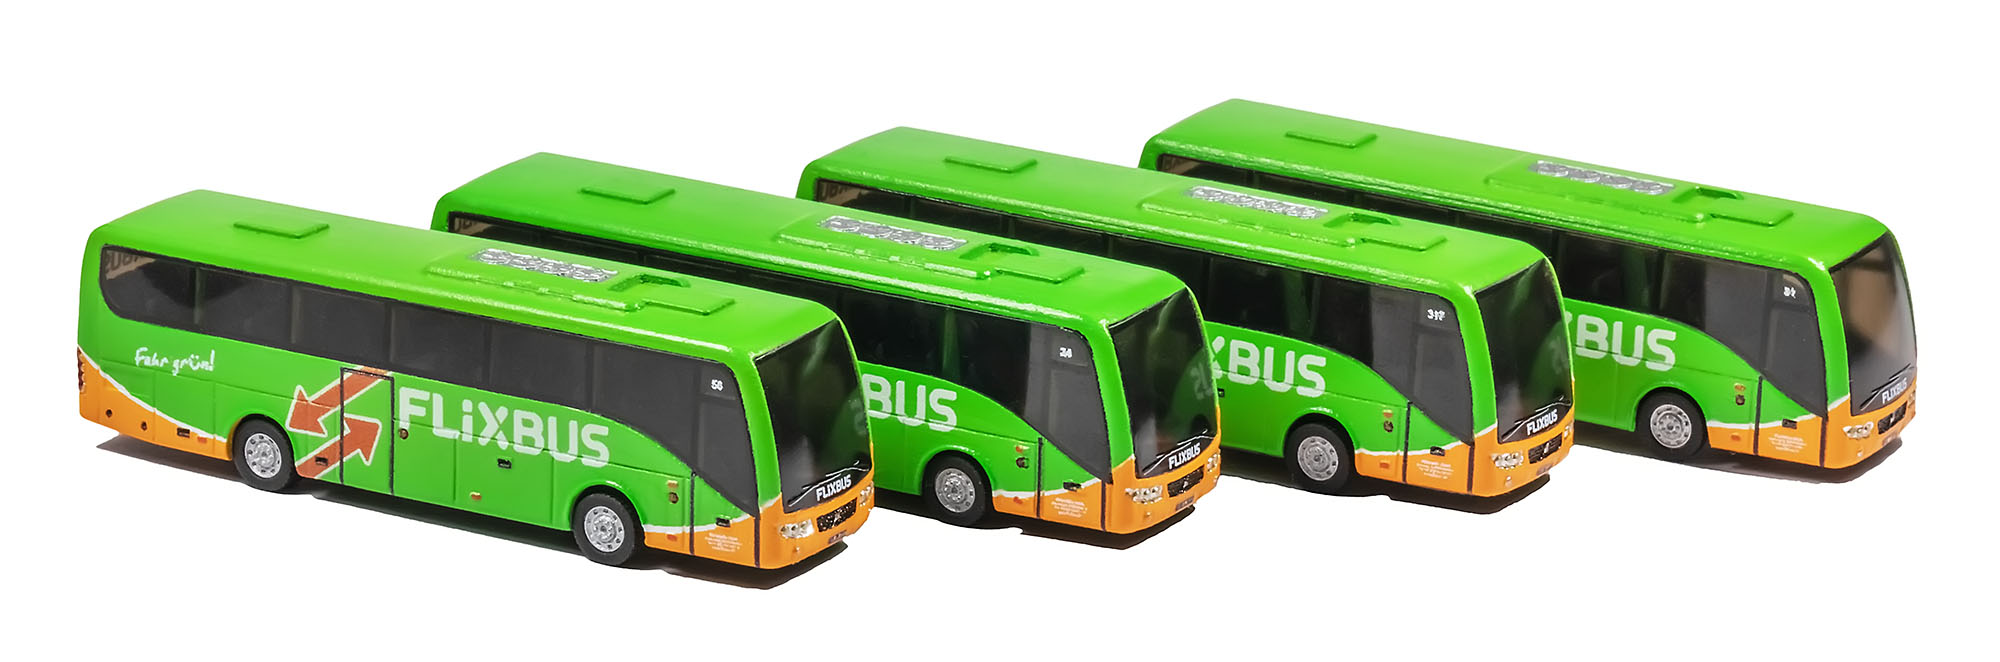
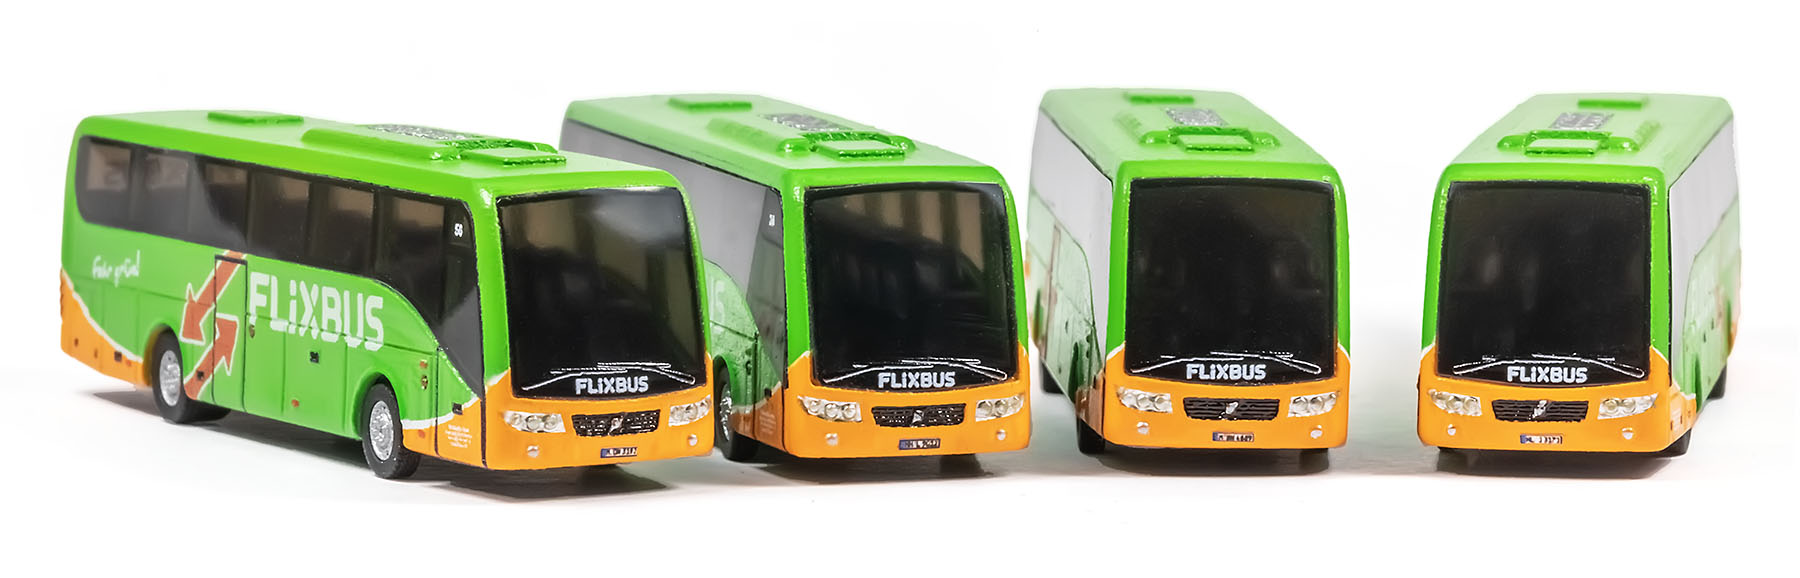
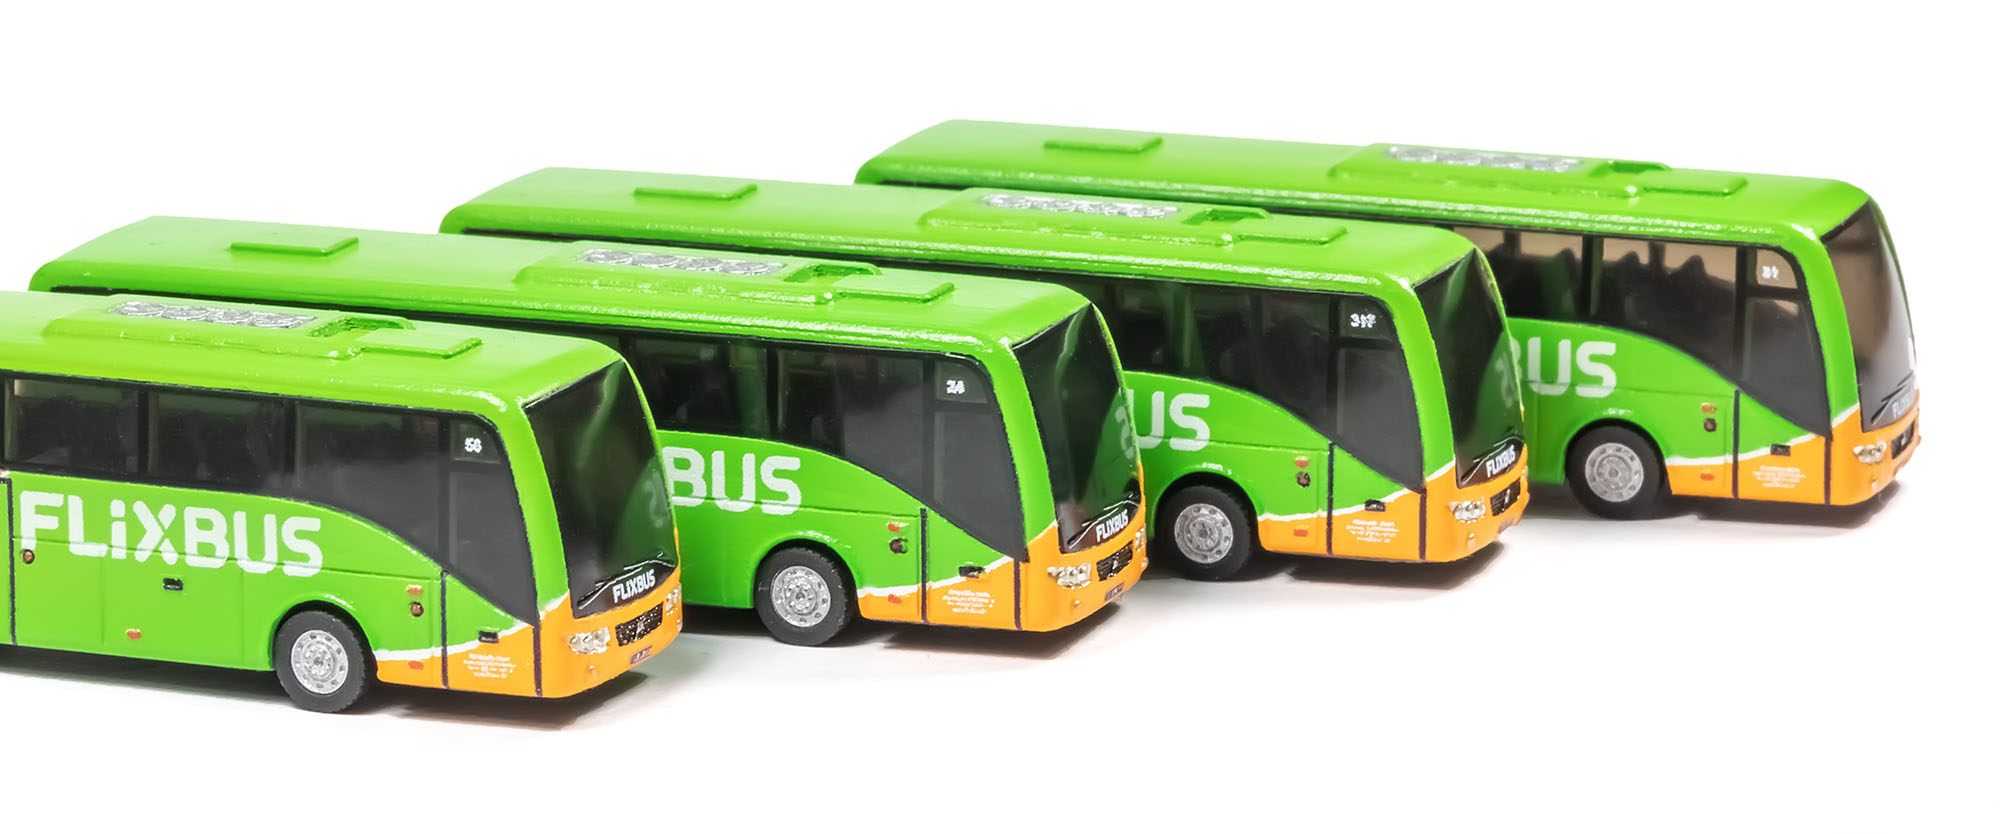
I prepared several Flixbus models, each with different number:

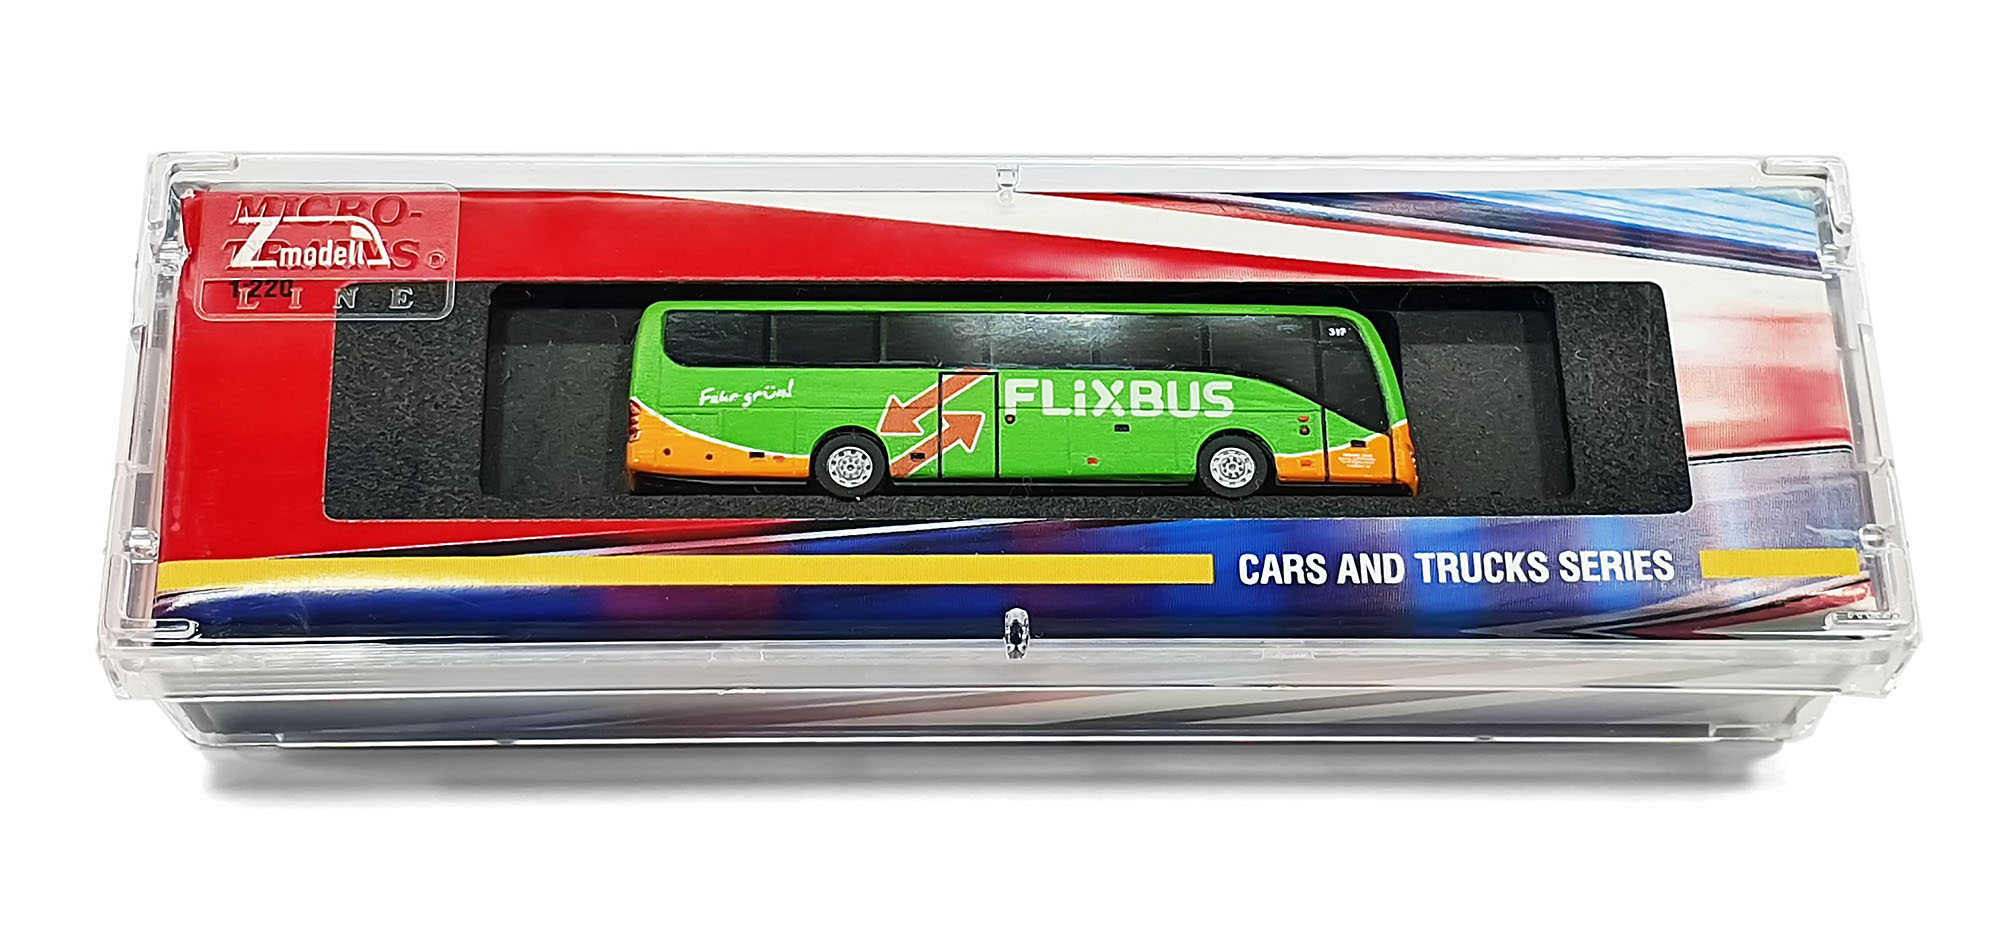
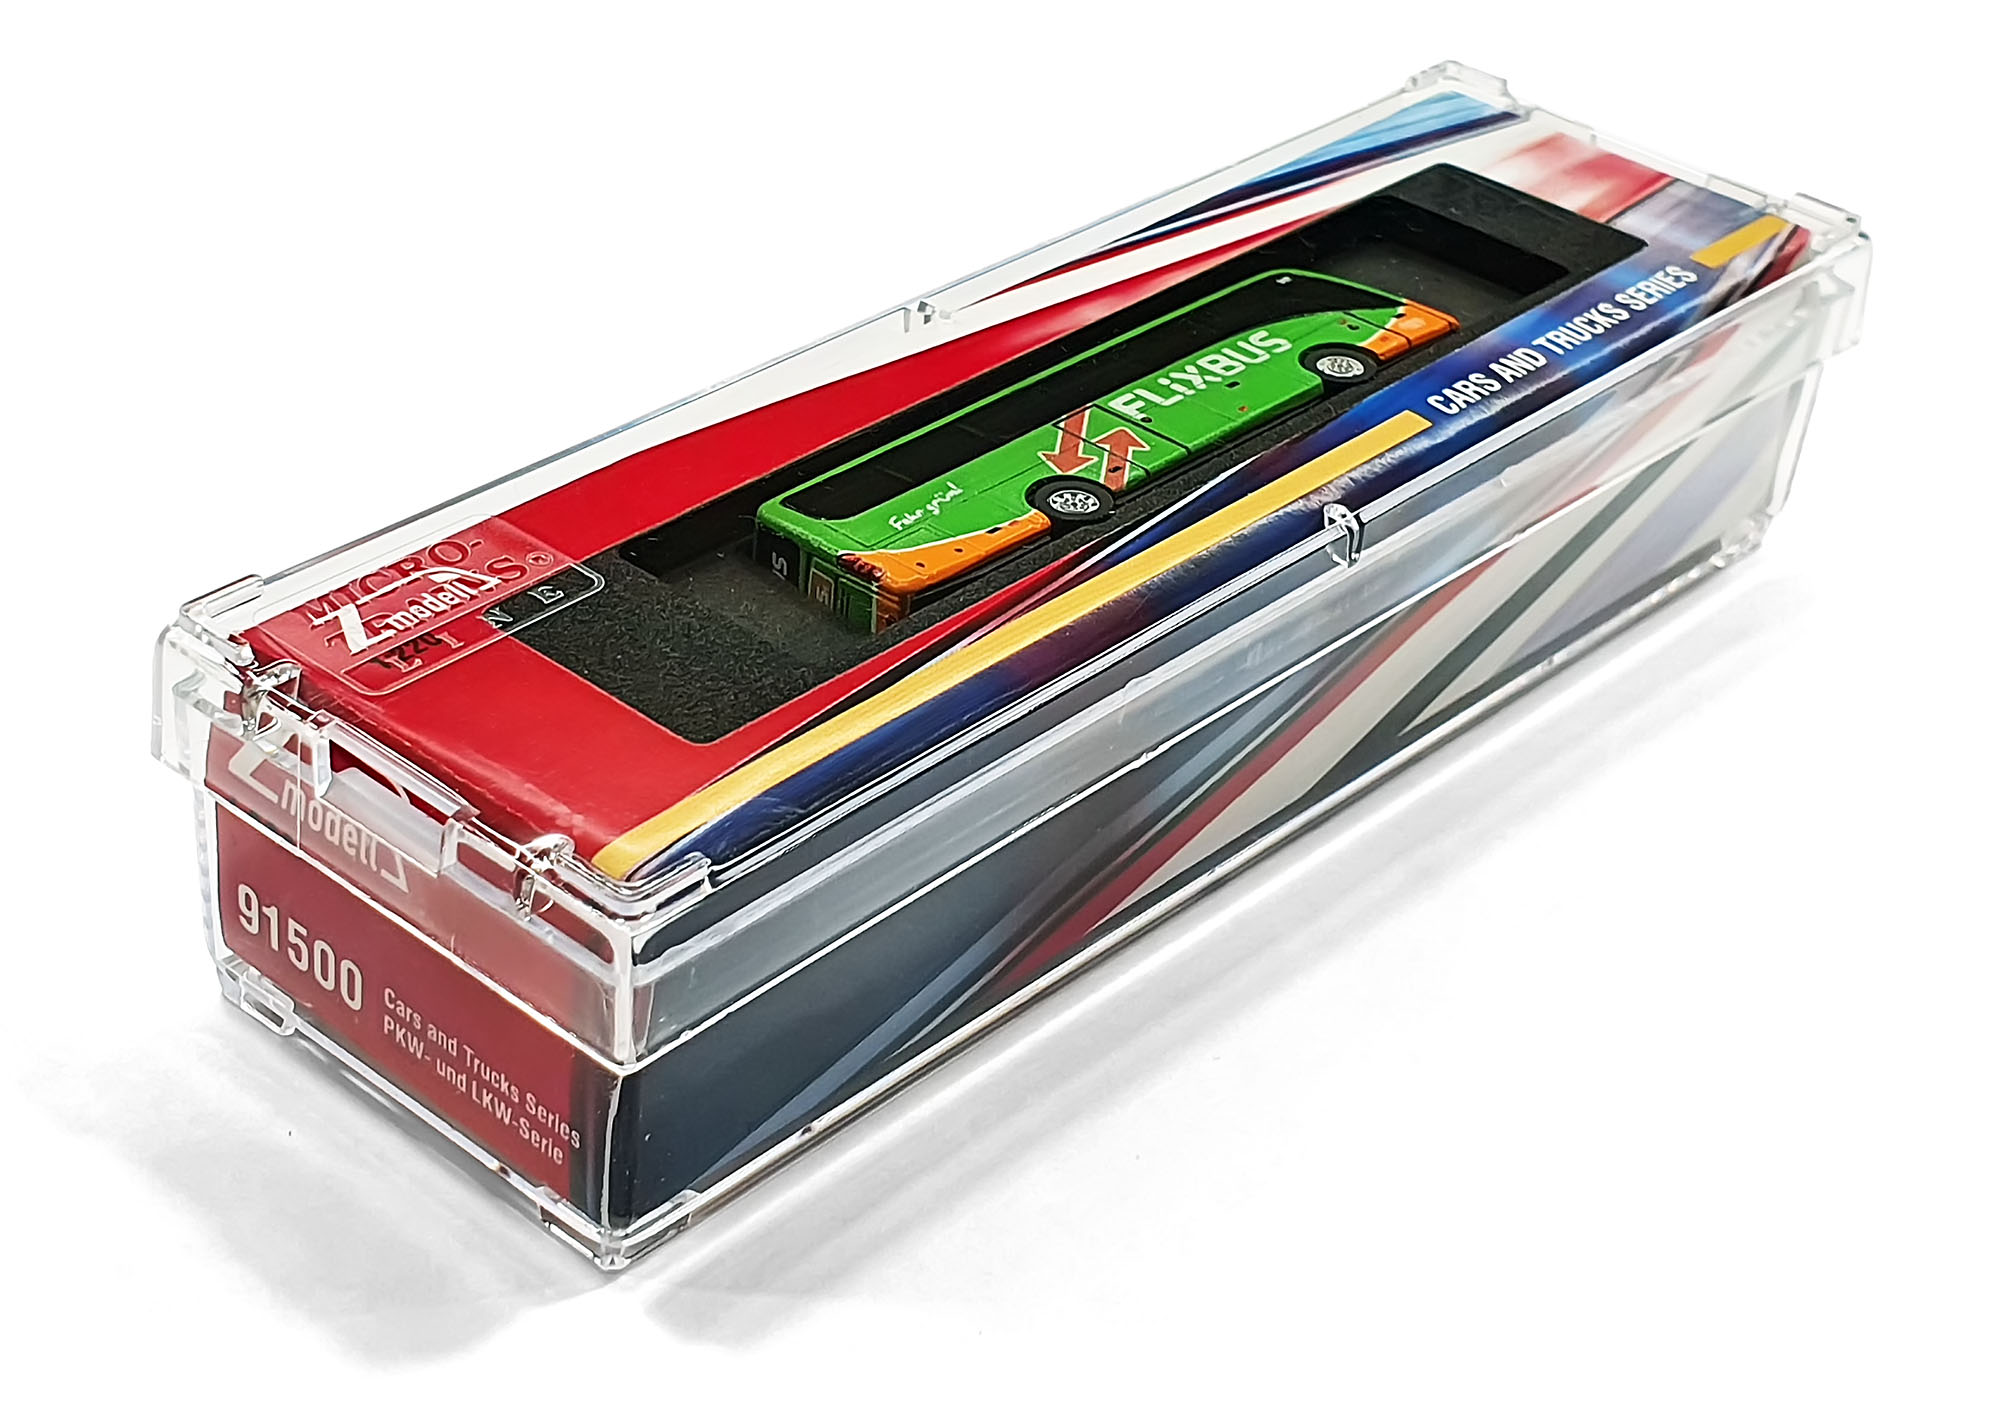
I also designed a special packaging for my models. MTL sells empty boxes – I decided to use them here:

About compatibility with Z car system chassis from Polish manufacturer KPPMO: this system did not existed at the moment when I started the development, therefore I cannot guarantee anything. However, dimensions of my bus are nearly the same to the size of the old Setra bus from Noch, for which Z car system chassis was initially developed, therefore any experiments are possible.
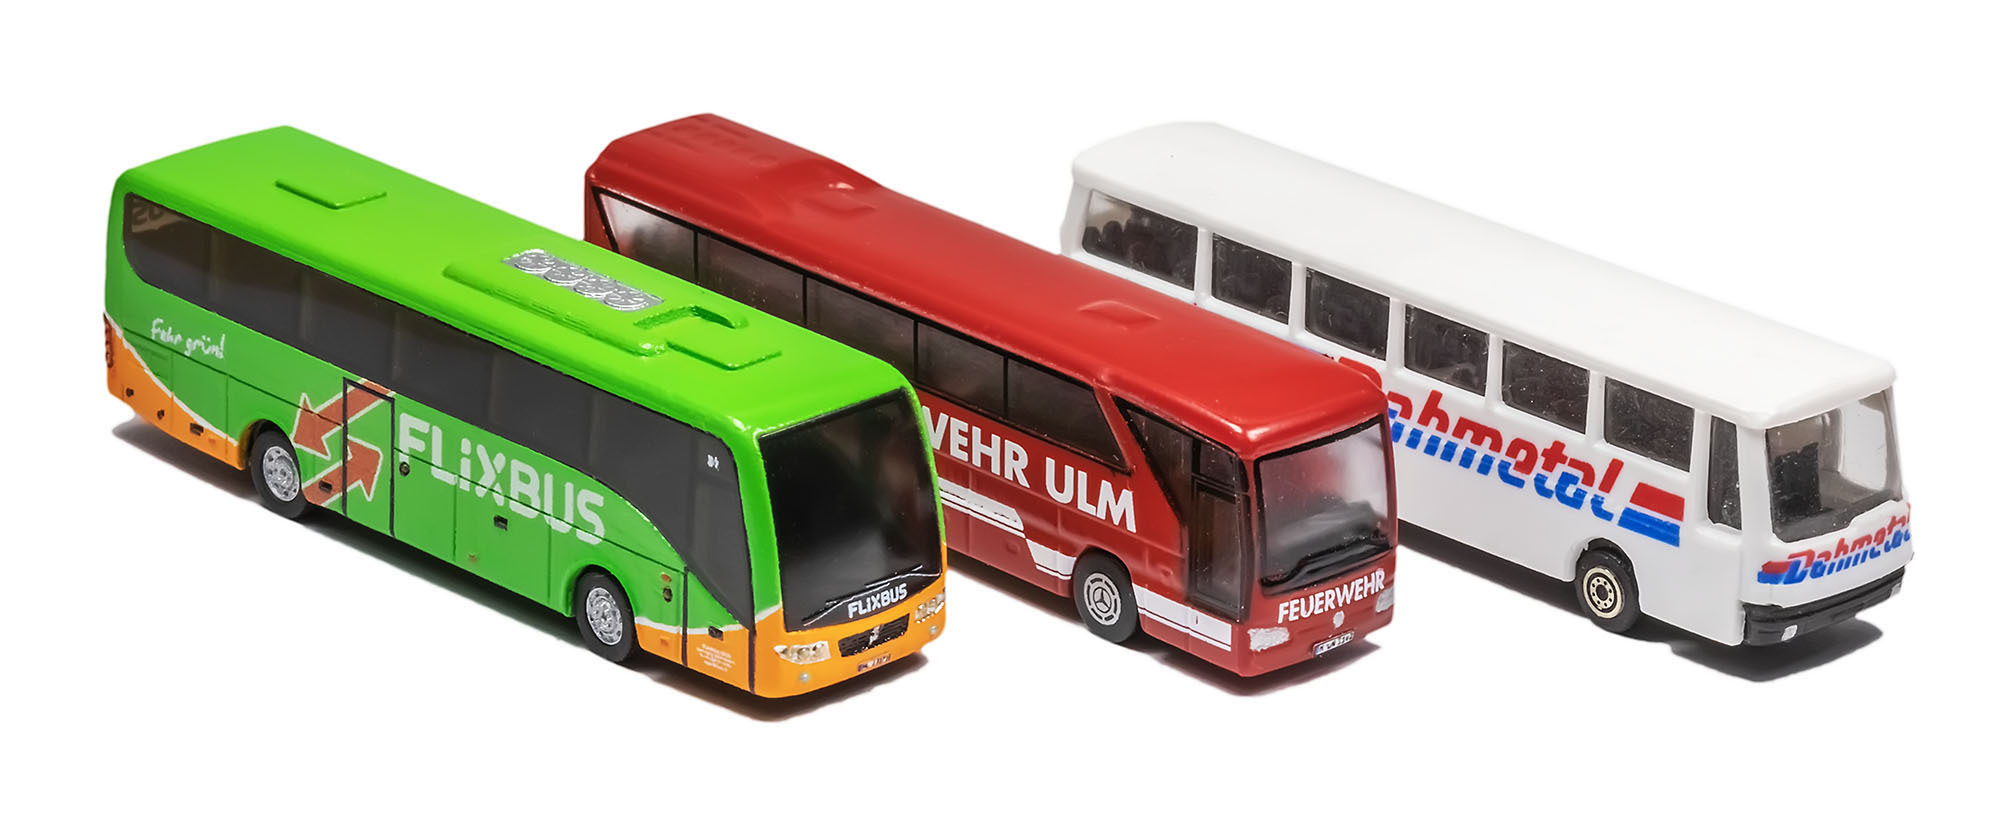
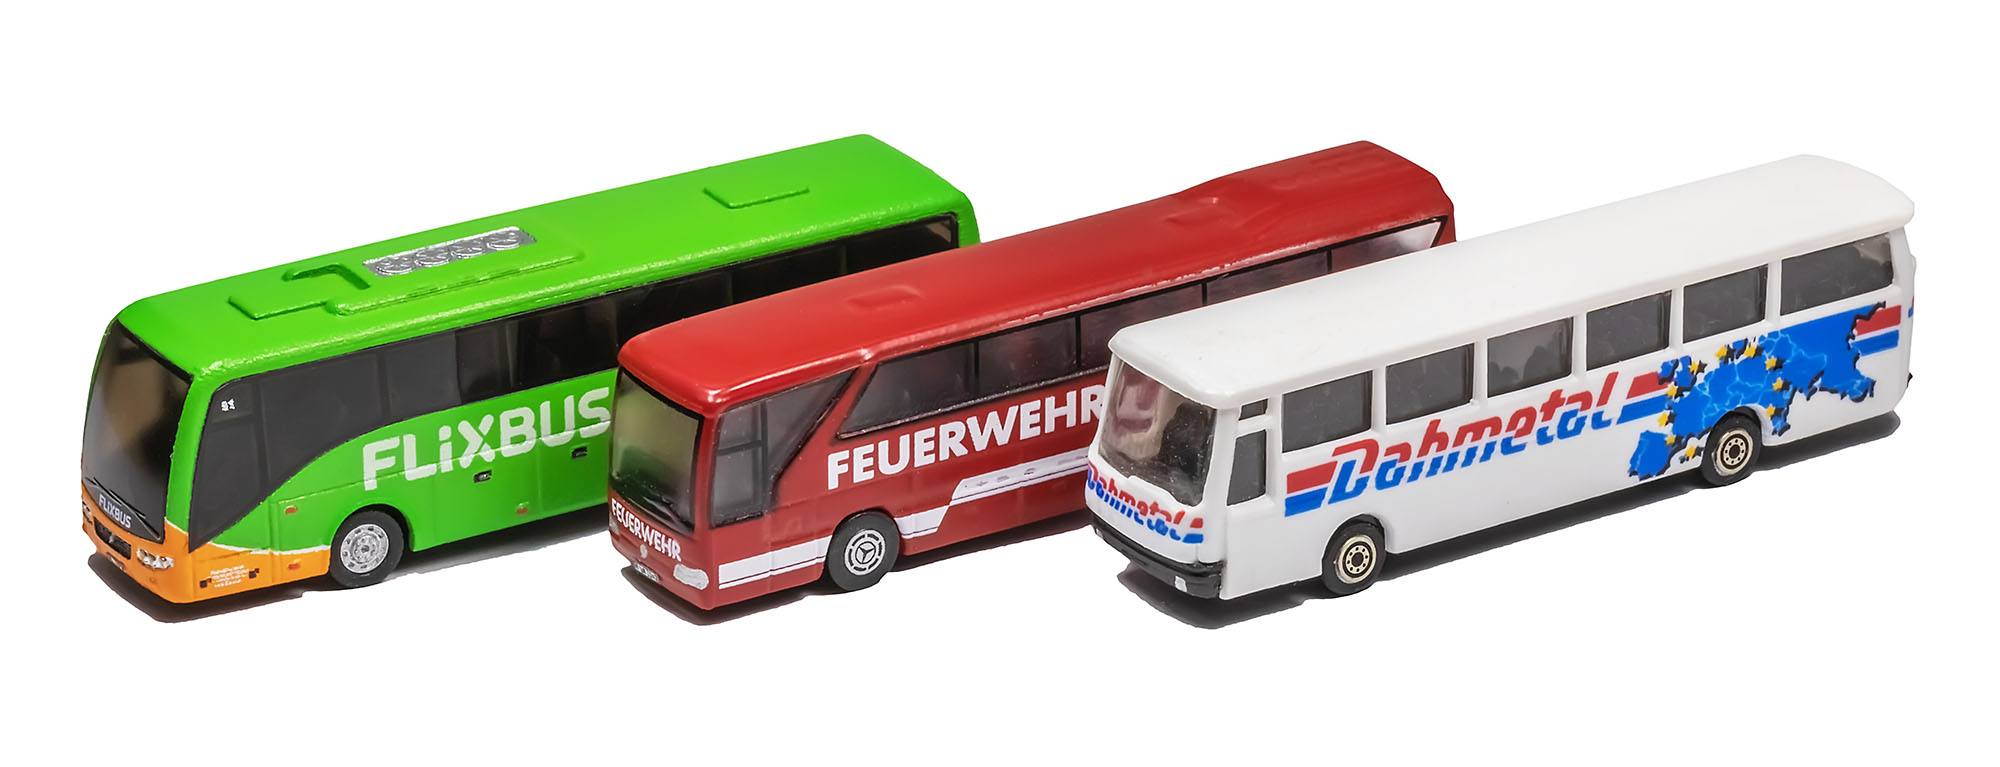
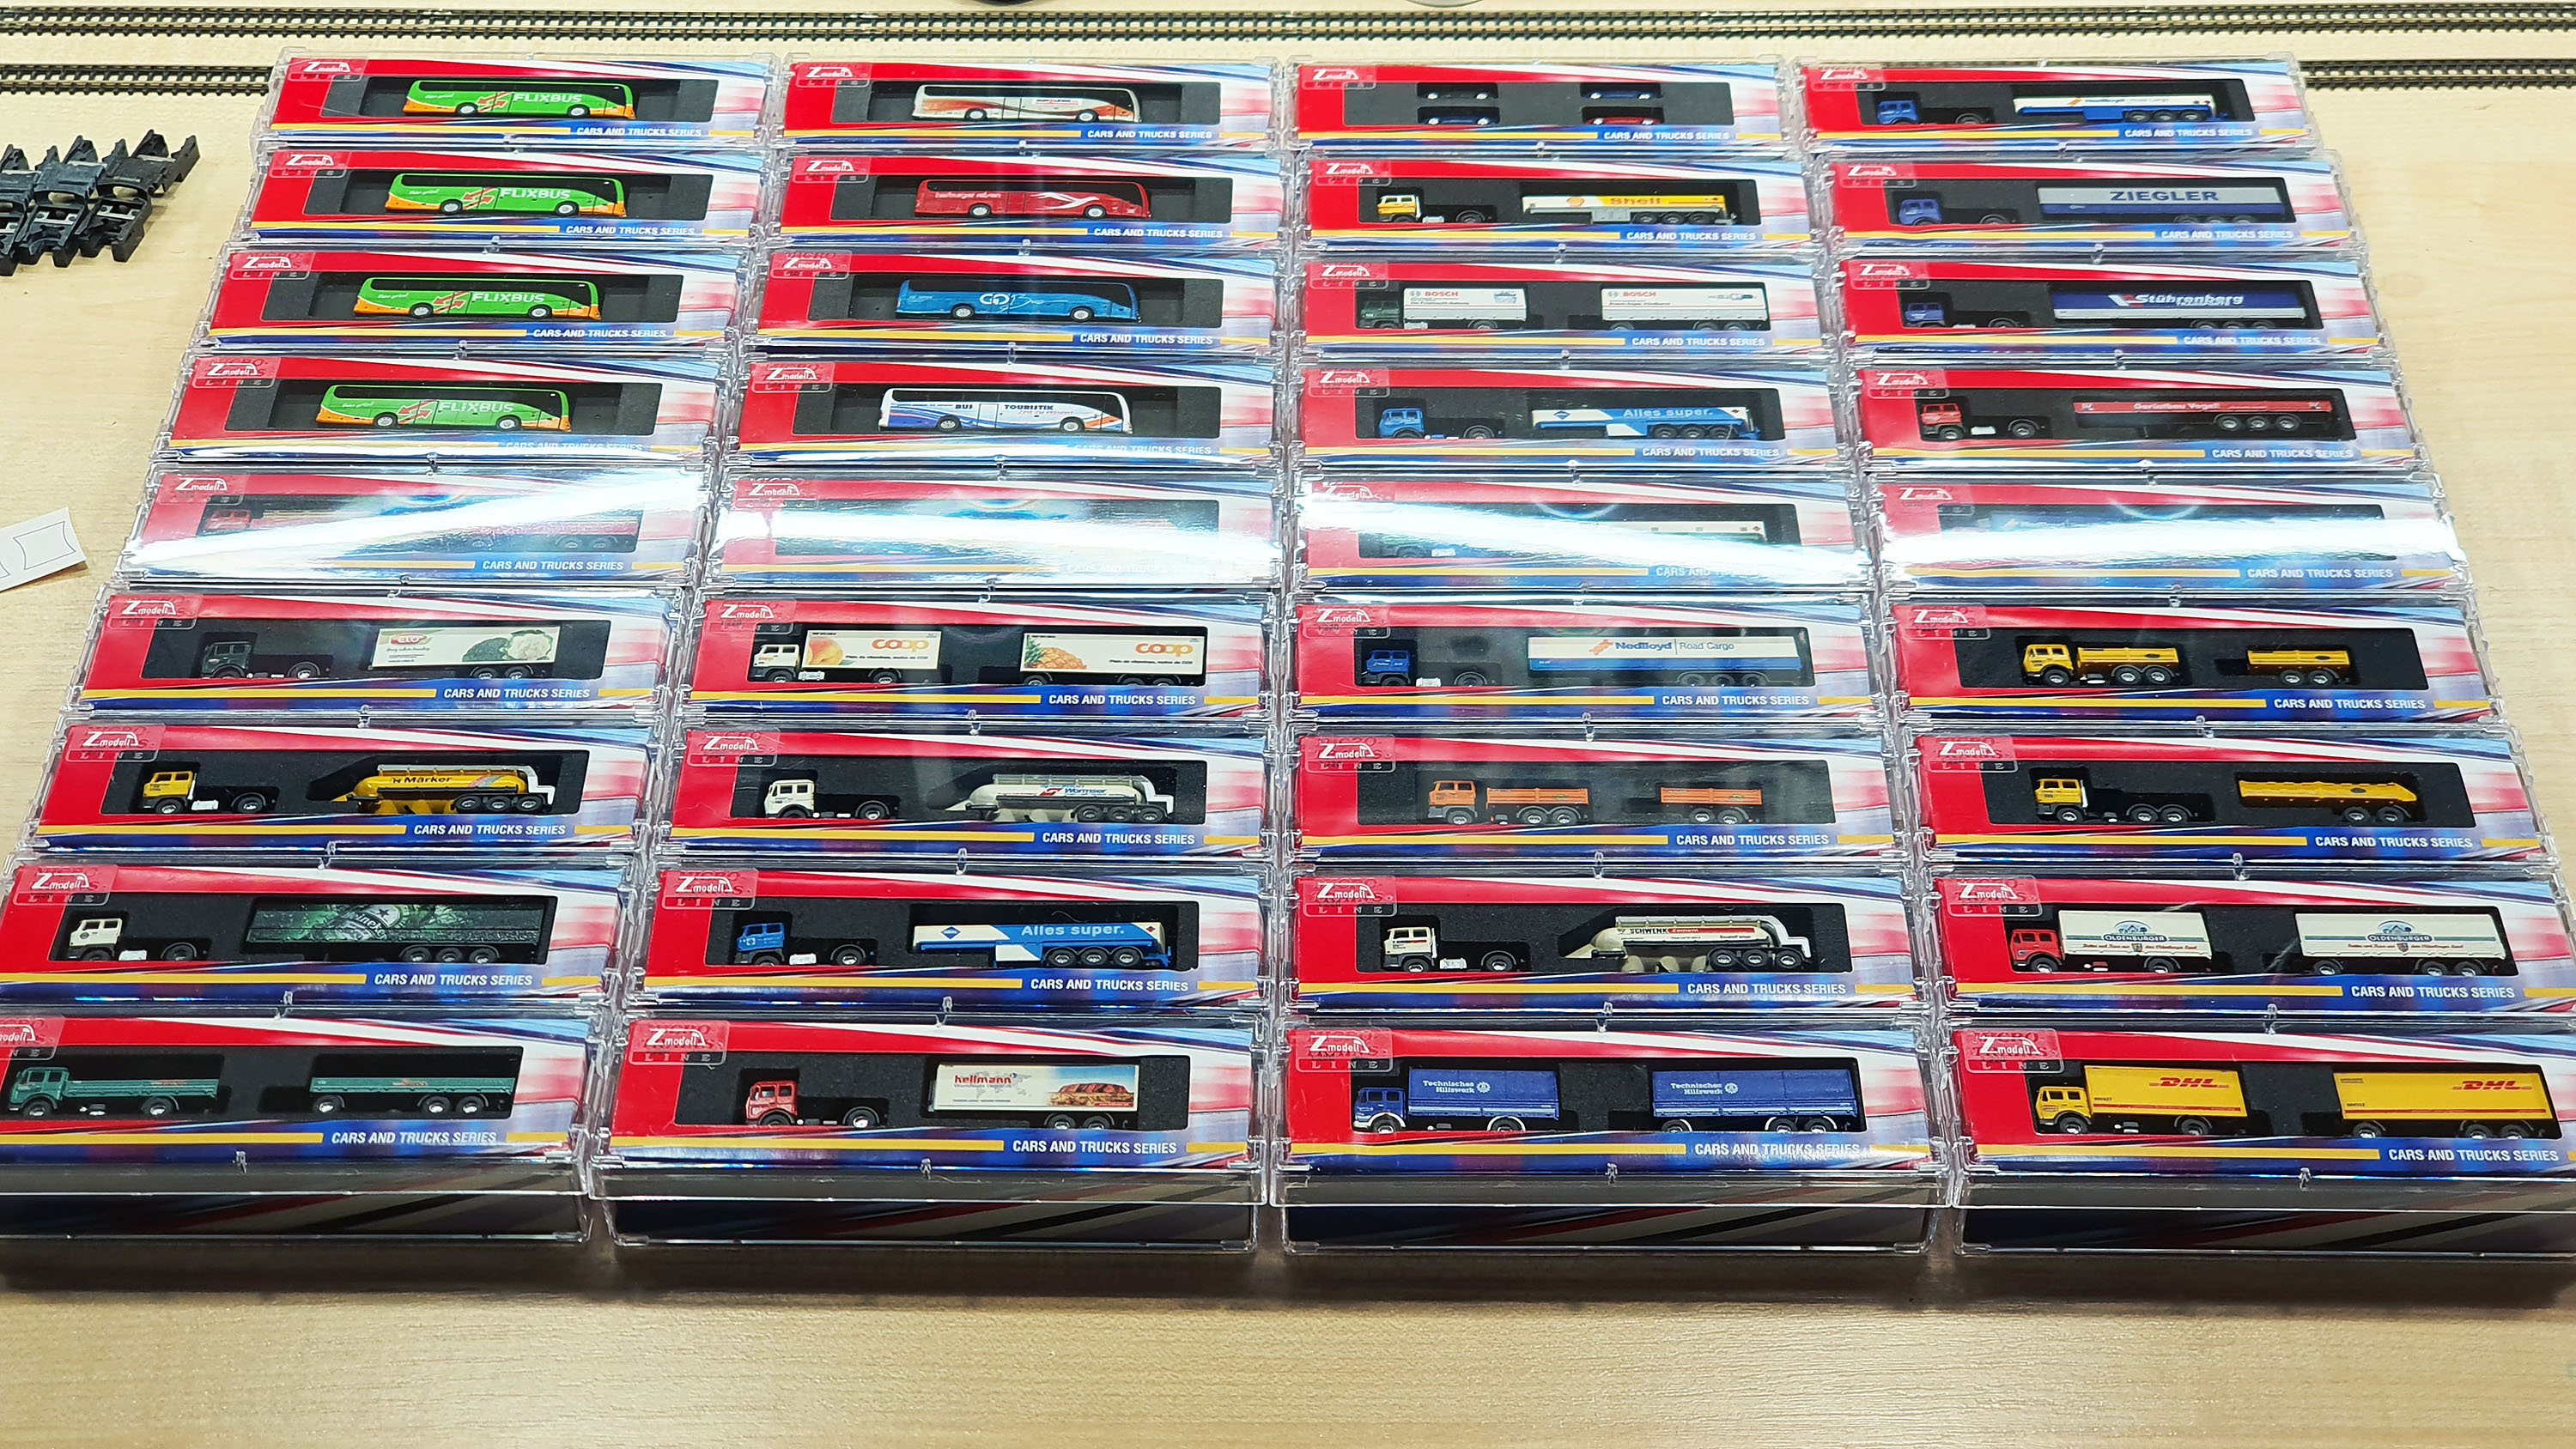
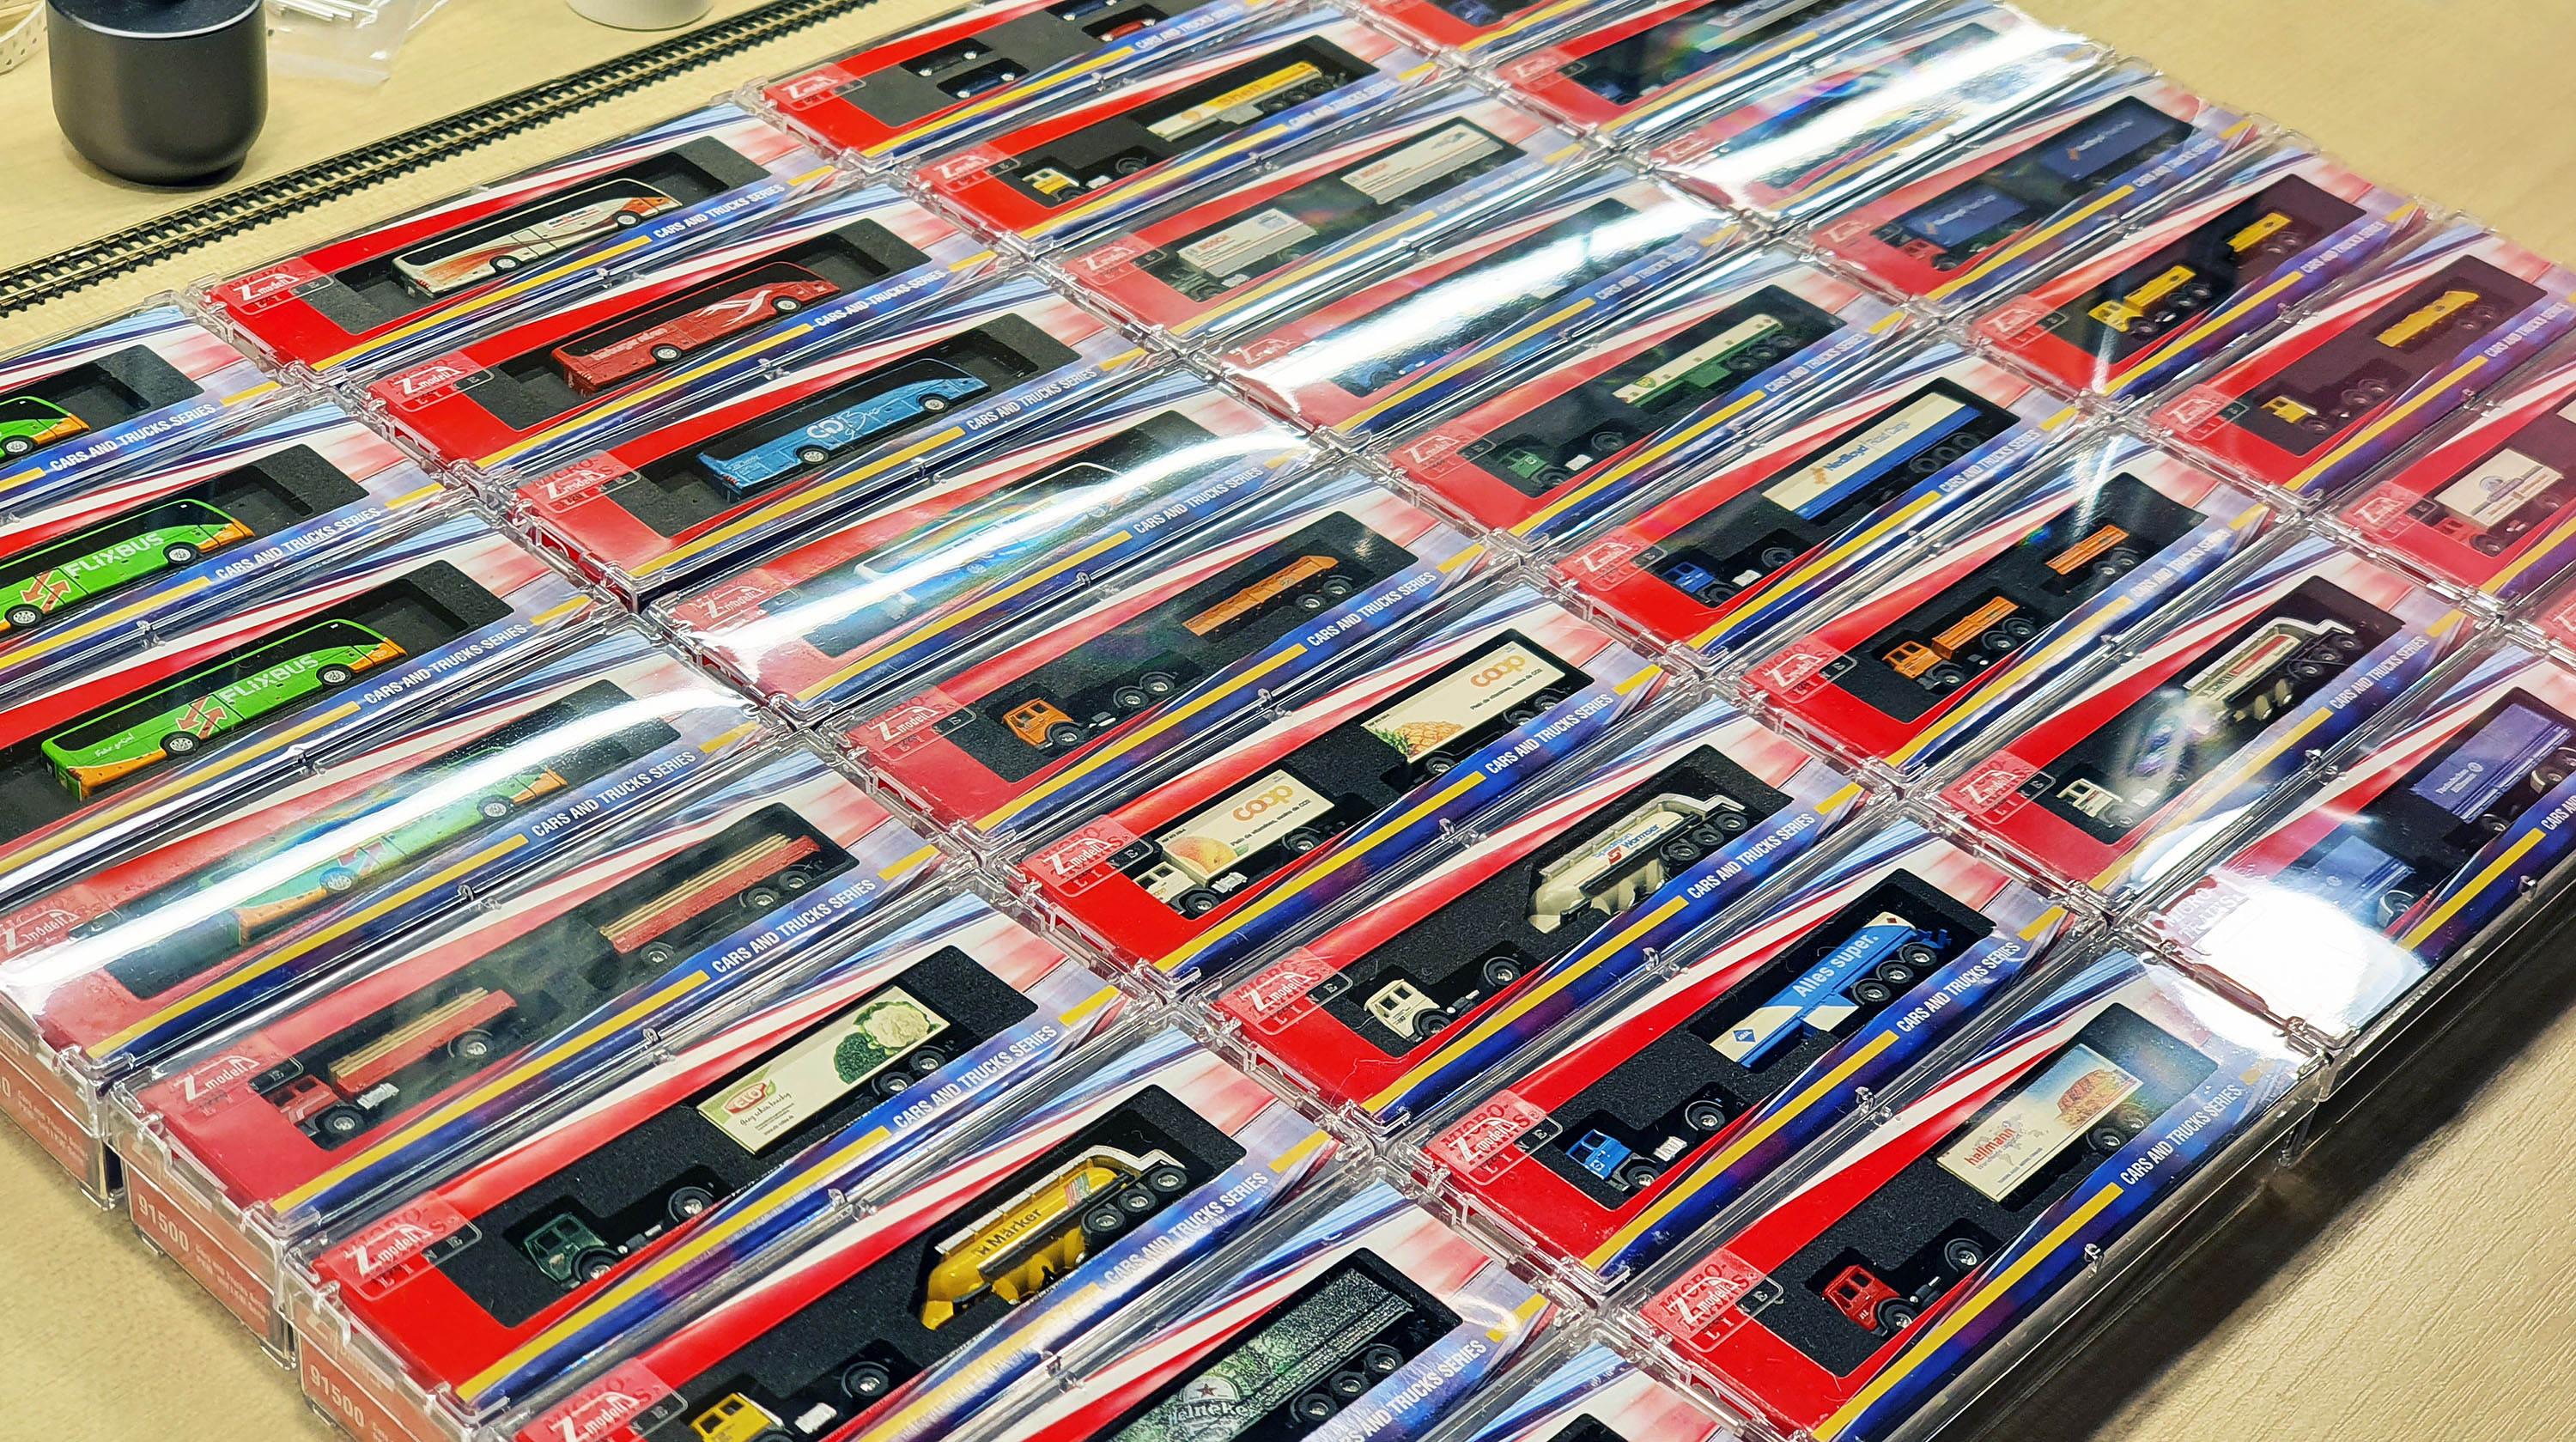
And here is my current assortment of Z scale automotive vehicles:

Best regards,
Alex
2020 is an unusual year. It has a beautiful number, but it started not so beautifully. All major railroad modeling events were canceled, and everything ended up in that way that we all are at home now. On March 28-29 I planned to take part in exhibition in Altenbeken, Germany, that is dedicated solely to Z scale, and I planned to present some novelties there. Since this important event was also canceled, I decided to prepare a detailed online report. Here is it: Volvo 9700 – the most detailed bus in Z scale ever:
Despite I finished it only now, this is my first model from which I started my own 3D modeling for Z scale about 4 years ago. It took too much time to finish this project, since I switched many times to other models of rolling stock, but recently I got more time for modeling during worldwide quarantine, so I finally decided to make this project alive.
Cars and trucks is a weakest ever category in Z scale. Even a neighboring N scale has nearly everything here! In Z scale, we have actually only one bus model that is relatively popular – Setra from Noch. Let’s be honest – it is a very old and ugly model in terms of quality and details. In addition, it has not been produced for a long time. There are also some bus models from European manufacturers HUG and MO Miniatur, but they are rare and not produced now too. So, given all this, I decided to fill this gap somehow.
Here are some words about technology. The model is printed at Shapeways using FXD material and then replicated in cast resin. All possible interior details are modeled too: very detailed seats, driver’s place with separate steering wheel, controls, buttons and screens, as well as a stairway to the central door:
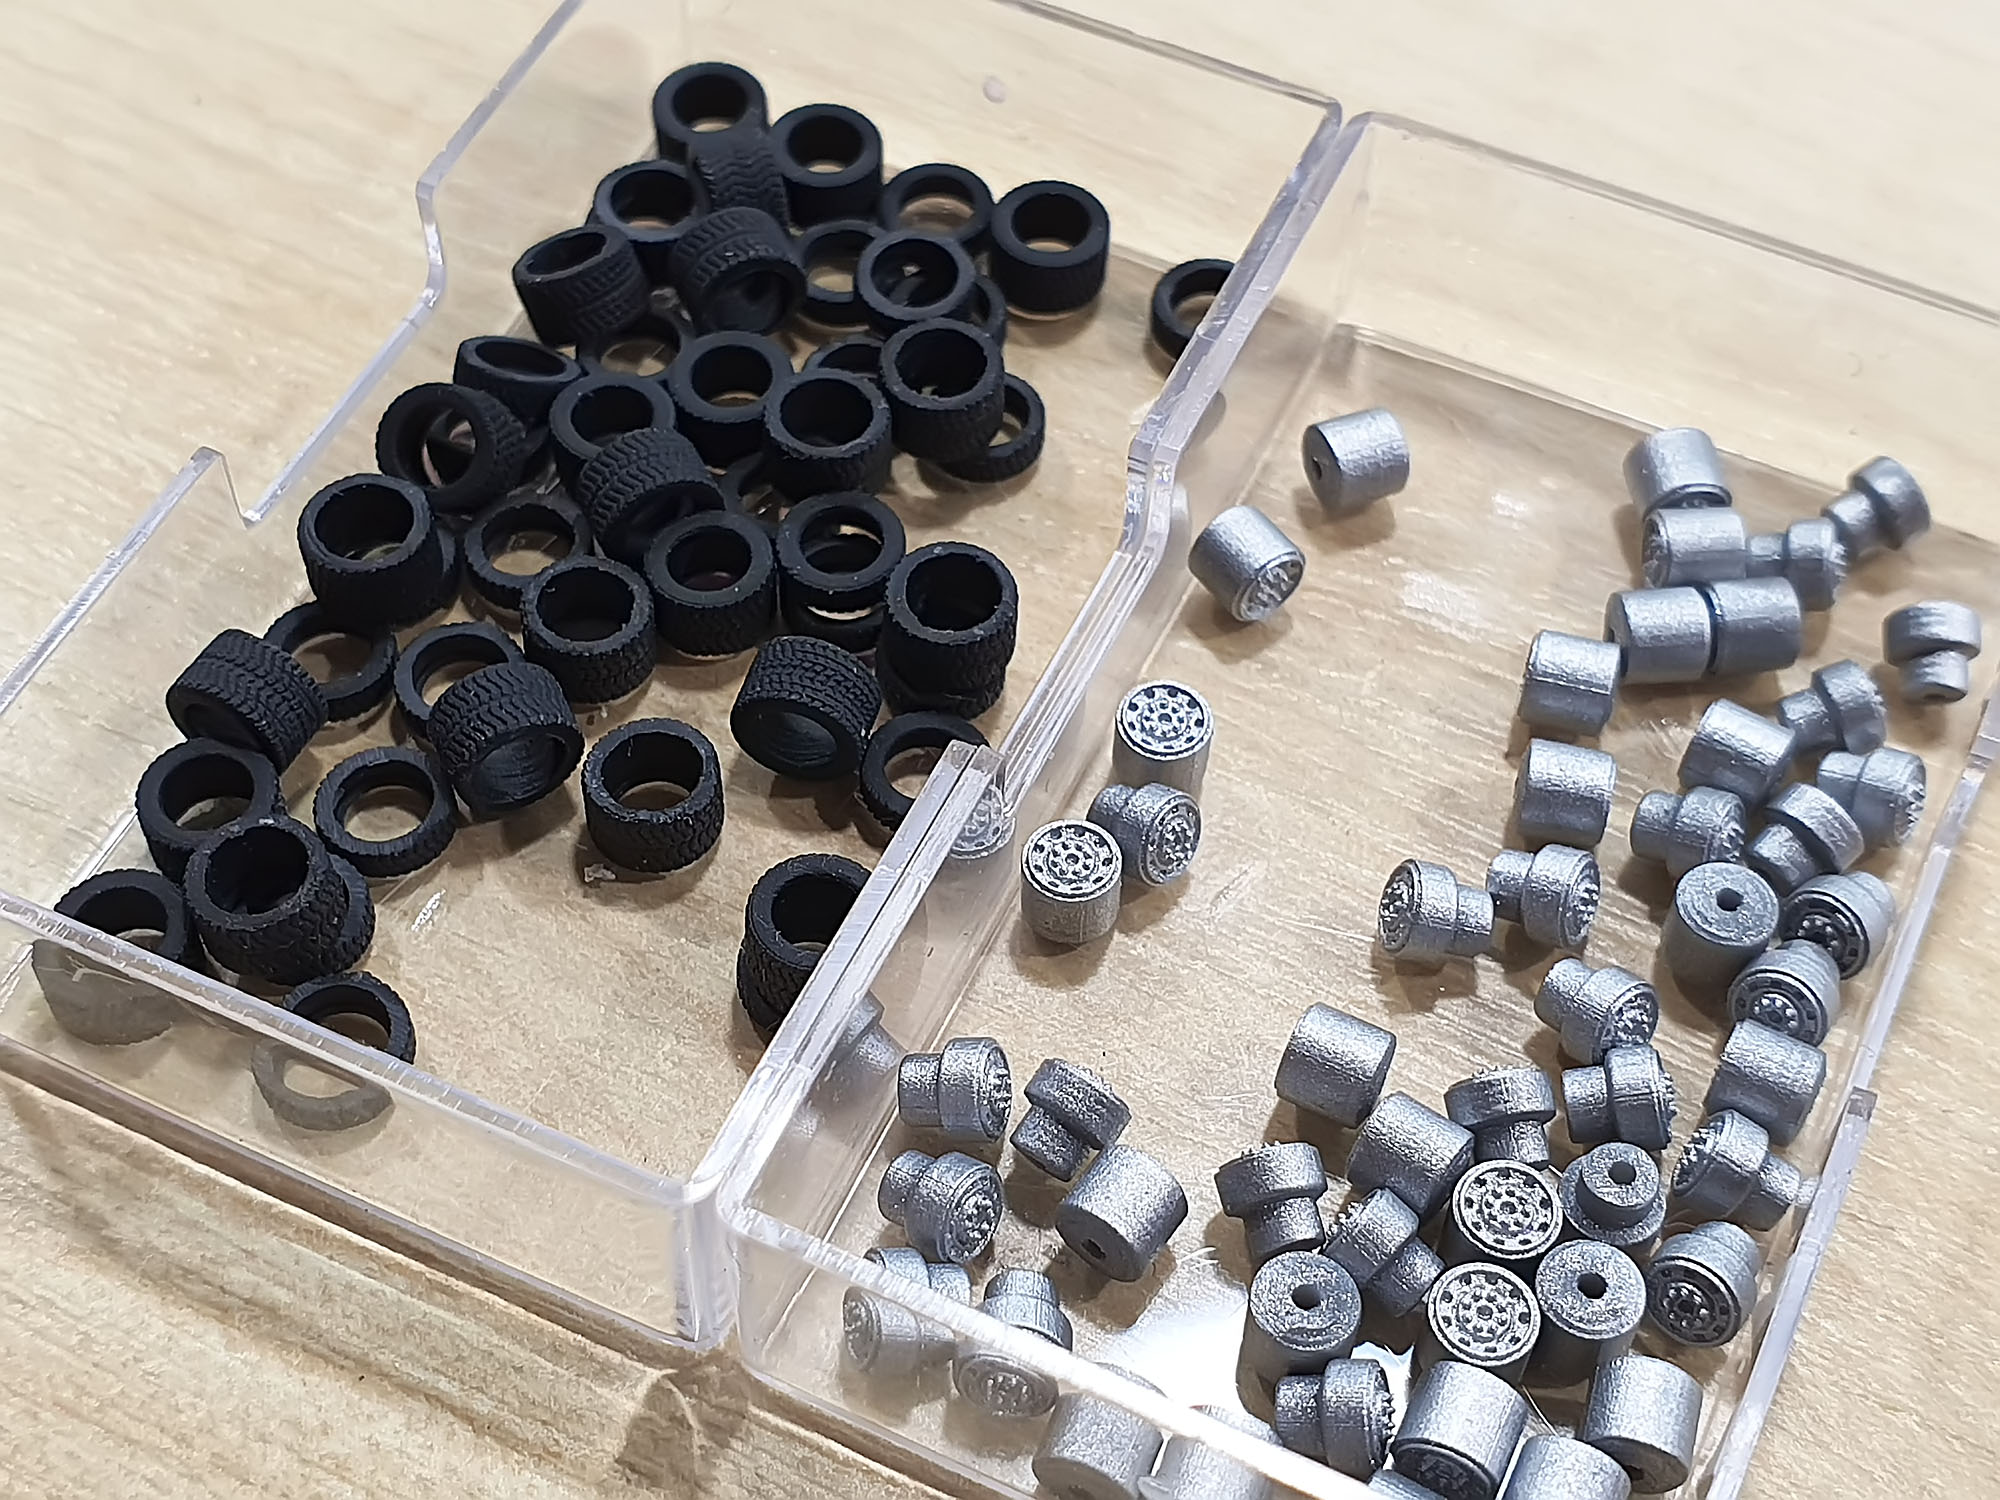
The bus has rotating wheels and is rollable. In turn, the wheels have an extreme level of details on their own – each wheel consists of two separate parts: rim and tire. Rim has a very detailed structure – all nuts, holes and screw heads are modeled. It is painted with brushed silver paint. Tires are printed using black elastic material and have clearly visible treads. Assembled wheels are connected with 0.8 mm stainless steel axles:
Here is a comparison of my wheels with ones from existing buses (I upgraded Noch bus with my own metal etched wheel rims):
The chassis and body are carefully painted with airbrush. Chassis has a black bottom and gray or dark blue seats (different in some versions). Steering wheel is painted in black separately in all versions.
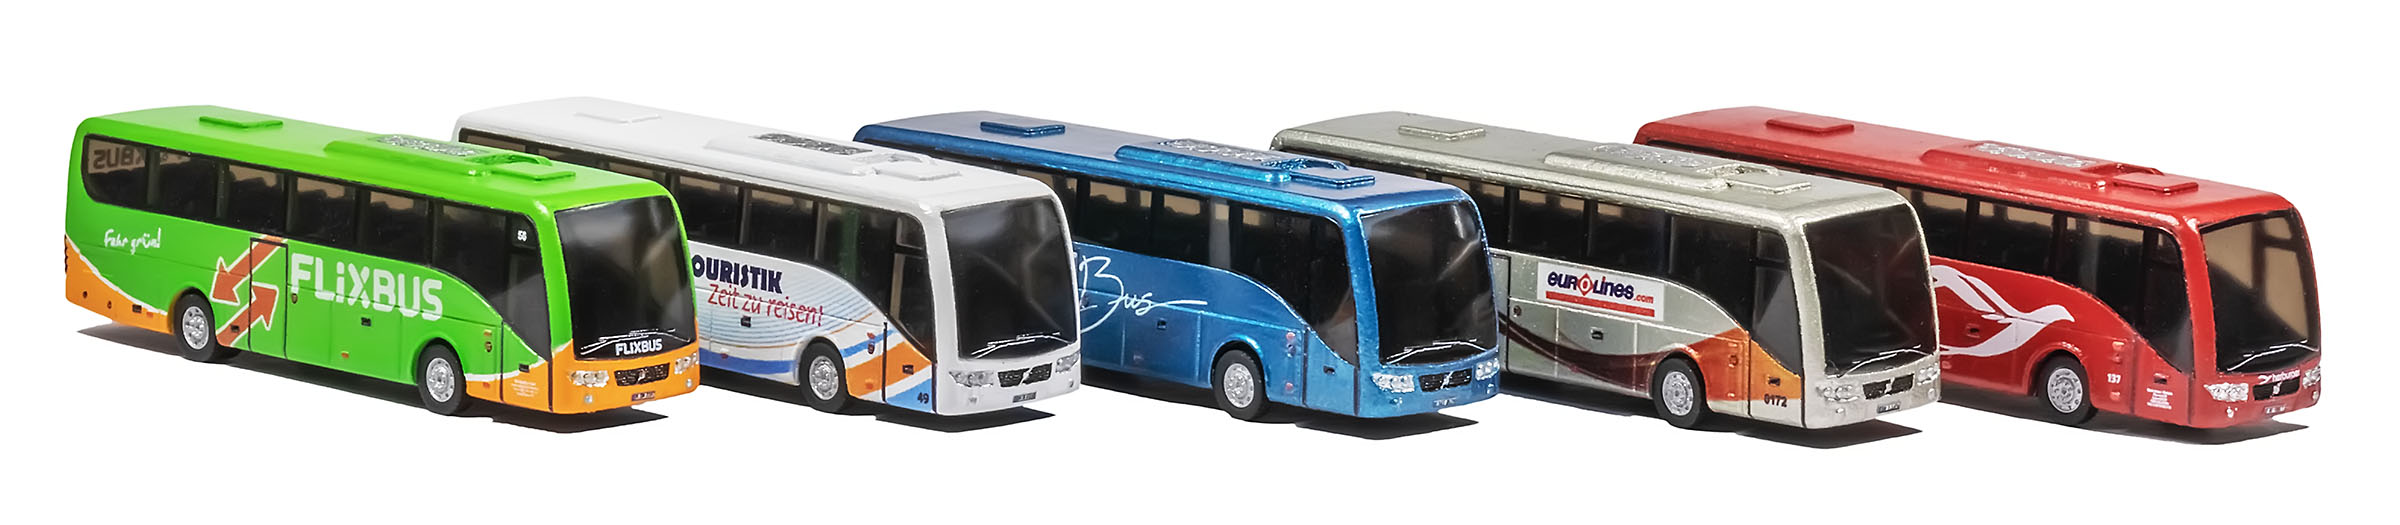
I prepared different versions:
- Flixbus (Germany, green)
- Eurolines (Germany, champagne gold)
- Herburger (Austria, red)
- GoBus (Estonia, metallic blue)
- Bus Touristik (Germany, generic version, white)
I decided to paint some versions with metallic colors, and it was somewhat problematic to find a suitable metallic paint for such a small model. Smaller models require higher quality of paints, and it is extremely important for metallic paints: the grain should have the finest grade, and dye should be able to cover the surface very uniformly.
After some experiments, I chose Tamiya X series of acrylic paints. Their metallic colors revealed very good results. Then all bodies were printed on Mimaki UV printer. To fix models vertically on the printing table, I had to build this special holder from Lego bricks:
Here is how the models were printed on Mimaki UV printer:
The most problematic stage of design was finding a way to make windows, especially windshield. Most modern buses feature windows made of tinted and curved glass. It is hard to implement this in such a small scale within small series; however, after some research I found a way to do this.
I was inspired by side windows of German ICE 3 high speed train, so I had to find a very thin material with similar properties. My local printing provider helped me with this – they got for me A4 sheets of tinted PET film – that was a perfect solution for my needs. Everything else was easy – I printed all window contours with black dye from inside and then carefully cut them out. I had to do this manually using manicure scissors, since plotter or CNC cutting seemed to be useless here due to the high risk of errors:
Now, the problem with side and rear windows was successfully solved. But the most difficult thing was still remaining – the windshield. I have to say that it became the biggest challenge in the whole project! The problem is obvious: windshields of the most modern buses are curved in both horizontal and vertical directions, and it is impossible to simplify this in model by bending the plastic only in one direction – it will look very unnatural. So, I had to search for an appropriate solution.
I tried to use different kinds of plastic. Thin transparent polystyrene was not suitable for these purposes – it began to shrink too early, even at not too high temperature. After a lot of tryouts, I have finally found a way to make perfect windshields. PET film showed much better thermal resistance than polystyrene, as well as better ability to transform into desired shape. I cut out windshield templates with a 10 mm margin around and carefully placed them between two small teaspoons. Then I heated them up with air soldering gun to 150° C and strongly pressed teaspoons together. Then I allowed them to cool down and removed ready windshields, which I carefully cut out with scissors:
I wanted to add even more details and decided to add wipers to the windshield. My first idea was to make them from etched metal, but I used a different solution – simpler and more effective: I printed wipers on UV printer. Thickness of printing layer is enough to make wipers visible enough:
So, the windshield is the most advanced part in the whole construction: frame is printed with black from inside, then it was thermally formed, cut out, carefully attached to the body and printed from outside again!
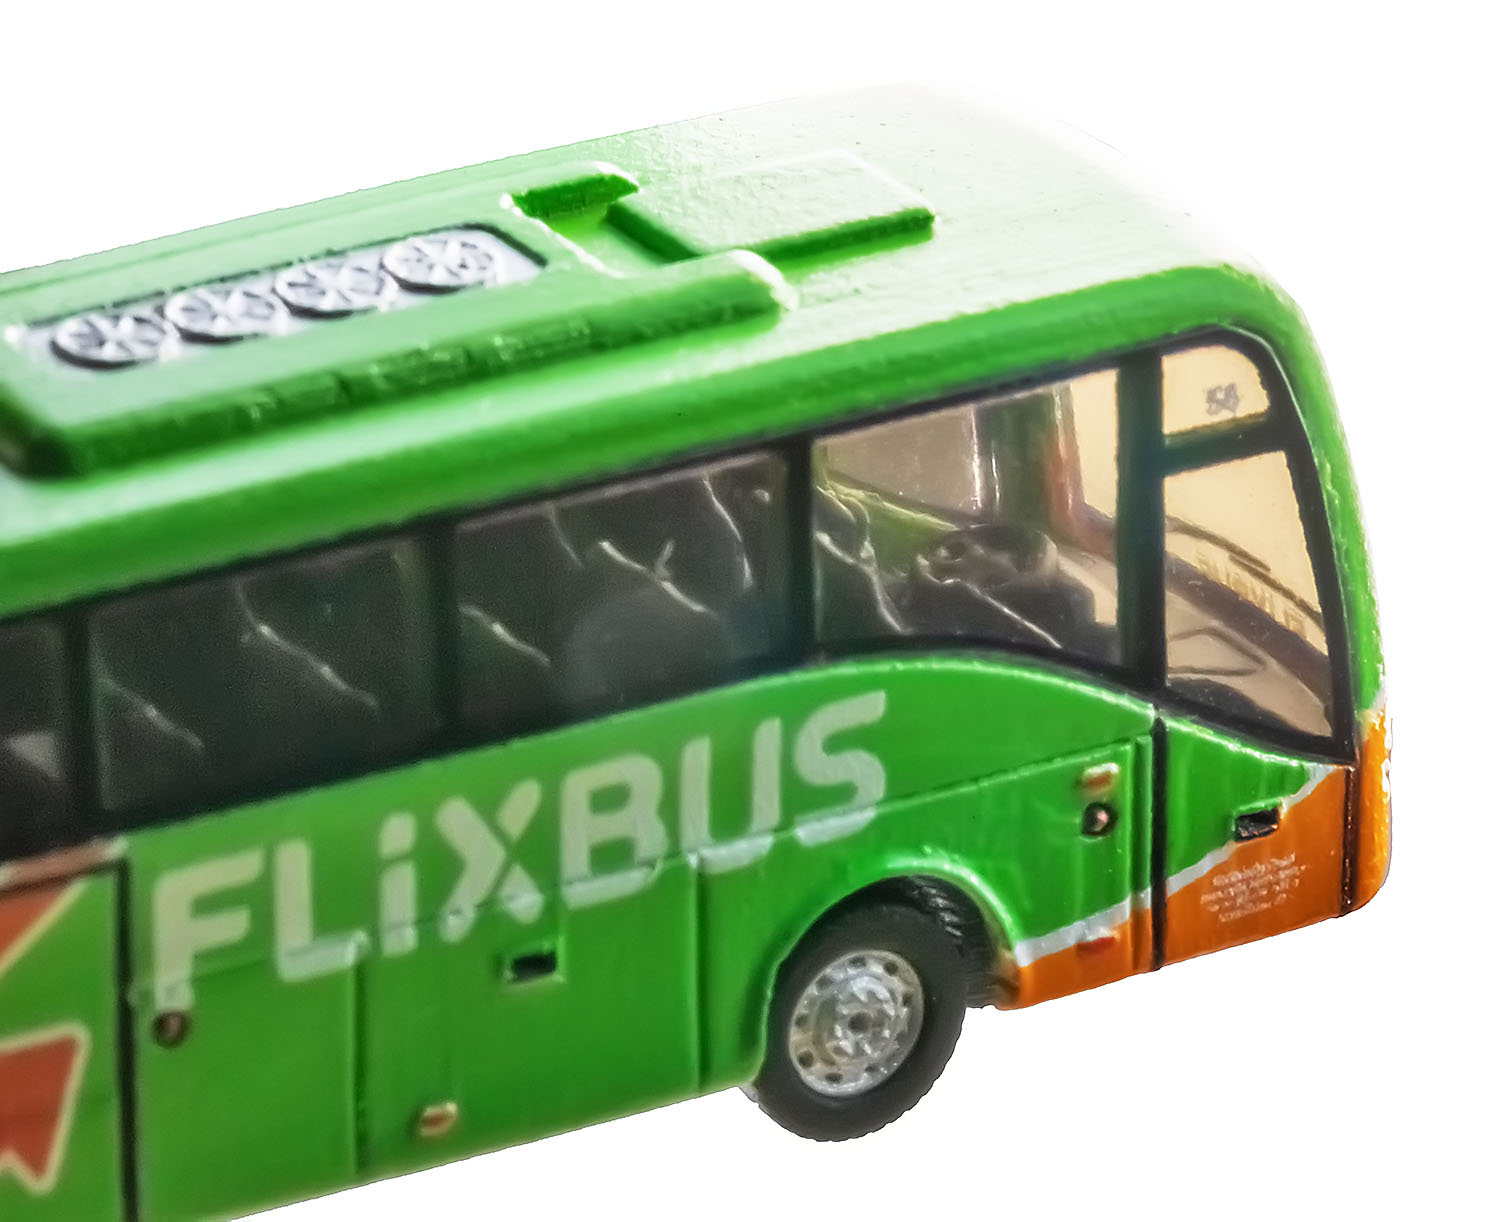
Headlights then were painted with silver, and rear lights – with silver and transparent red lacquer over it to achieve more realistic effect. I also applied country-specific readable license number plates – they were printed on plastic adhesive film using color laser printer.
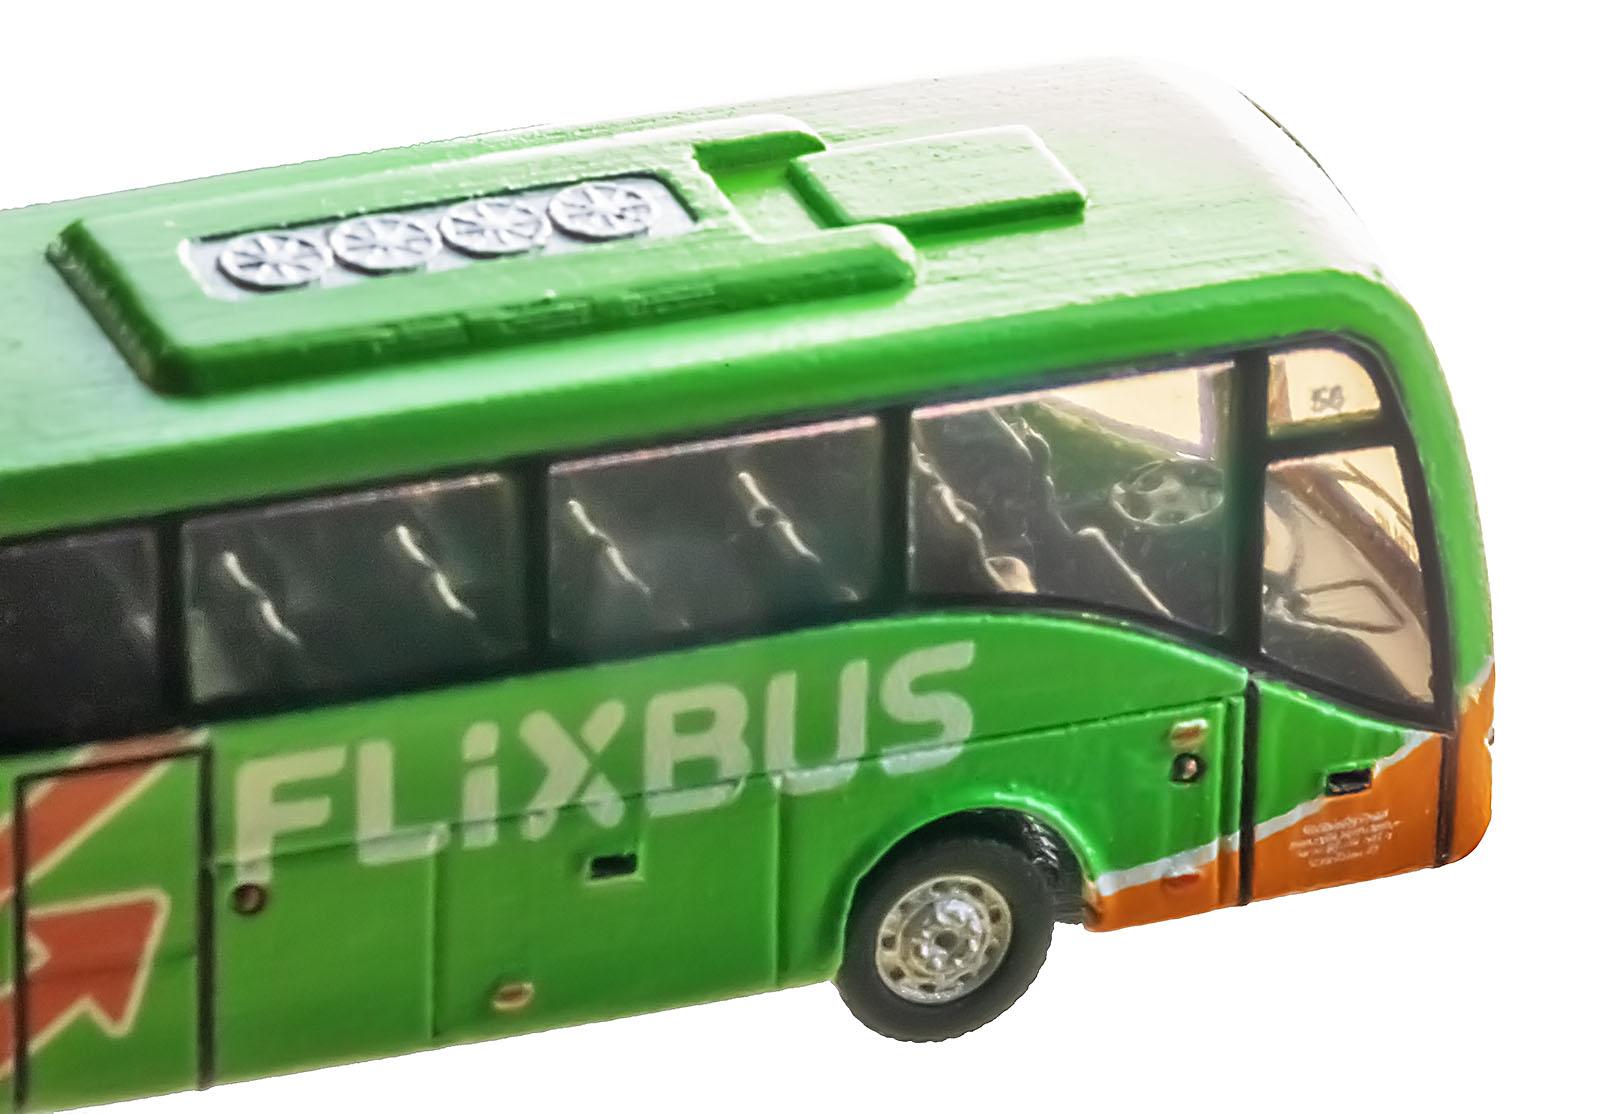
Flixbus (Germany):
Bottom side. Look at tire treads:
GoBus (Estonia):
Bus Touristik (Germany):
Eurolines (Germany):
Herburger Reisen (Austria):
Now here is a small peer-to-peer comparison with other models of buses that exist in Z scale (rare model from HUG and a popular, but aged model from Noch):
All models together:
I prepared several Flixbus models, each with different number:
I also designed a special packaging for my models. MTL sells empty boxes – I decided to use them here:
About compatibility with Z car system chassis from Polish manufacturer KPPMO: this system did not existed at the moment when I started the development, therefore I cannot guarantee anything. However, dimensions of my bus are nearly the same to the size of the old Setra bus from Noch, for which Z car system chassis was initially developed, therefore any experiments are possible.
And here is my current assortment of Z scale automotive vehicles:
Best regards,
Alex


