Hi friends,
First of all, I would like to share excellent news – this project is not dead

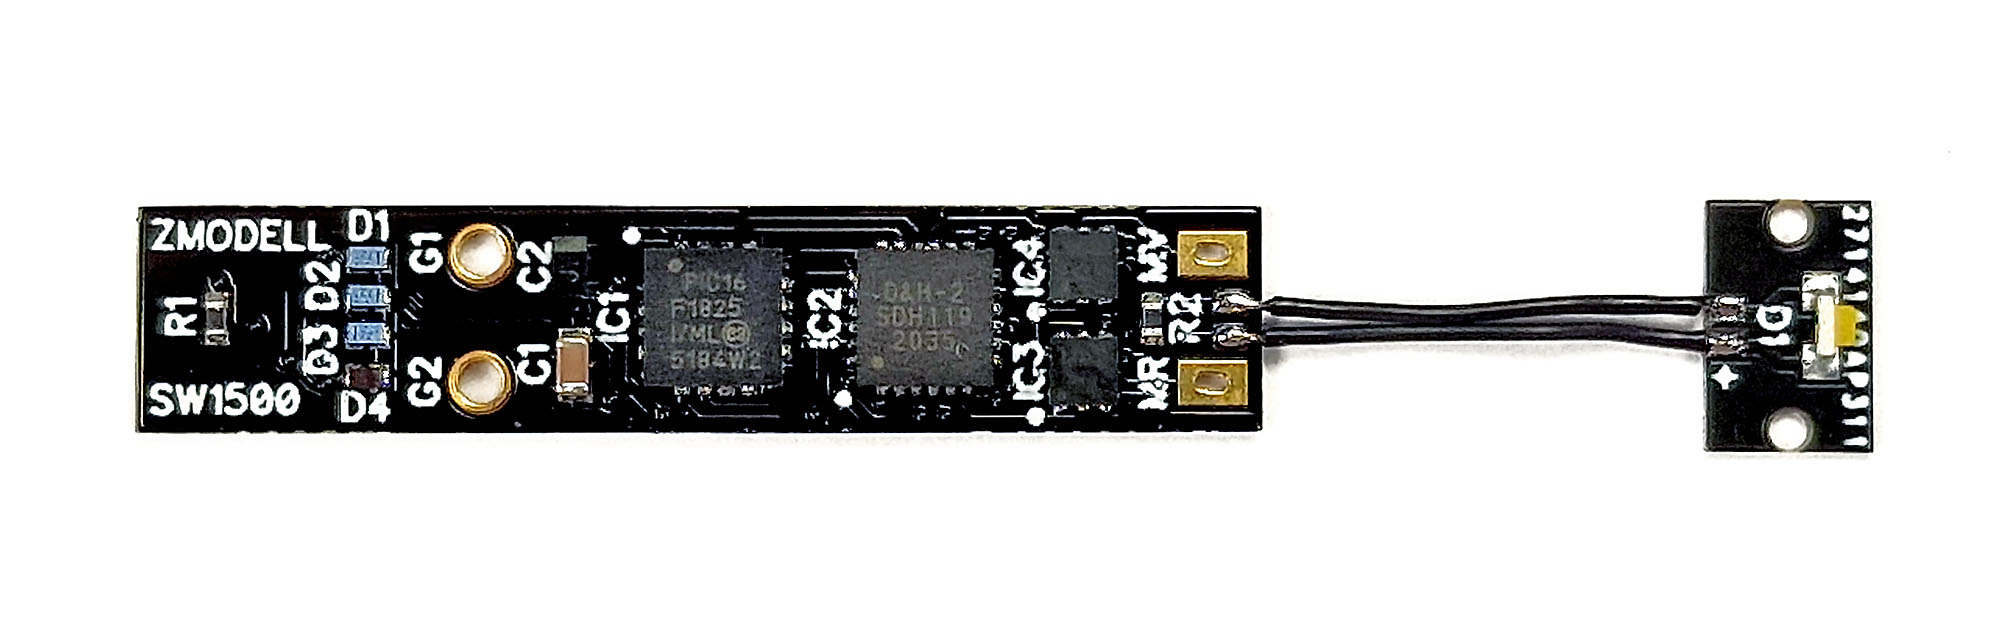
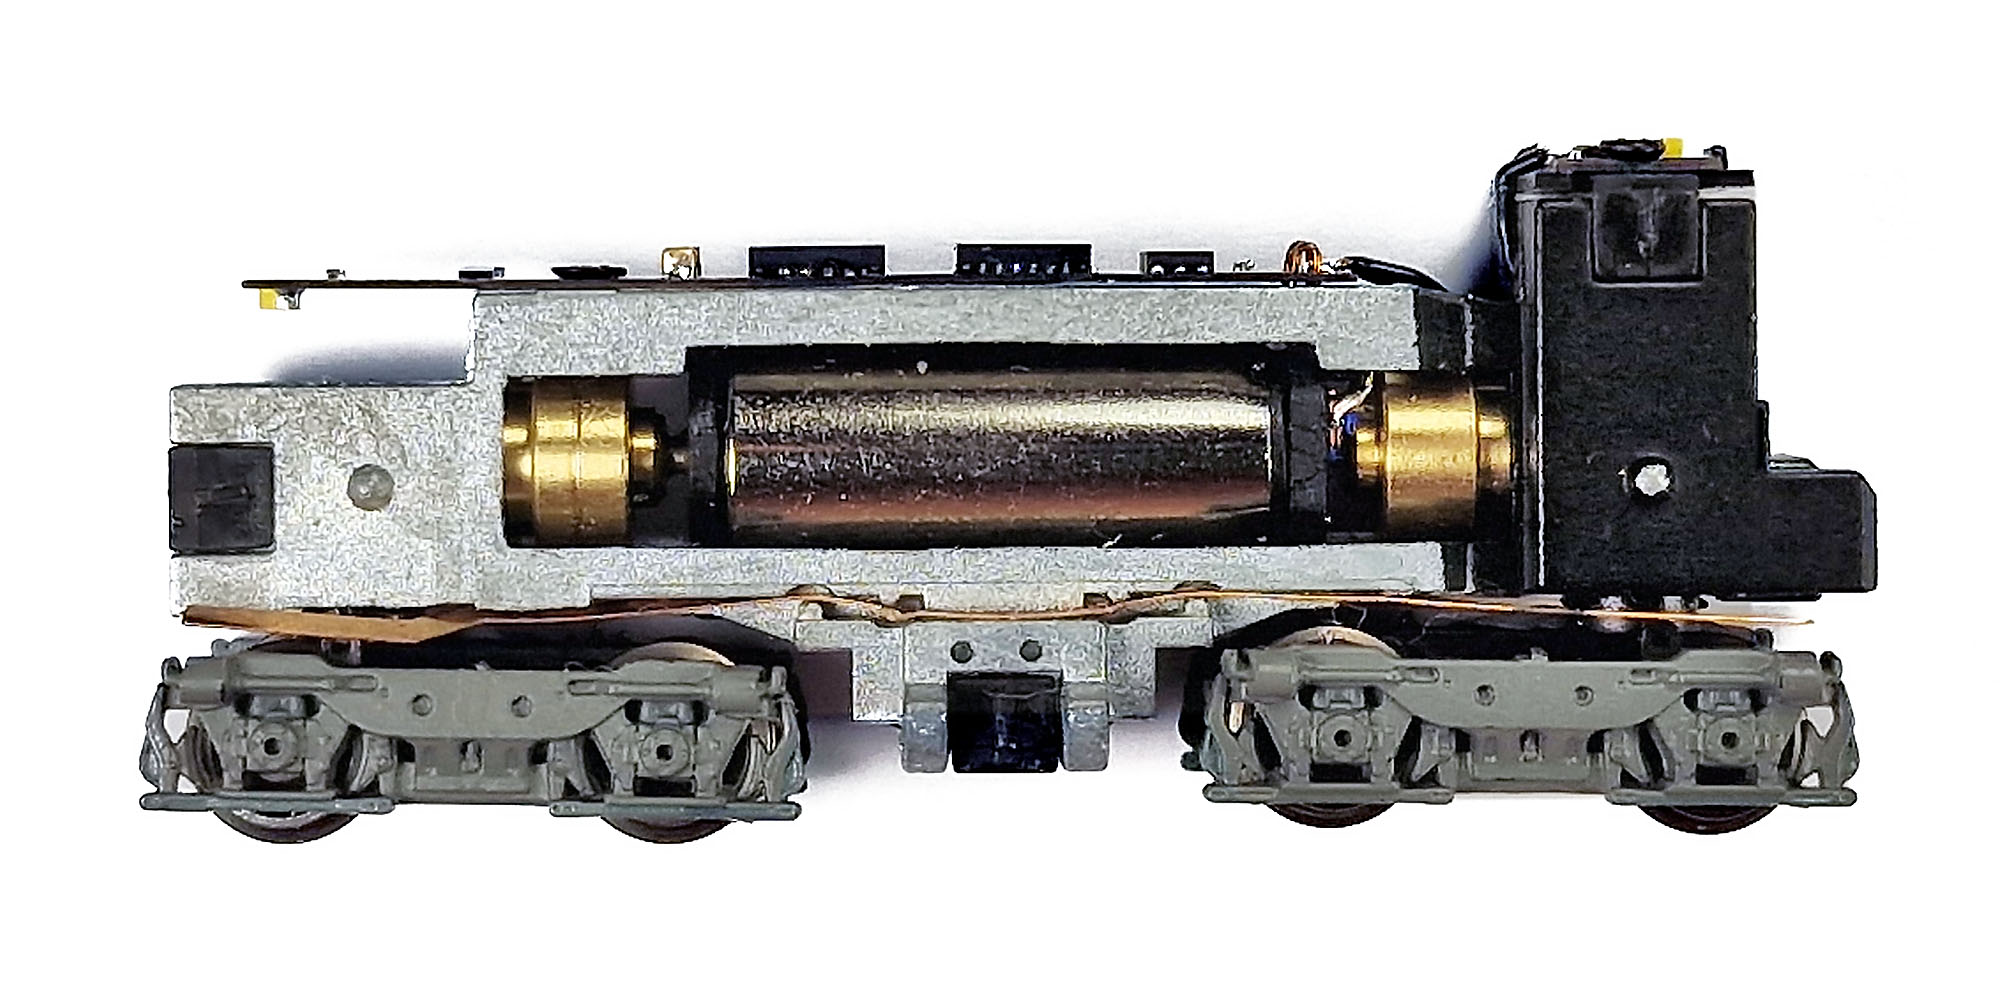
But this is not even the most important thing. I would like to say that first series copy of this decoder in its final version is ready. Here is it, top side:
Bottom side:

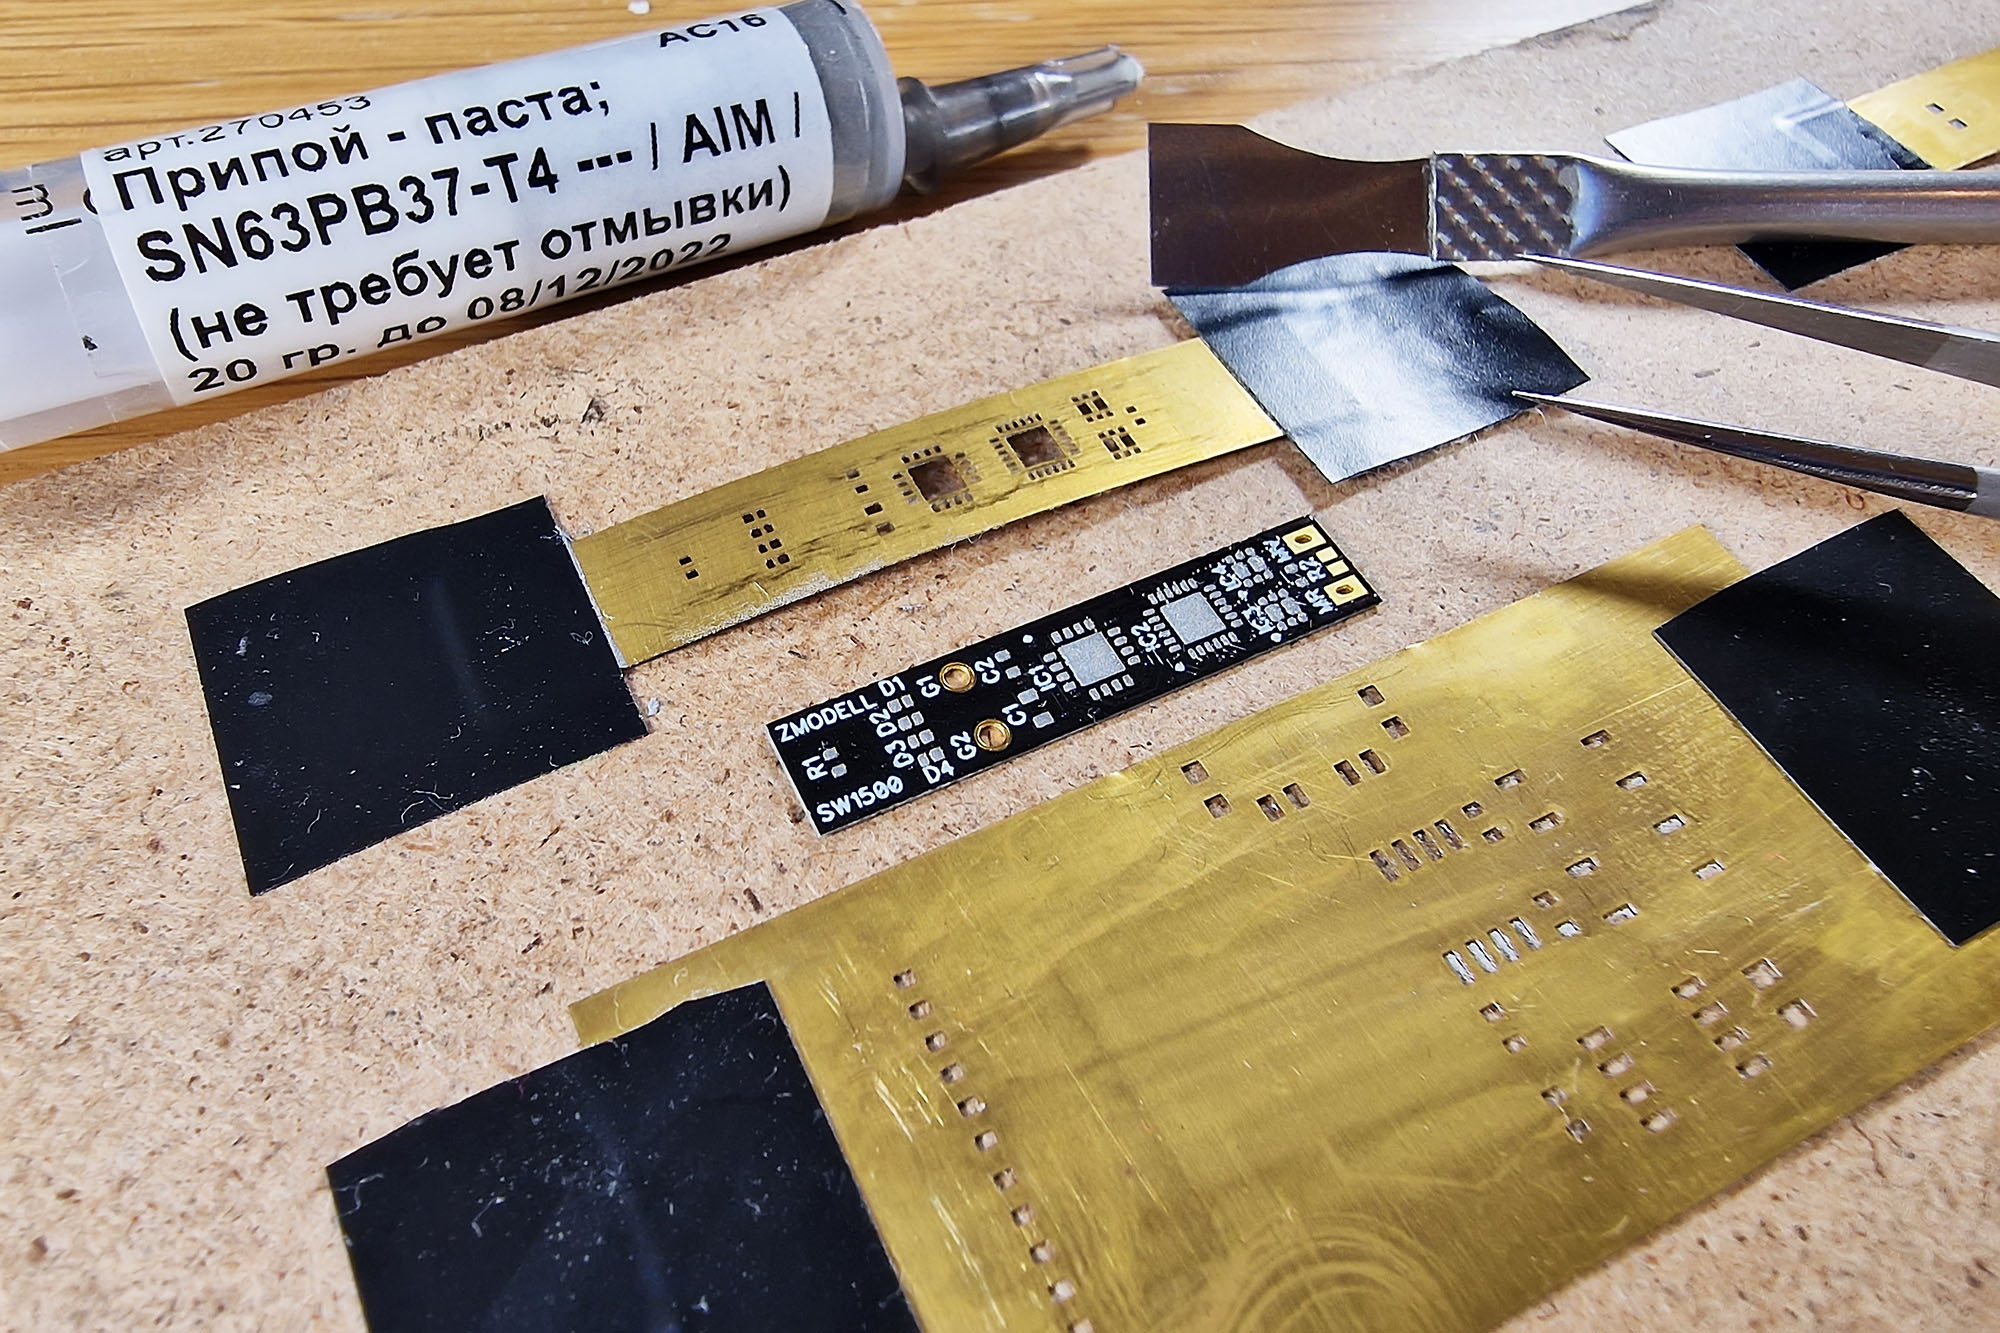
In the final version, I used different material – high grade FR4 with increased strength, because I required a very low thickness – only 0.25 mm. I also used black mask and gold coating. The last one was used to increase reliability of mechanical contacts between chassis (two separate parts of which transfer a power to the decoder), pads on the circuit board and output pins of the motor.
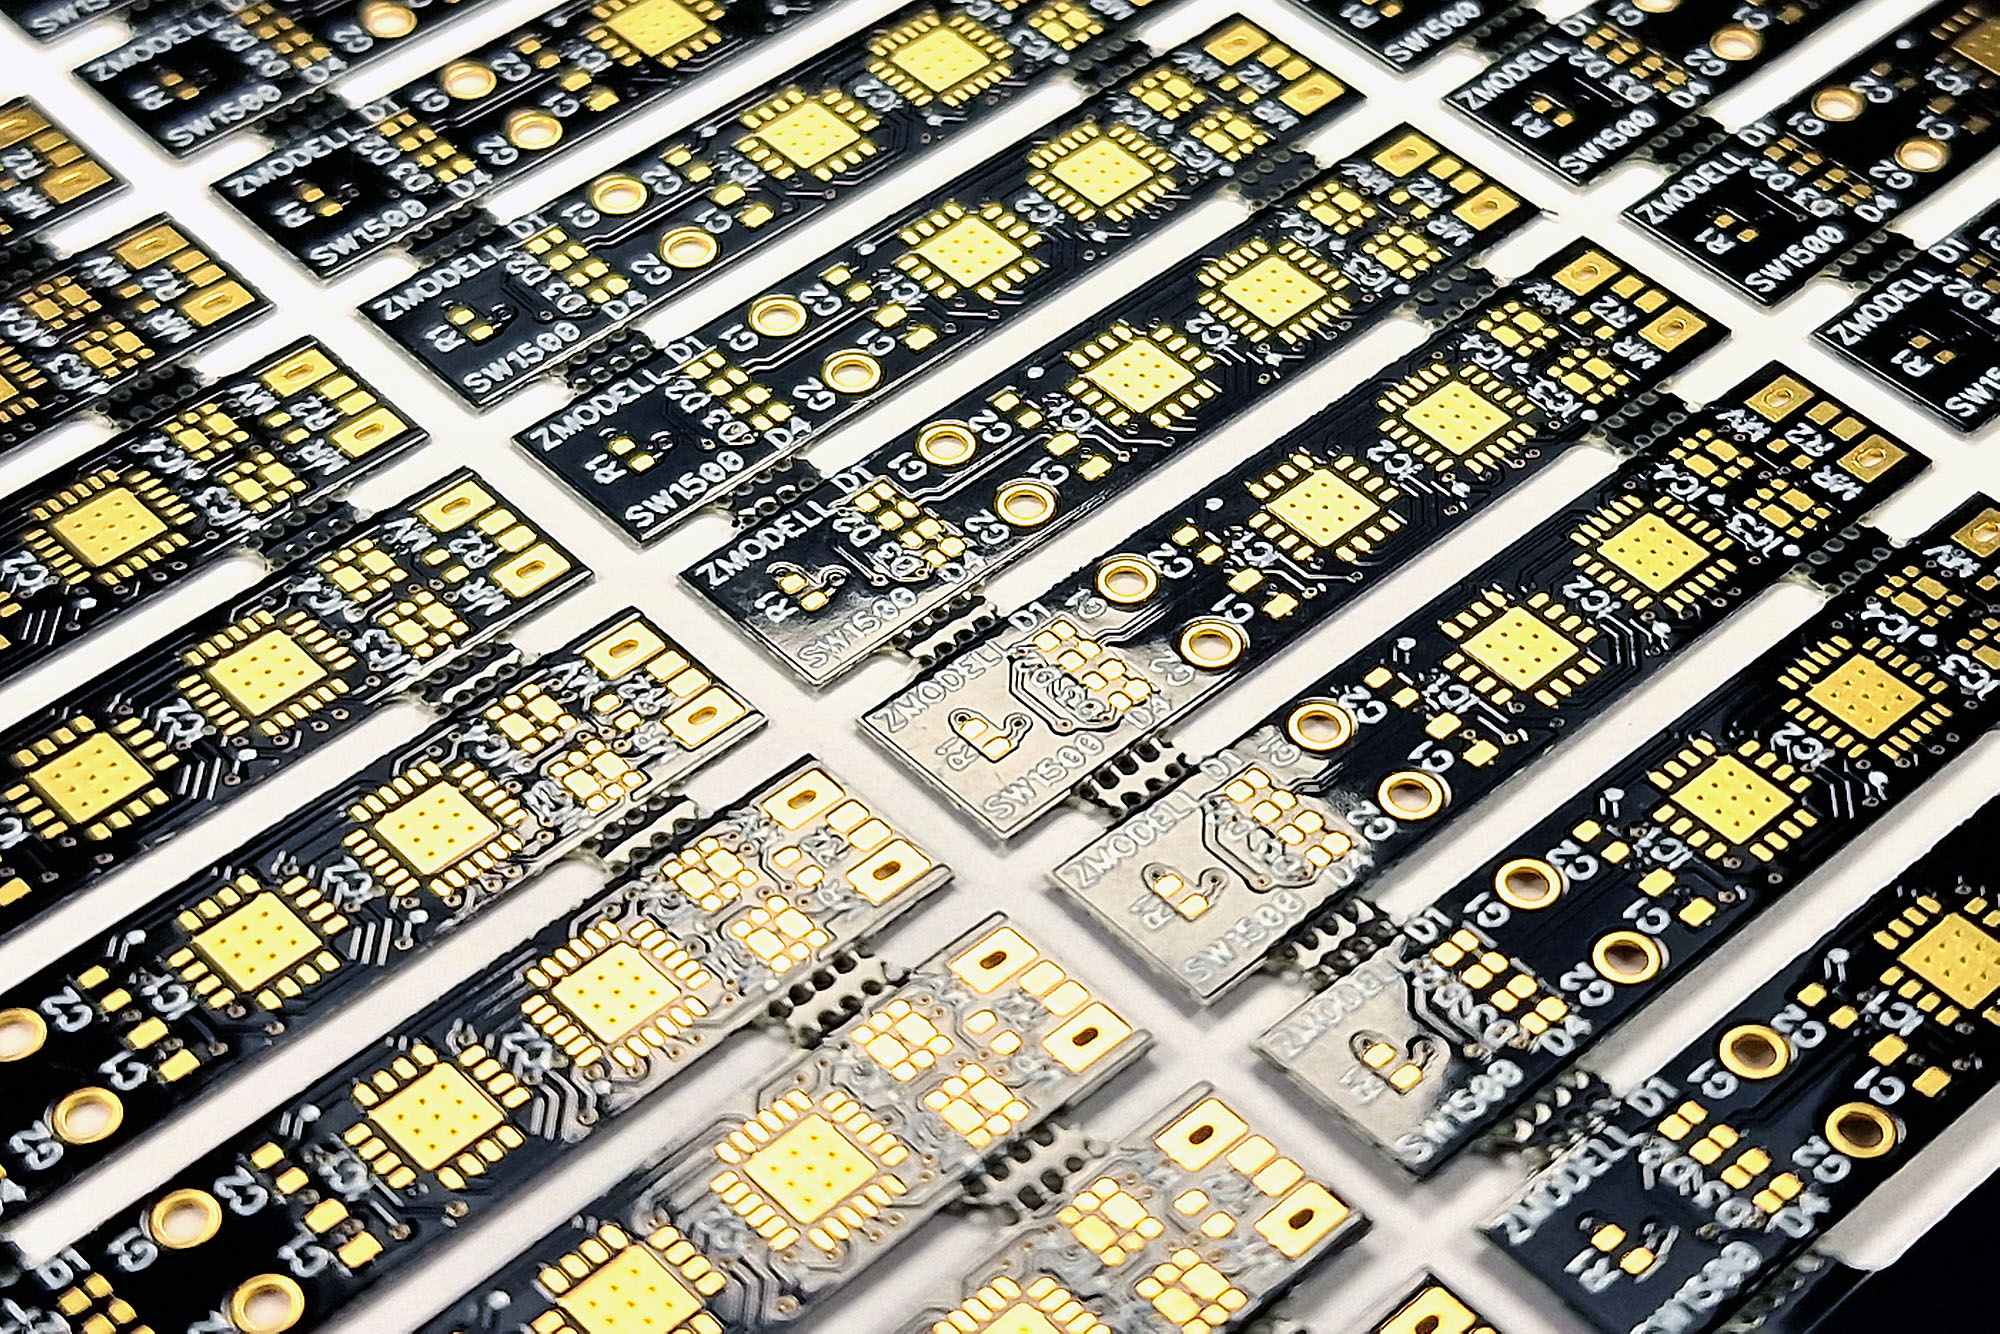
Circuit boards were ordered back in Ukraine before the war in the beginning of the last winter. Recently I had a luck to receive them safely here in Germany, including all required electronic components. The quality is simply excellent:
In the final version of circuit boards, I changed the shape and size of pads and holes for connecting the motor output pins – now they provide more reliable electric contact and are better secured from the short circuit with the chassis.
I also found a very good supplier of wires and cables here in Germany – I found an excellent 21-strand wires with only 0.5 mm outer diameter (including insulation) there (normally, such thin wires have only 7 strands). I used this kind of wires for connecting two circuit boards of this decoder.
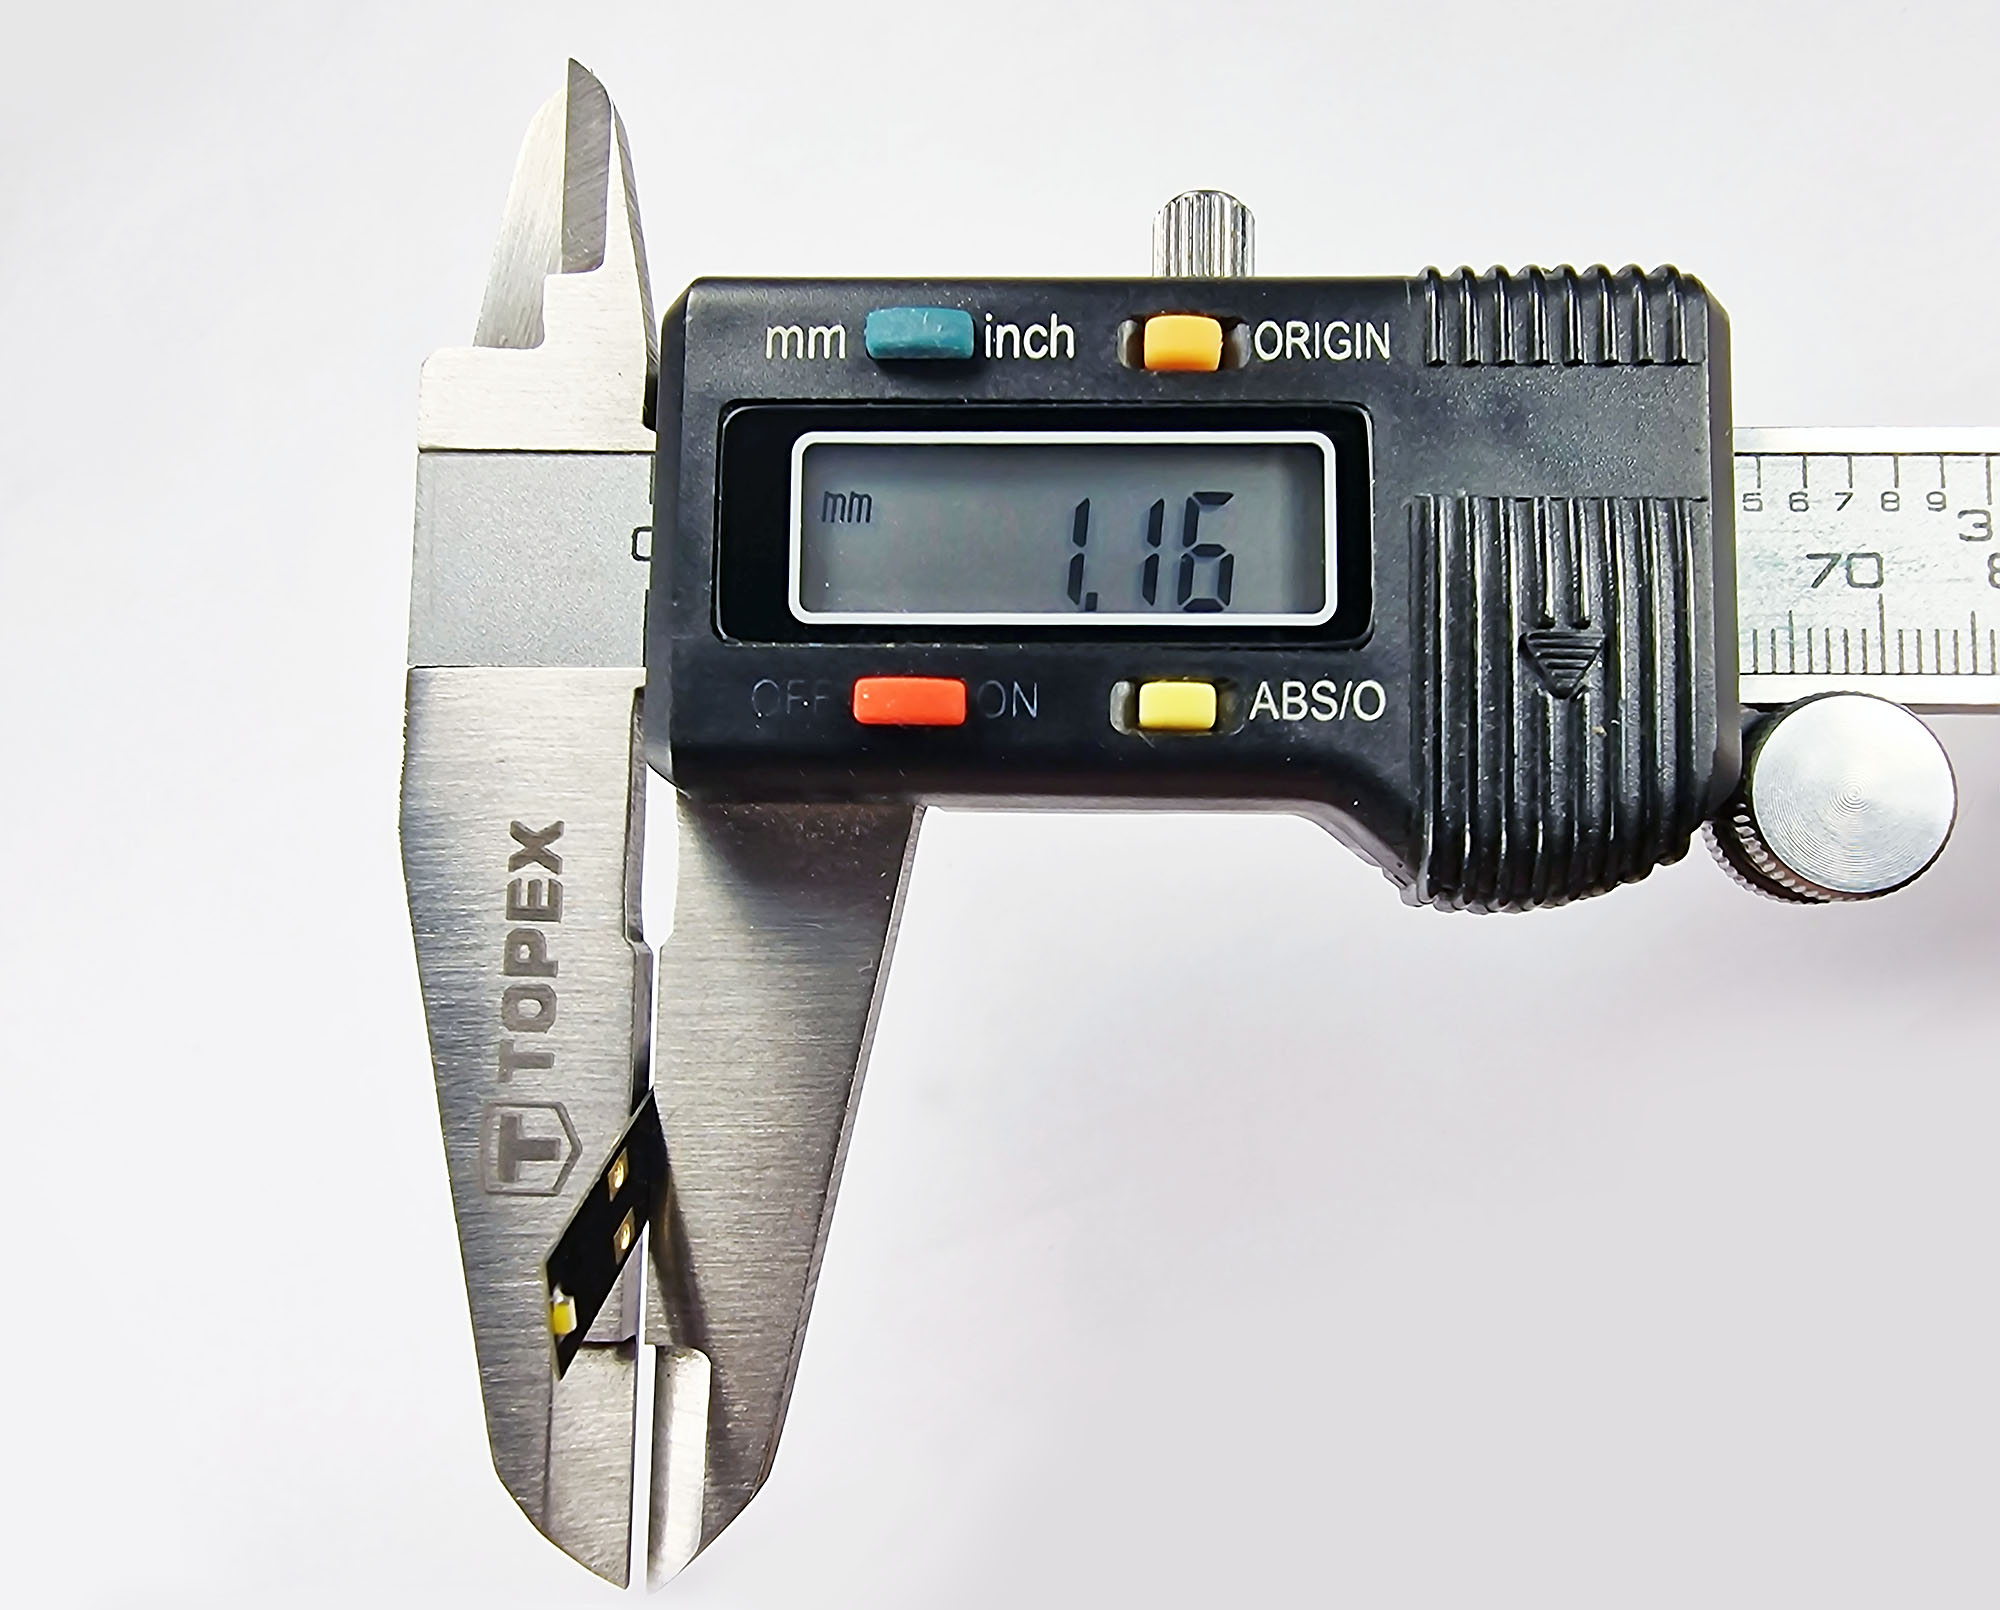
As you can see, thanks to the smallest possible components and very low thickness of the circuit board, we got a very thin decoder – only 1.16 mm thick:
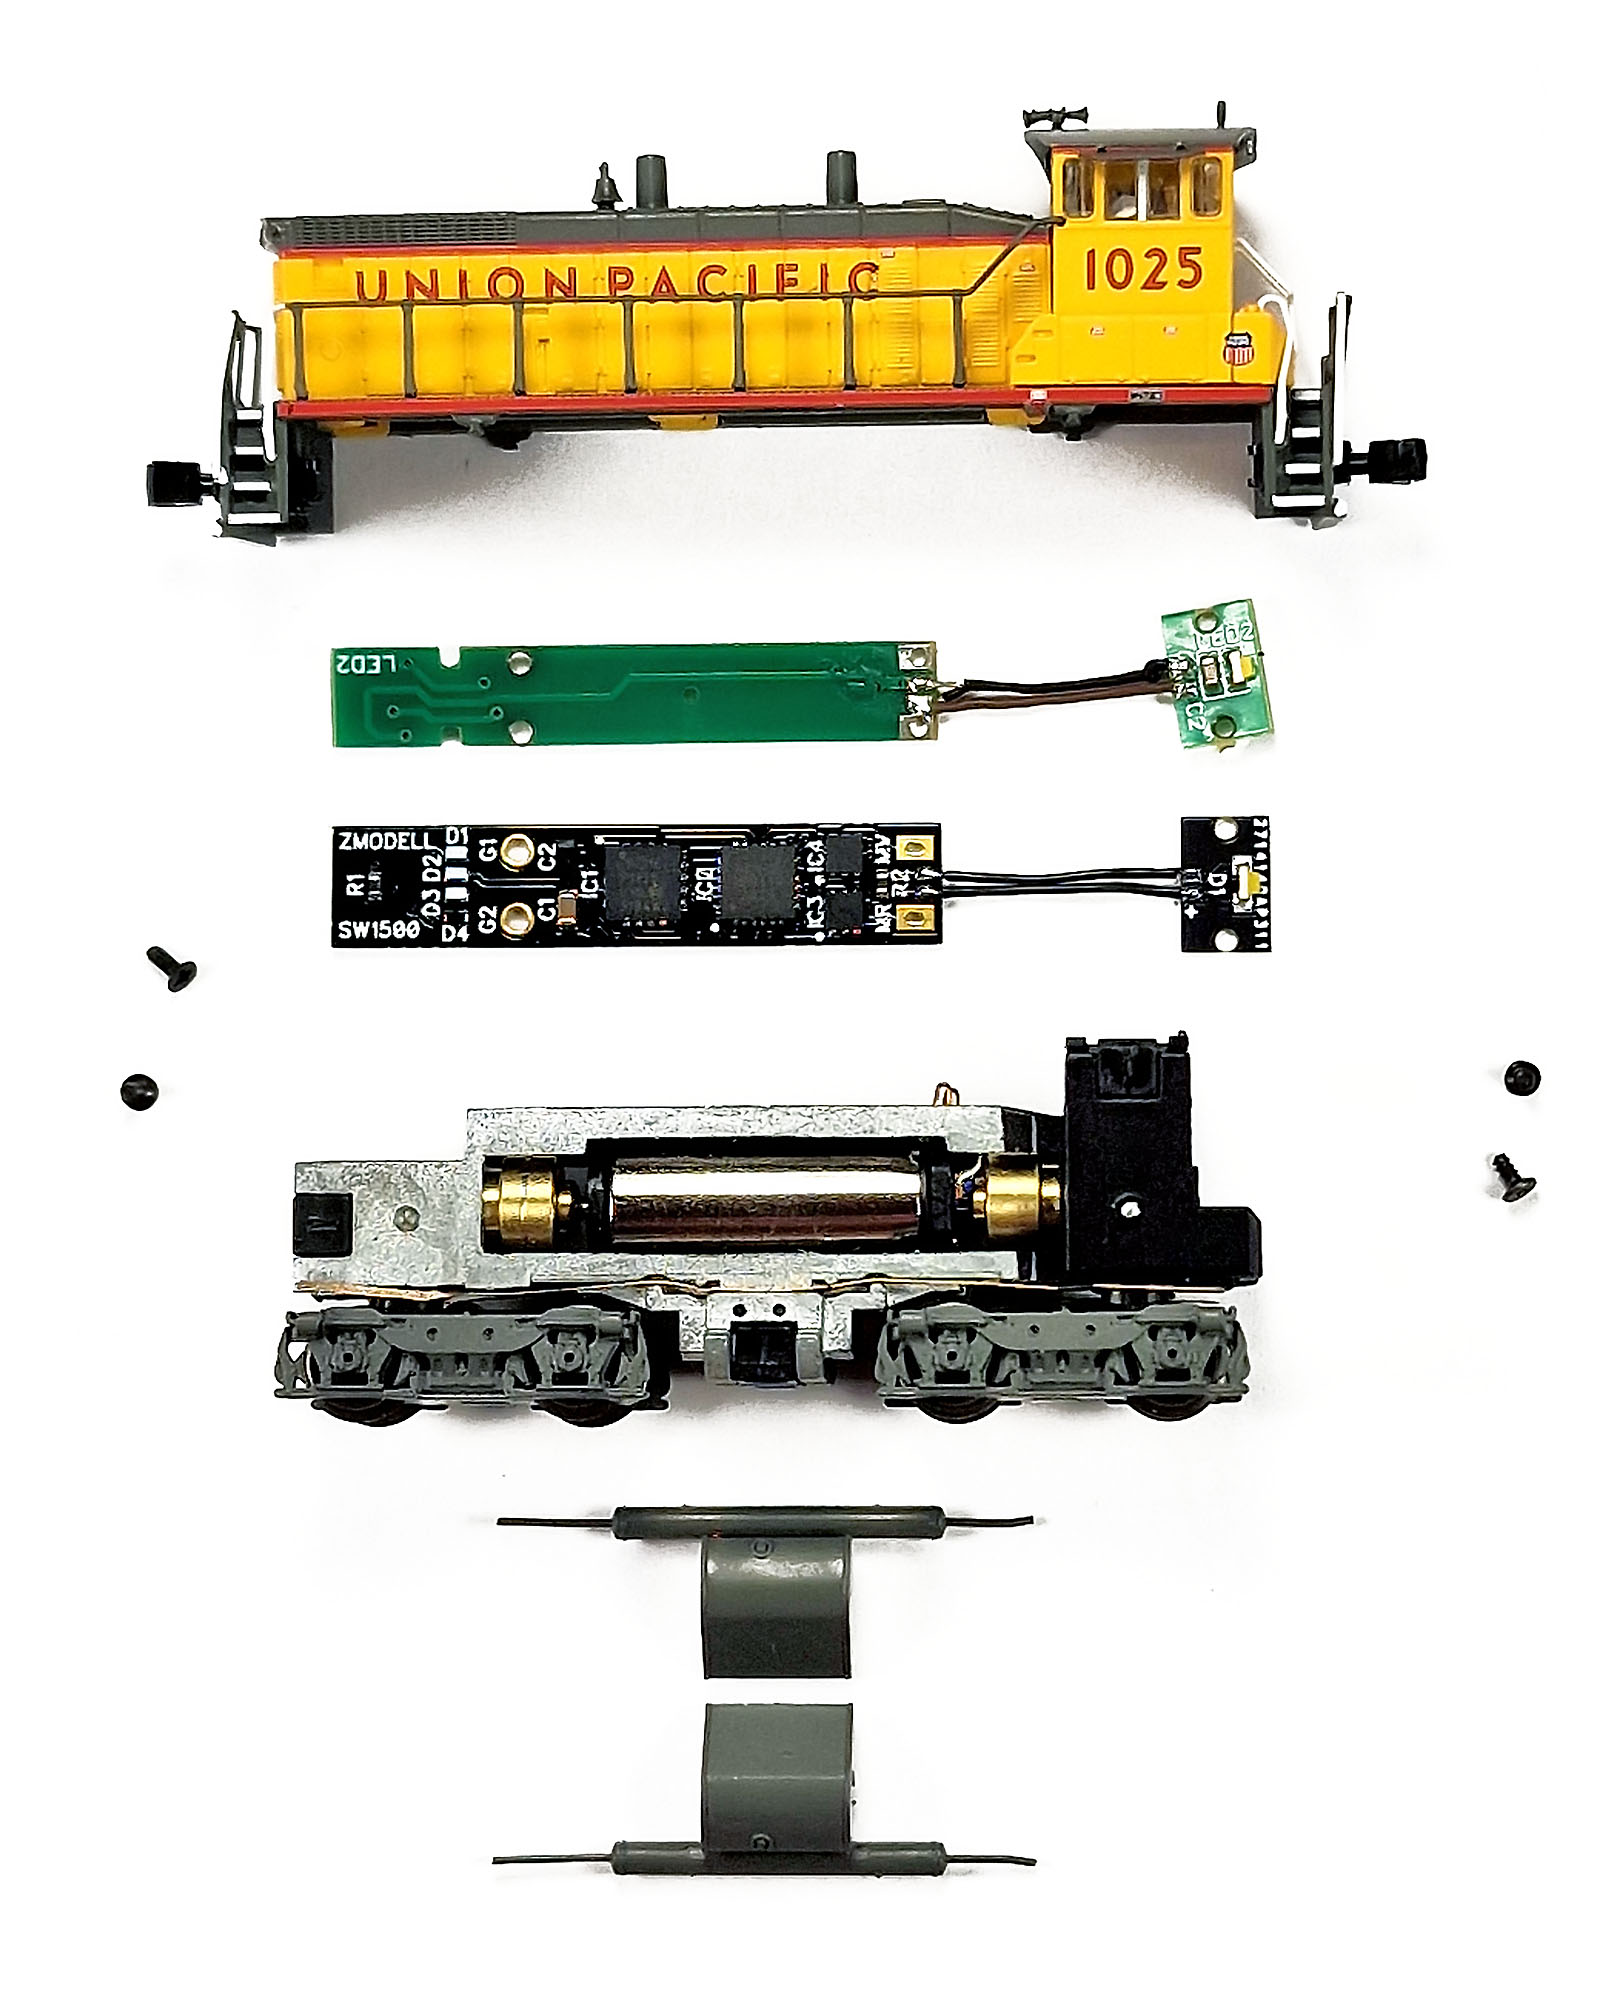
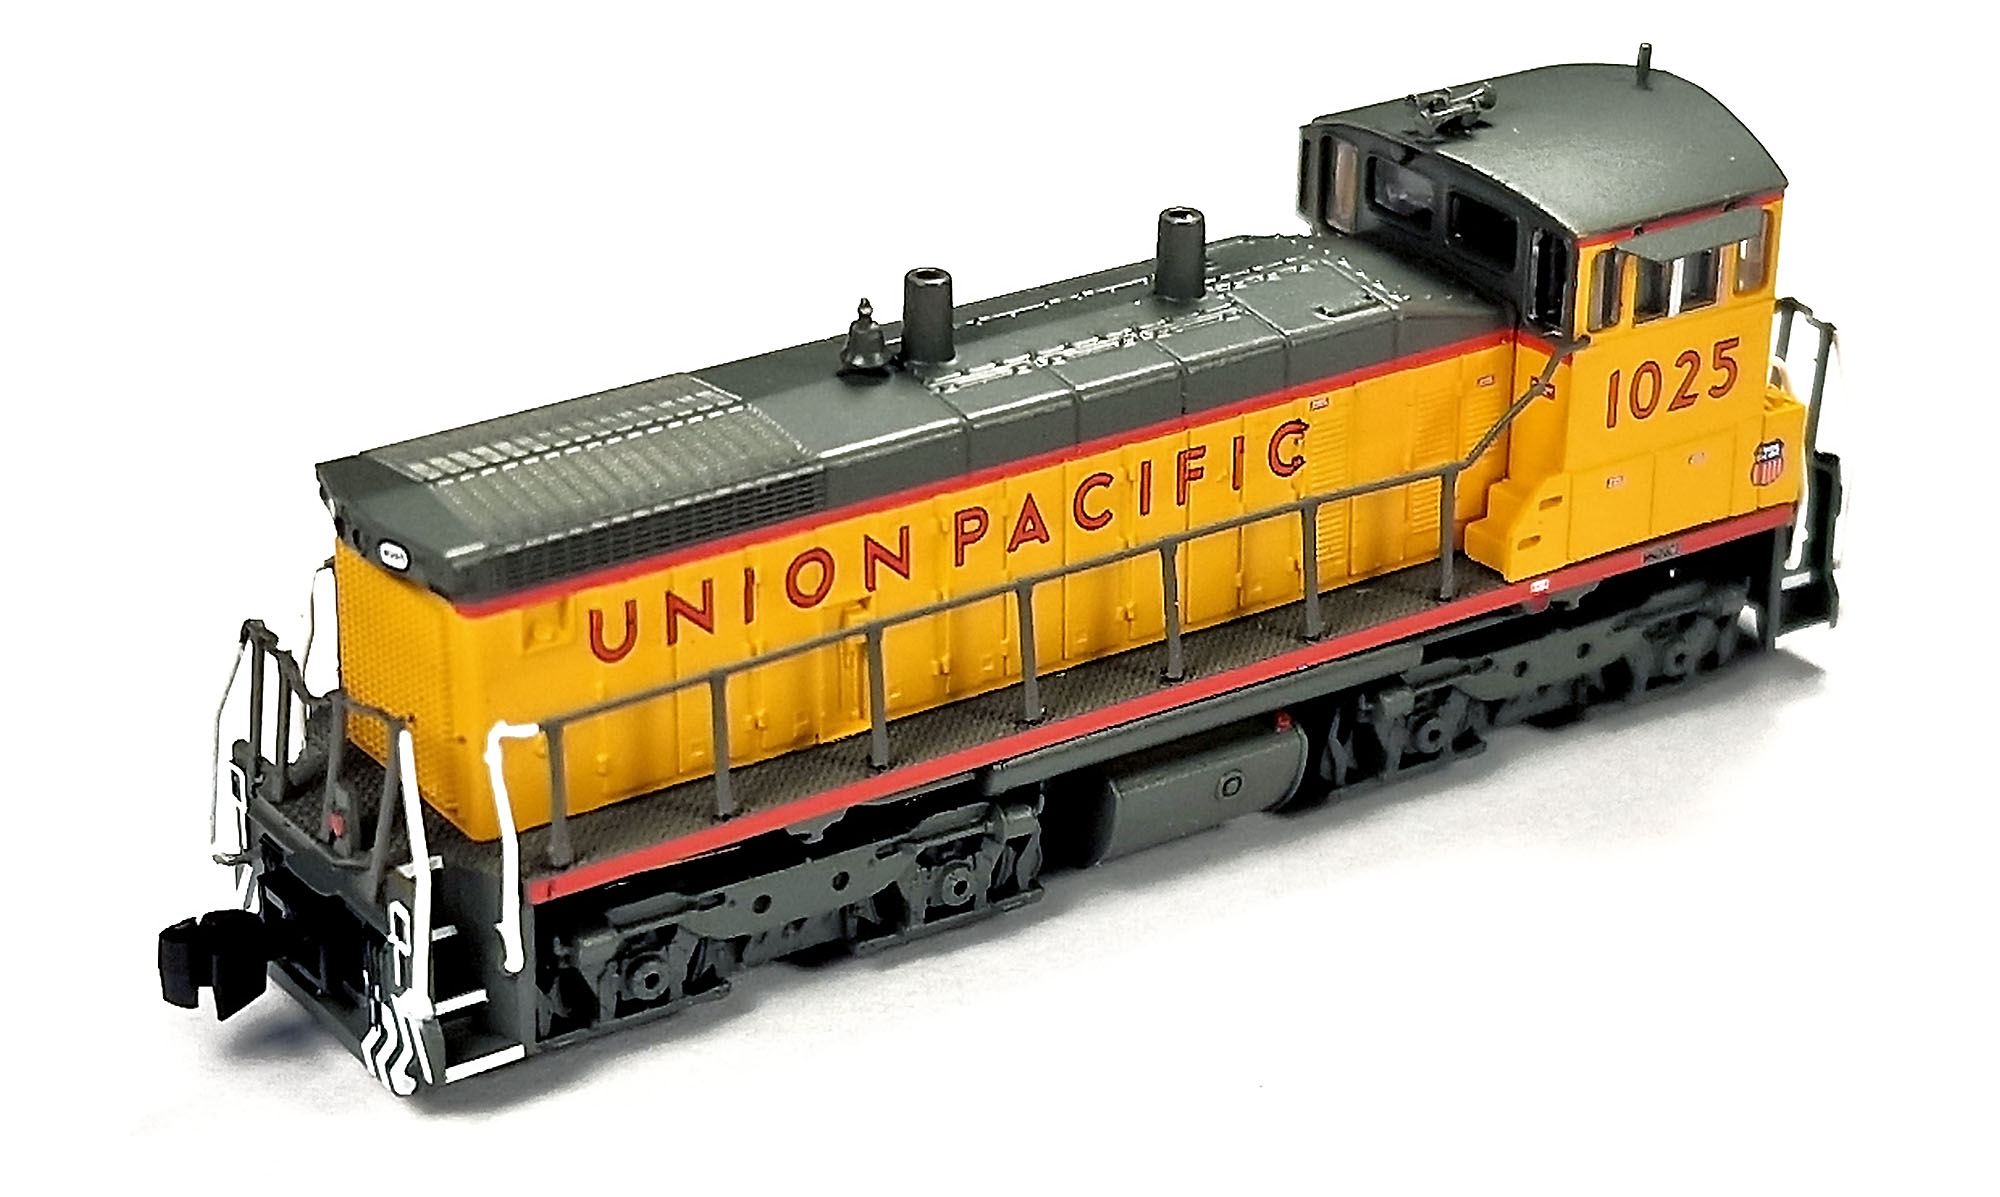
One more time regarding disassembly of this tiny locomotive: I recommend following recommendations posted here on the forum:
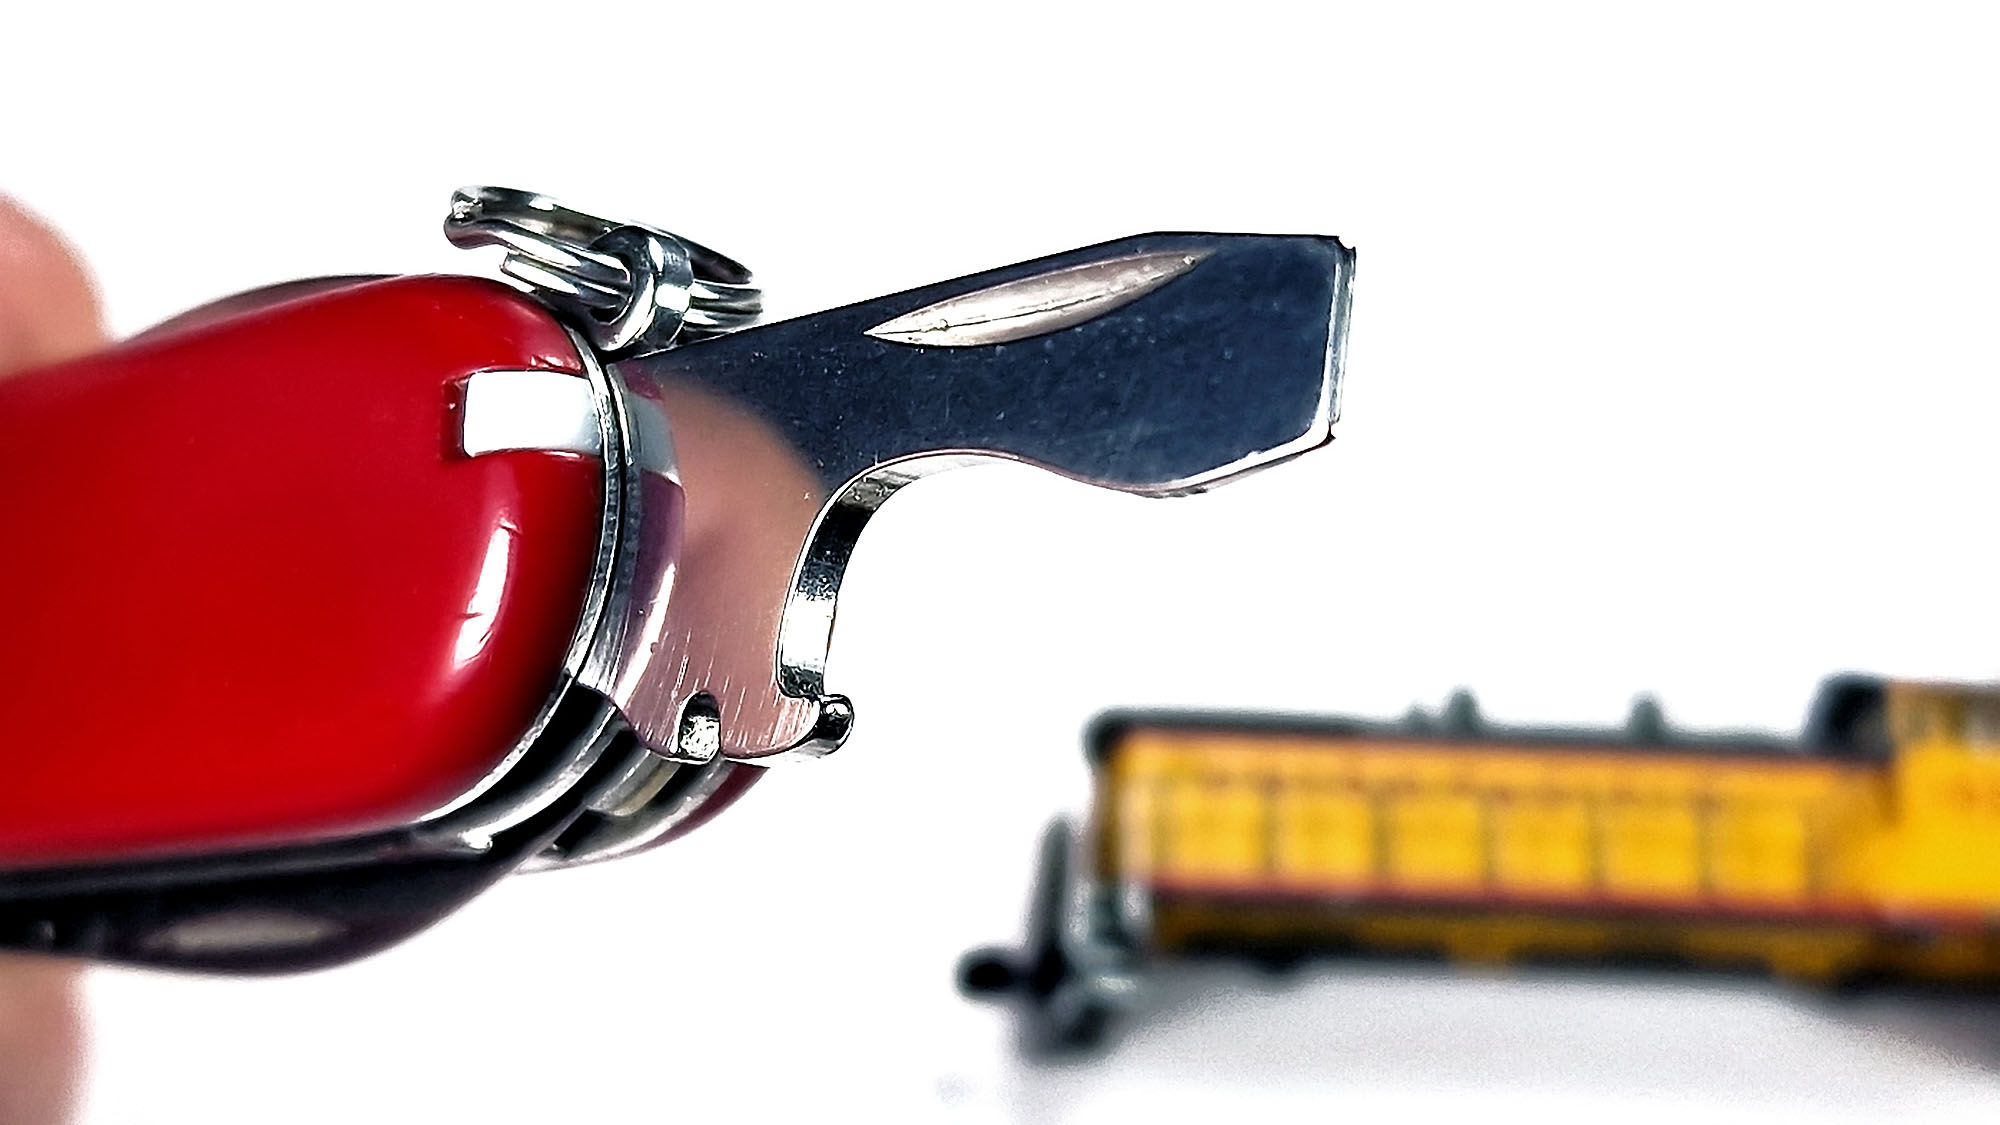
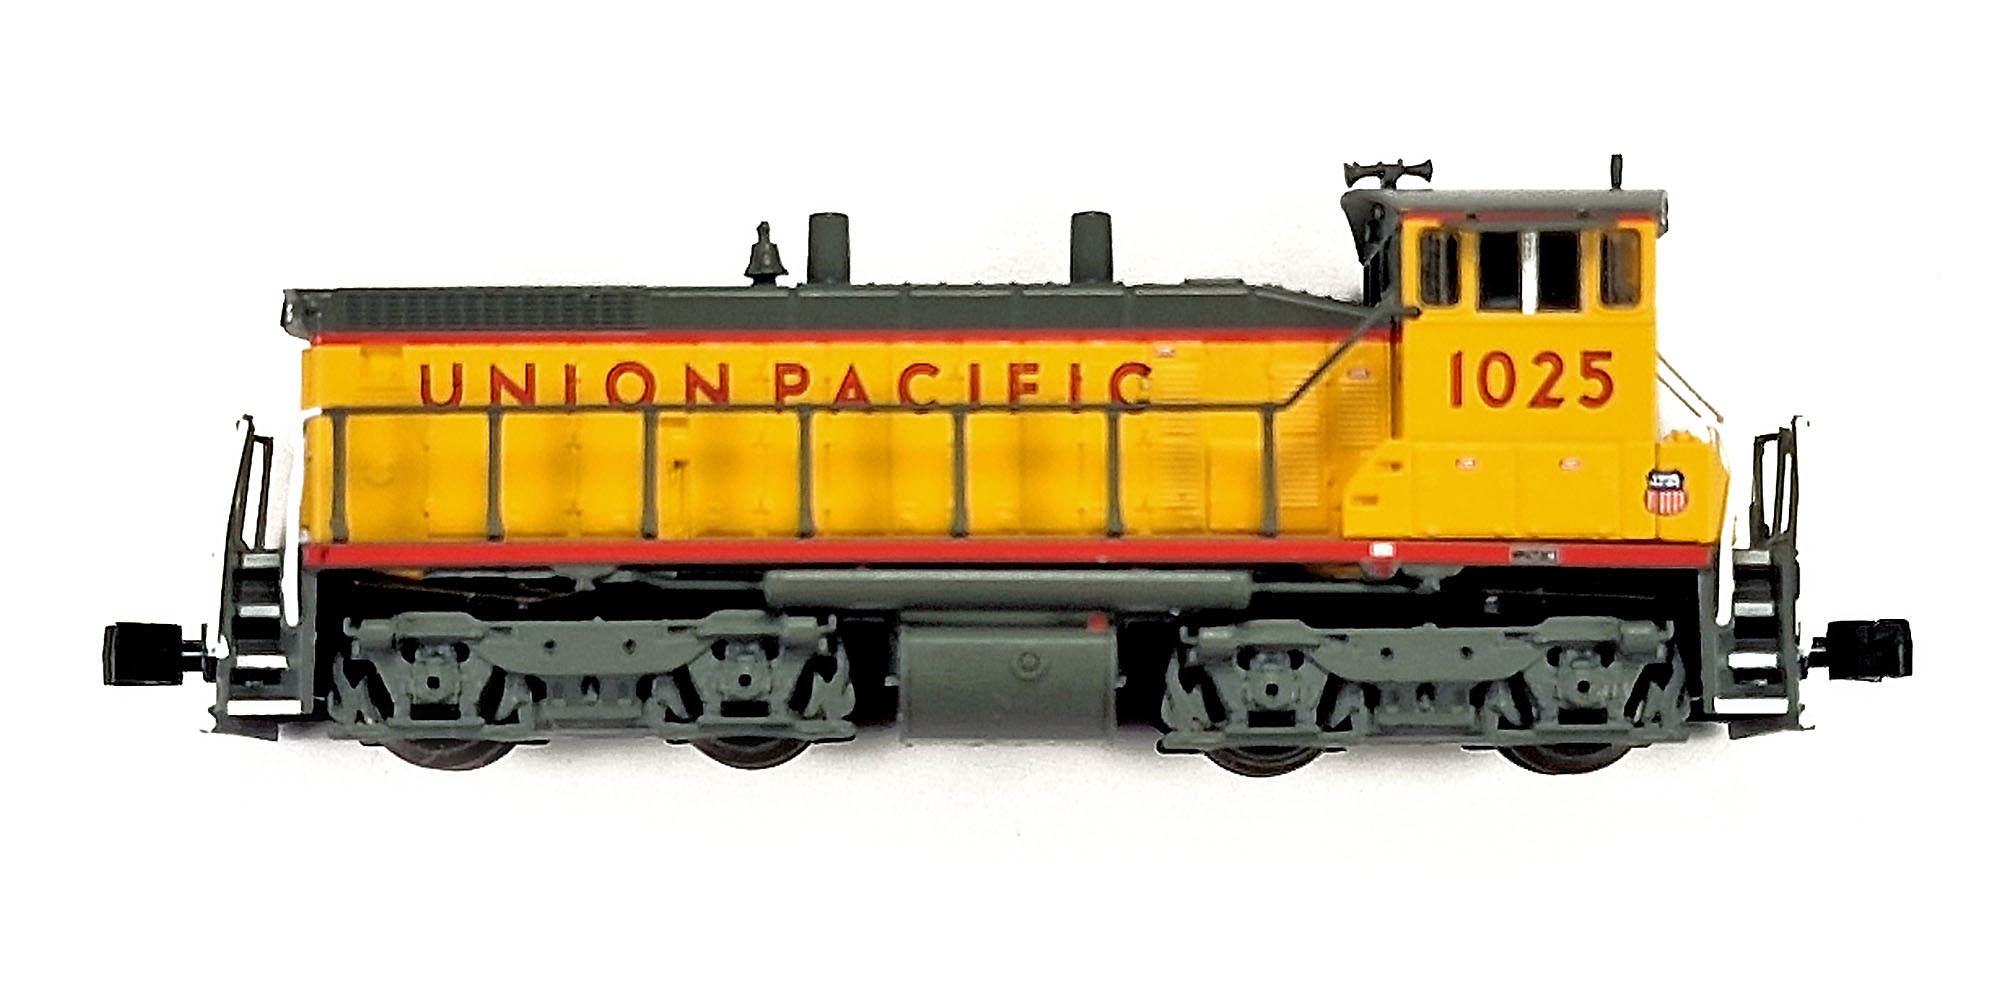
azlforum.com/thread/2046/emd-sw1500-removalIn general, I did the same: I carefully removed halves of the fuel tank, and then slowly, with very small steps pulled out the chassis outside of the housing of my Union Pacific SW1500 locomotive. The only difference is that I used a flat screwdriver of my Swiss knife. All surfaces of these knives are very well polished, and all edges are rounded, so there is no risk to damage the locomotive (of course, if everything is done carefully enough):
Here you can see a disassembled locomotive. I also left an original analog circuit board on the picture for comparison:
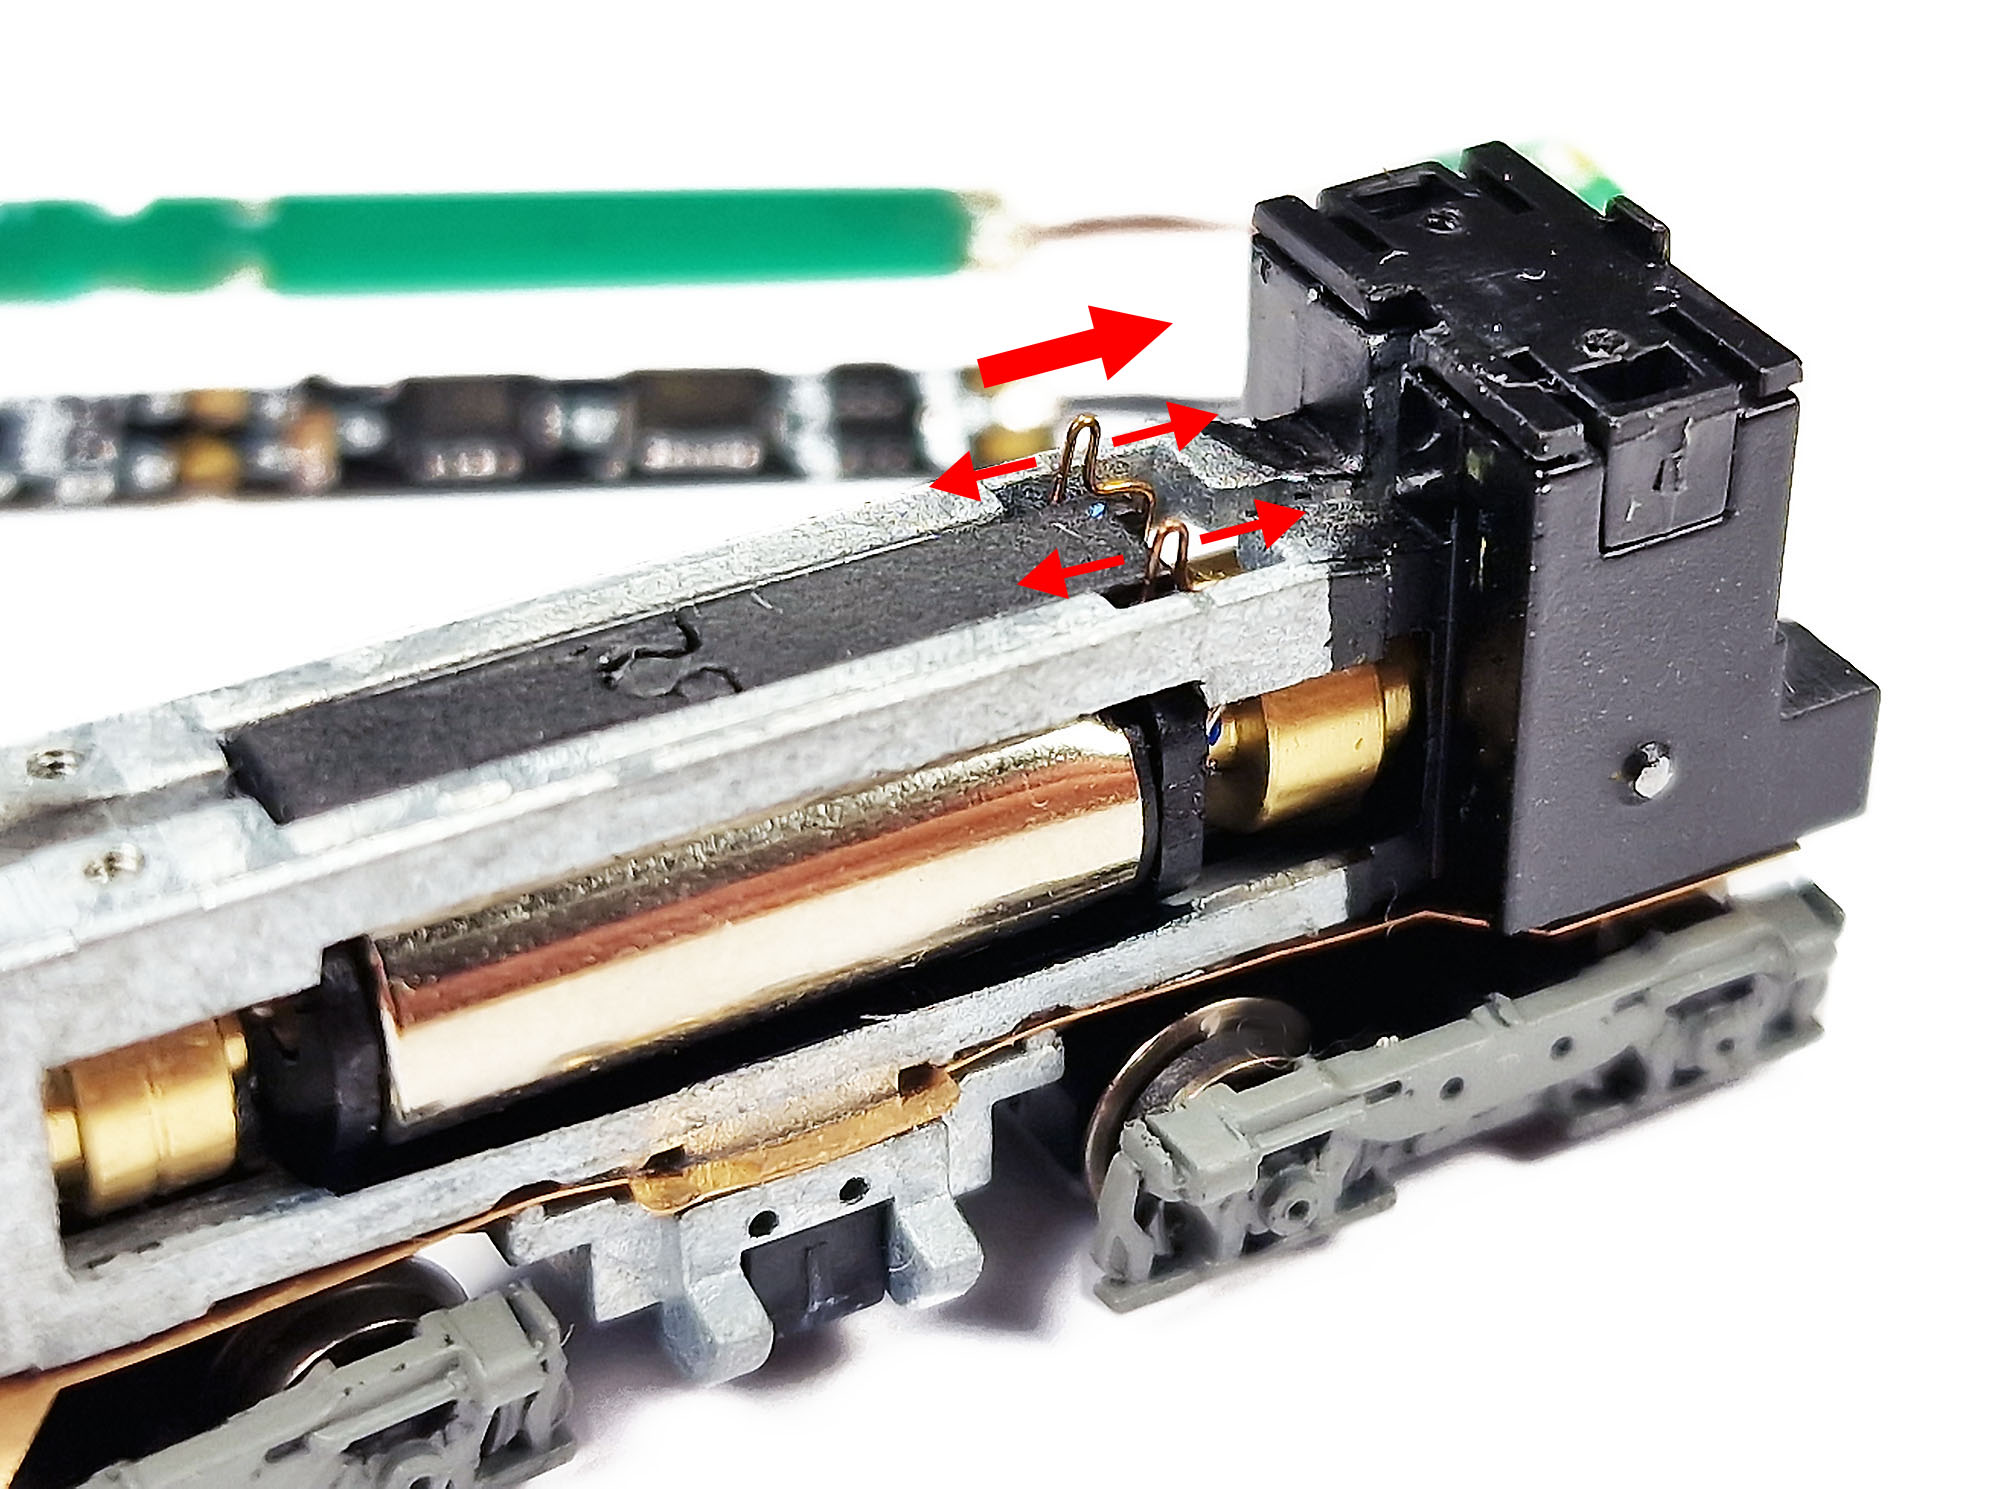
One important point to consider before installing the decoder: it may be necessary to adjust pins of the motor outputs. If you believe that electric contact between the pins and the holes in the circuit board is not reliable enough, you may do some fine adjustments to the pins, as shown on the following picture – slightly pull them apart and then bend them a little towards the cabin. Once again: normally it does not needed to do this; perform this only if you believe that it is really needed:
Now it is time to install the decoder onto the chassis. Another important point: it is necessary not to overtighten the screws that hold the main circuit board. Stock screws have reverse conical heads, so it is quite easy to bend a thin circuit board in case of overtightening. After fixing everything in place, wires that connect small circuit board with LED should be carefully threaded inside the gap between halves of the chassis. While doing this, make sure that these cables don’t touch the driveshaft of the motor:
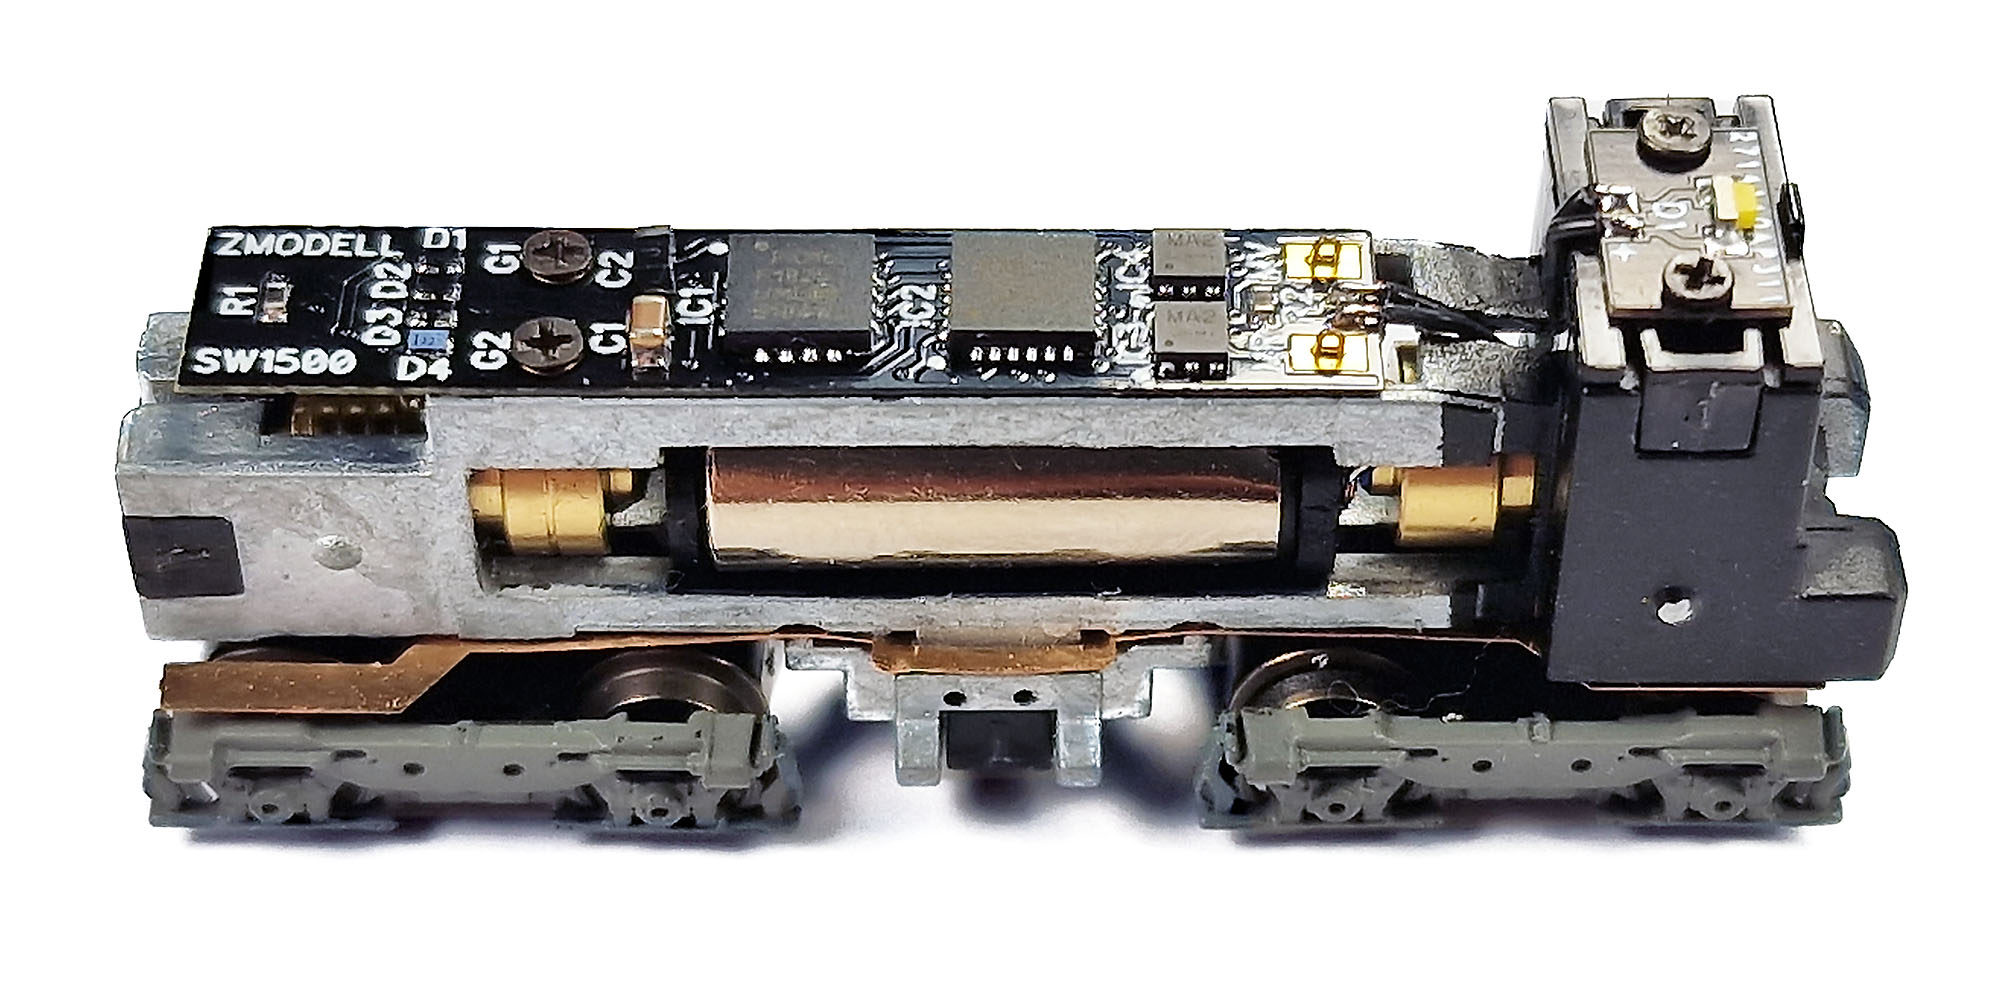
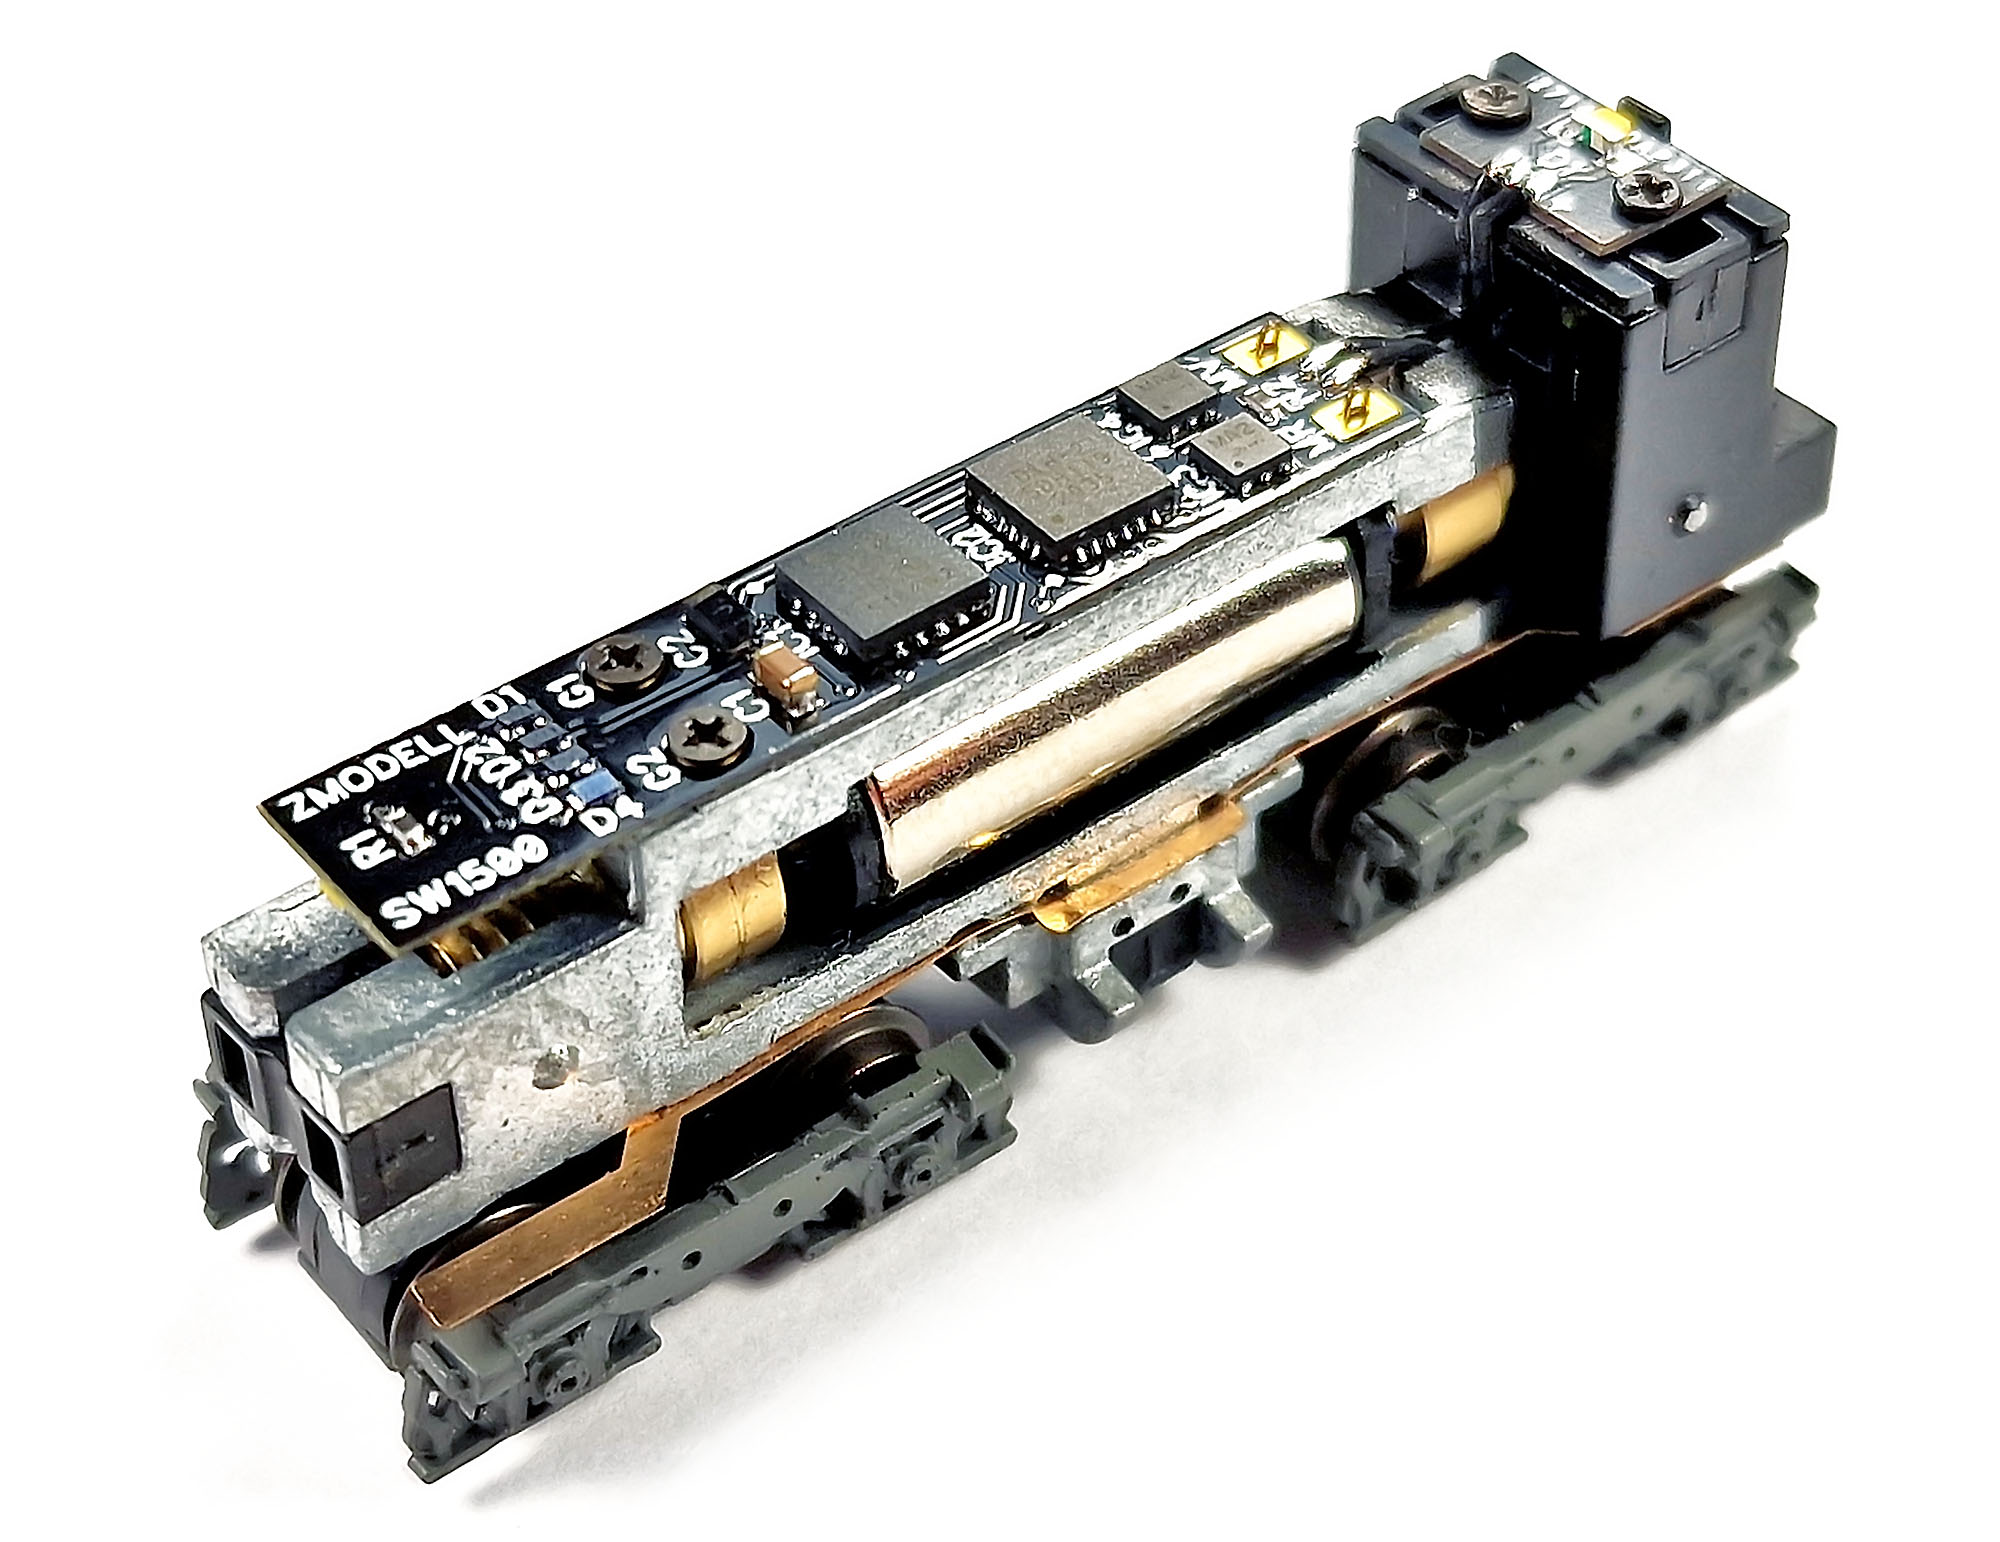
On this picture, you can see how thin this decoder indeed is:
But don’t worry – the circuit board is made from a very good material, it does not feel like a “piece of paper”, it is rigid enough.
I would like not to leave without attention one more point: despite I did my best to design the motor connectors on the circuit board in the safest possible way that leaves almost no chance for the short circuit with chassis, the construction of the chassis, in my opinion, is a little bit “risky” at this point. Thus, I recommend to examine connection between the digital decoder and motor very closely, and even test it for short circuit with chassis using a multimeter if needed.
After installing the decoder, I put the chassis onto the small test circle in order to check if everything works correctly before installing the locomotive shell:
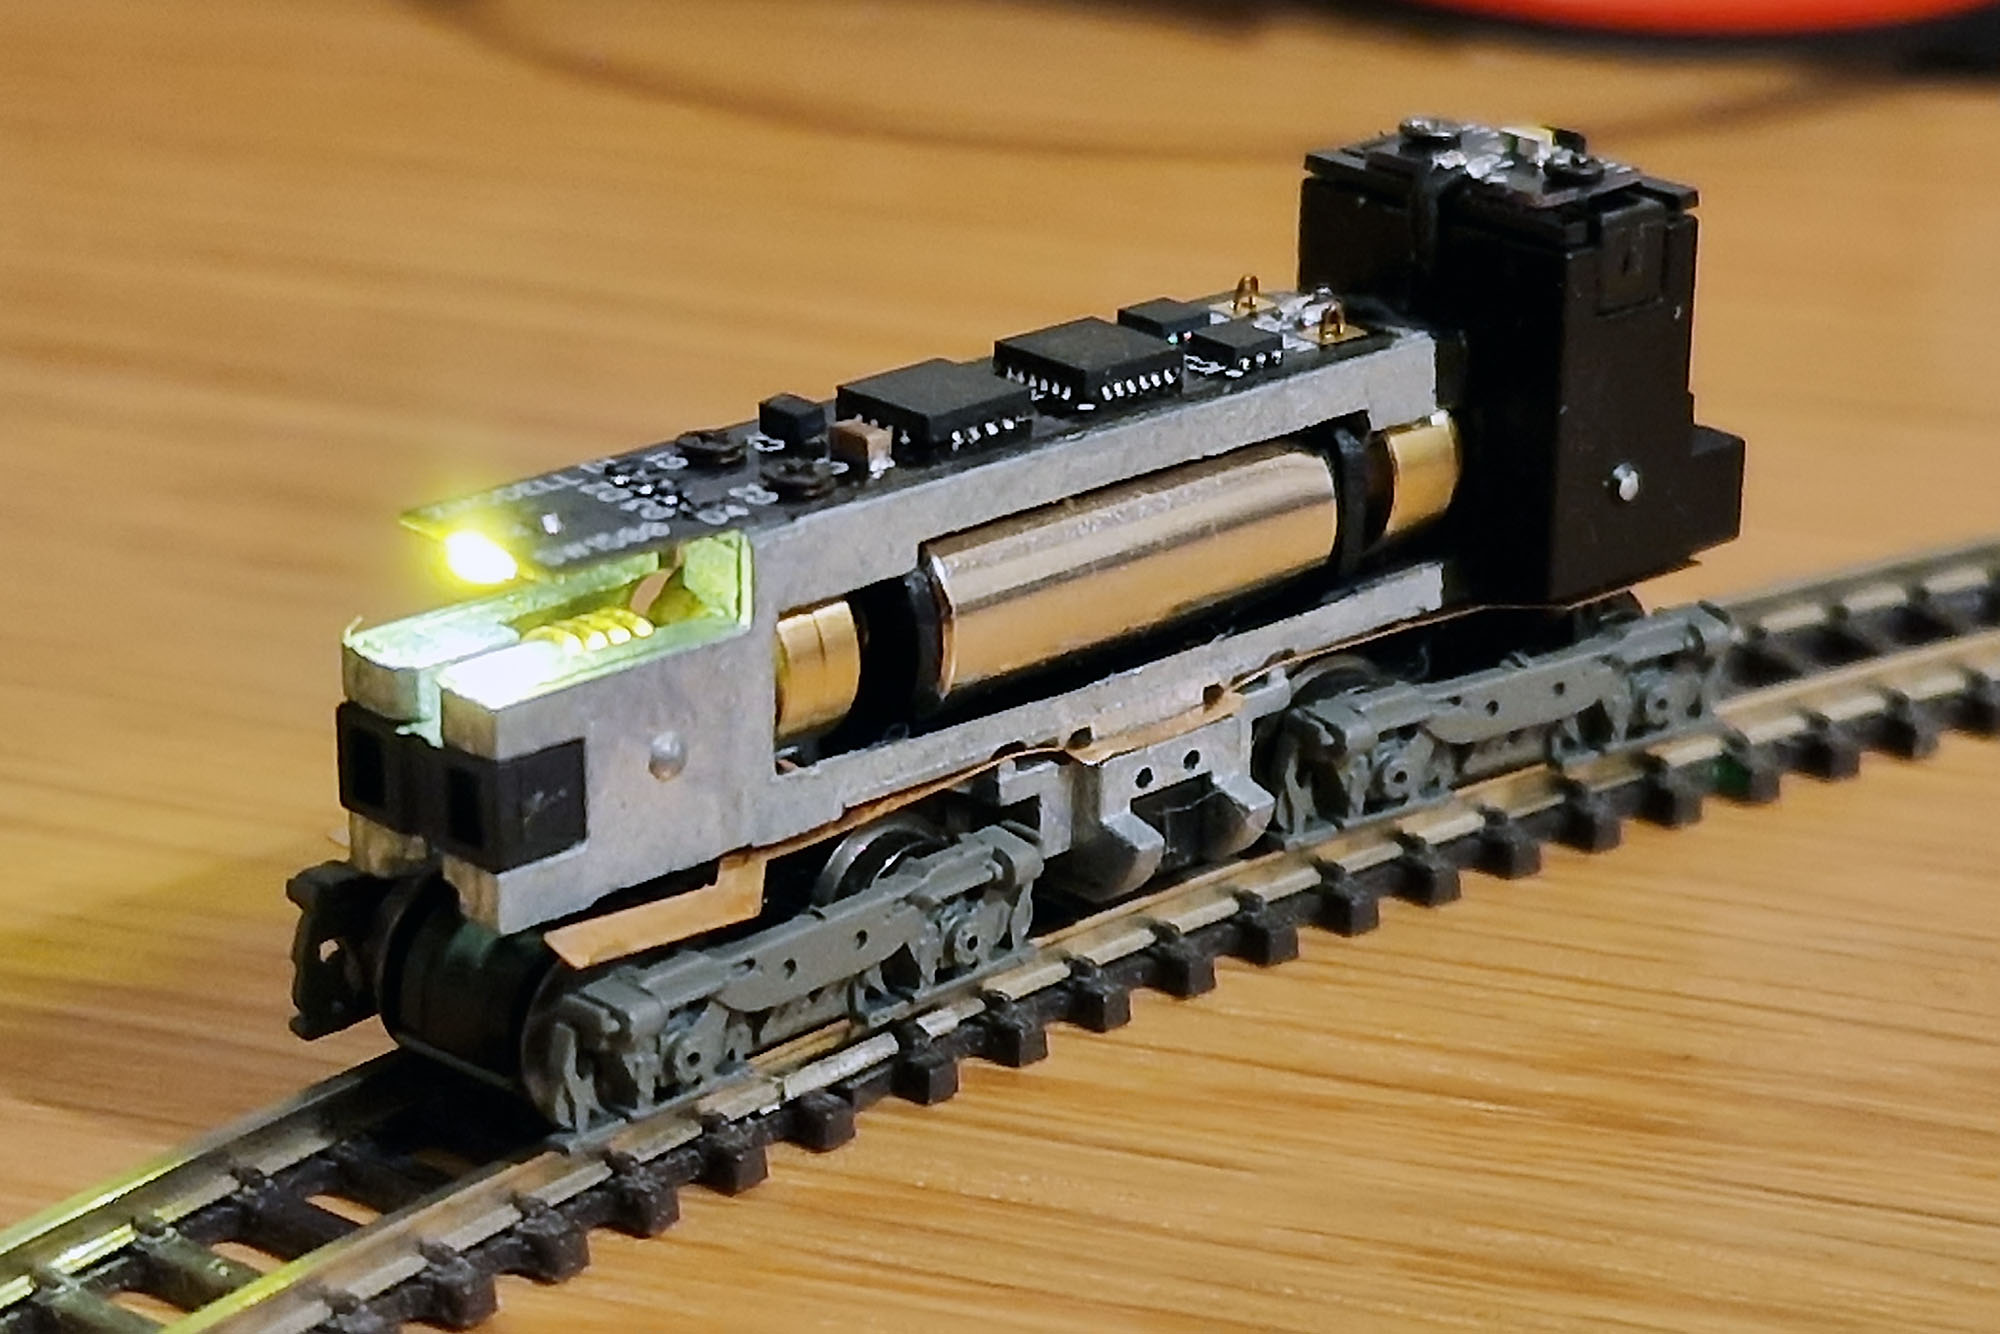
I was so lucky when it turned out that everything works flawlessly with decoder’s default settings. Maybe the only thing you need to do is to adjust CV5 (max speed) to the maximal value 127 (it is 92 by default), as this locomotive runs already quite slowly in analog mode.
Now we will get an answer to the most important question that was my deepest concern – will the decoder appear to be thin enough to fit inside such a tiny model without any problems? Of course, all preliminary measurements and calculations always precede any development and production, but in many cases, only the practical tests can prove if design was correct.
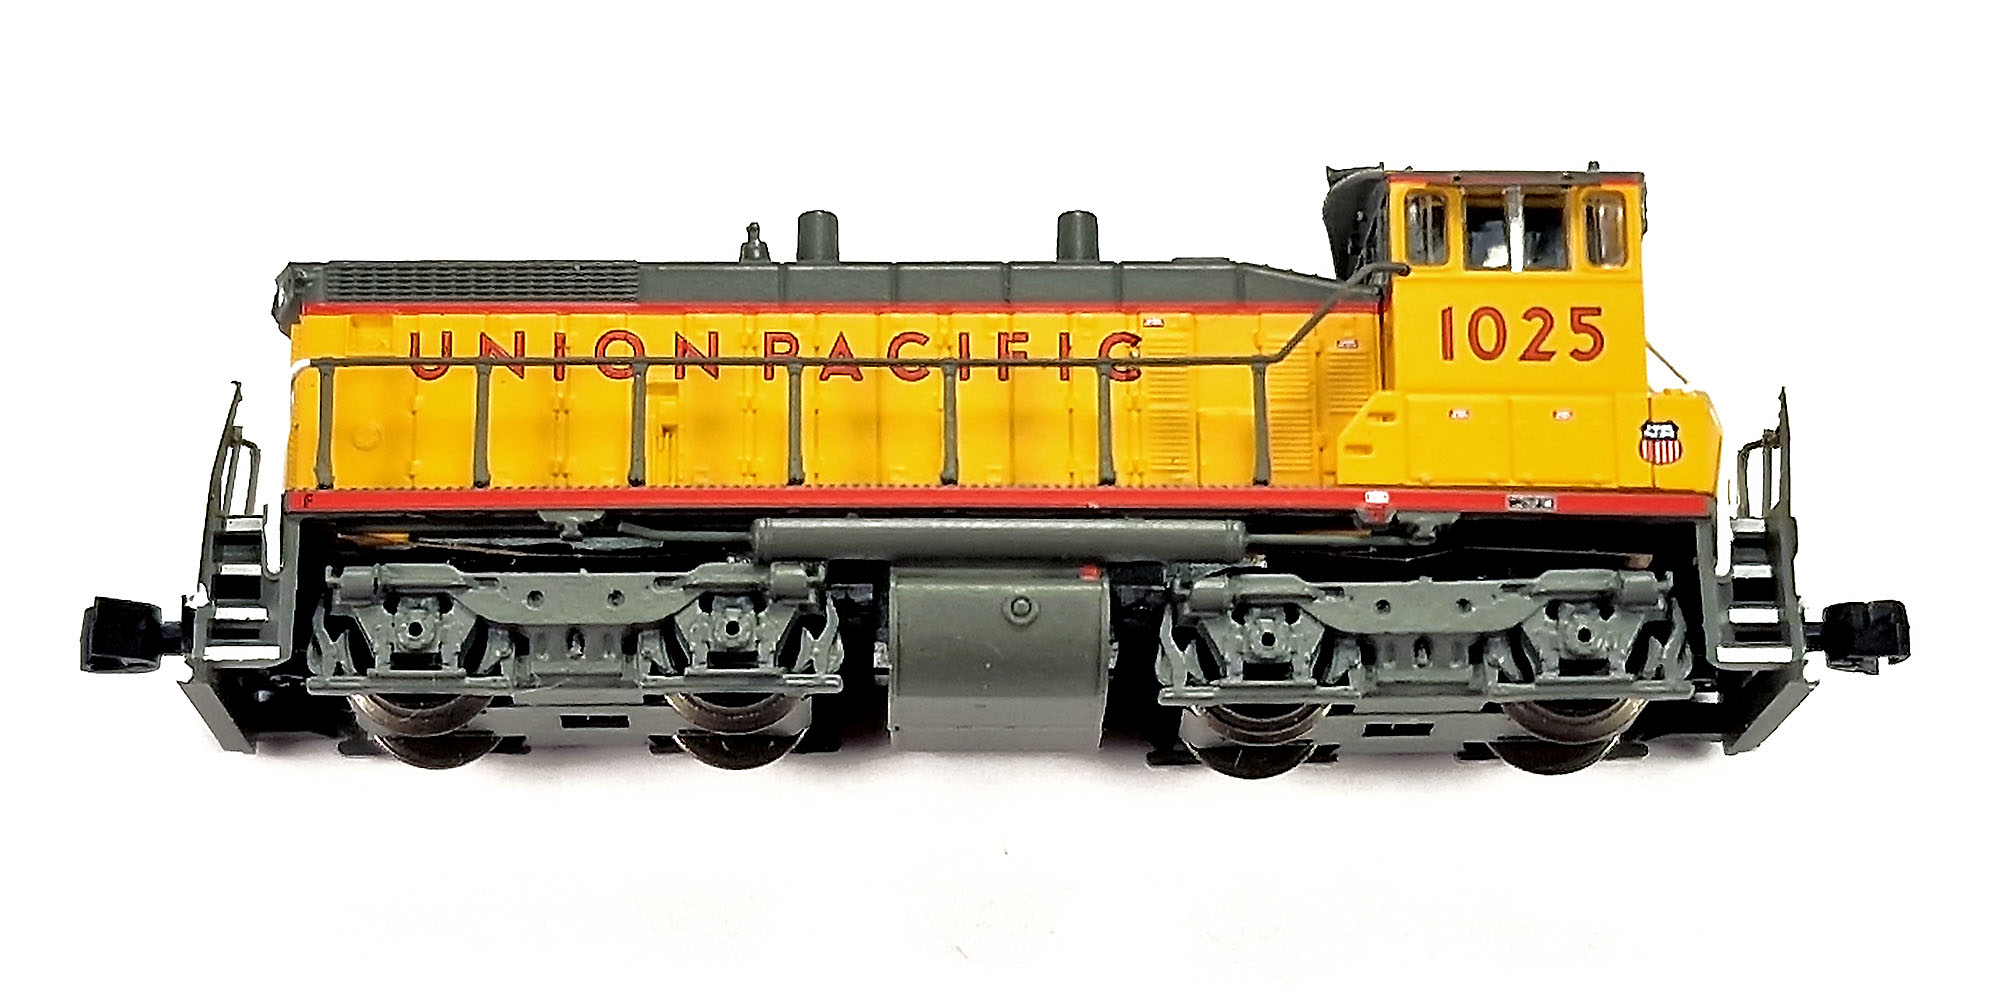
So, just look at these pictures – they speak for themselves. No gaps between the chassis and the housing at all! The locomotive looks exactly the same – both before and after installation of the digital decoder. I am proud that this development is indeed successful in all terms:
For running trains in digital, I use Märklin CS3 Plus with digital signal reducer from Arnold Hübsch (AMW). Here is a short video where you can see a newly digitized AZL SW1500 Union Pacific running on the small test loop:
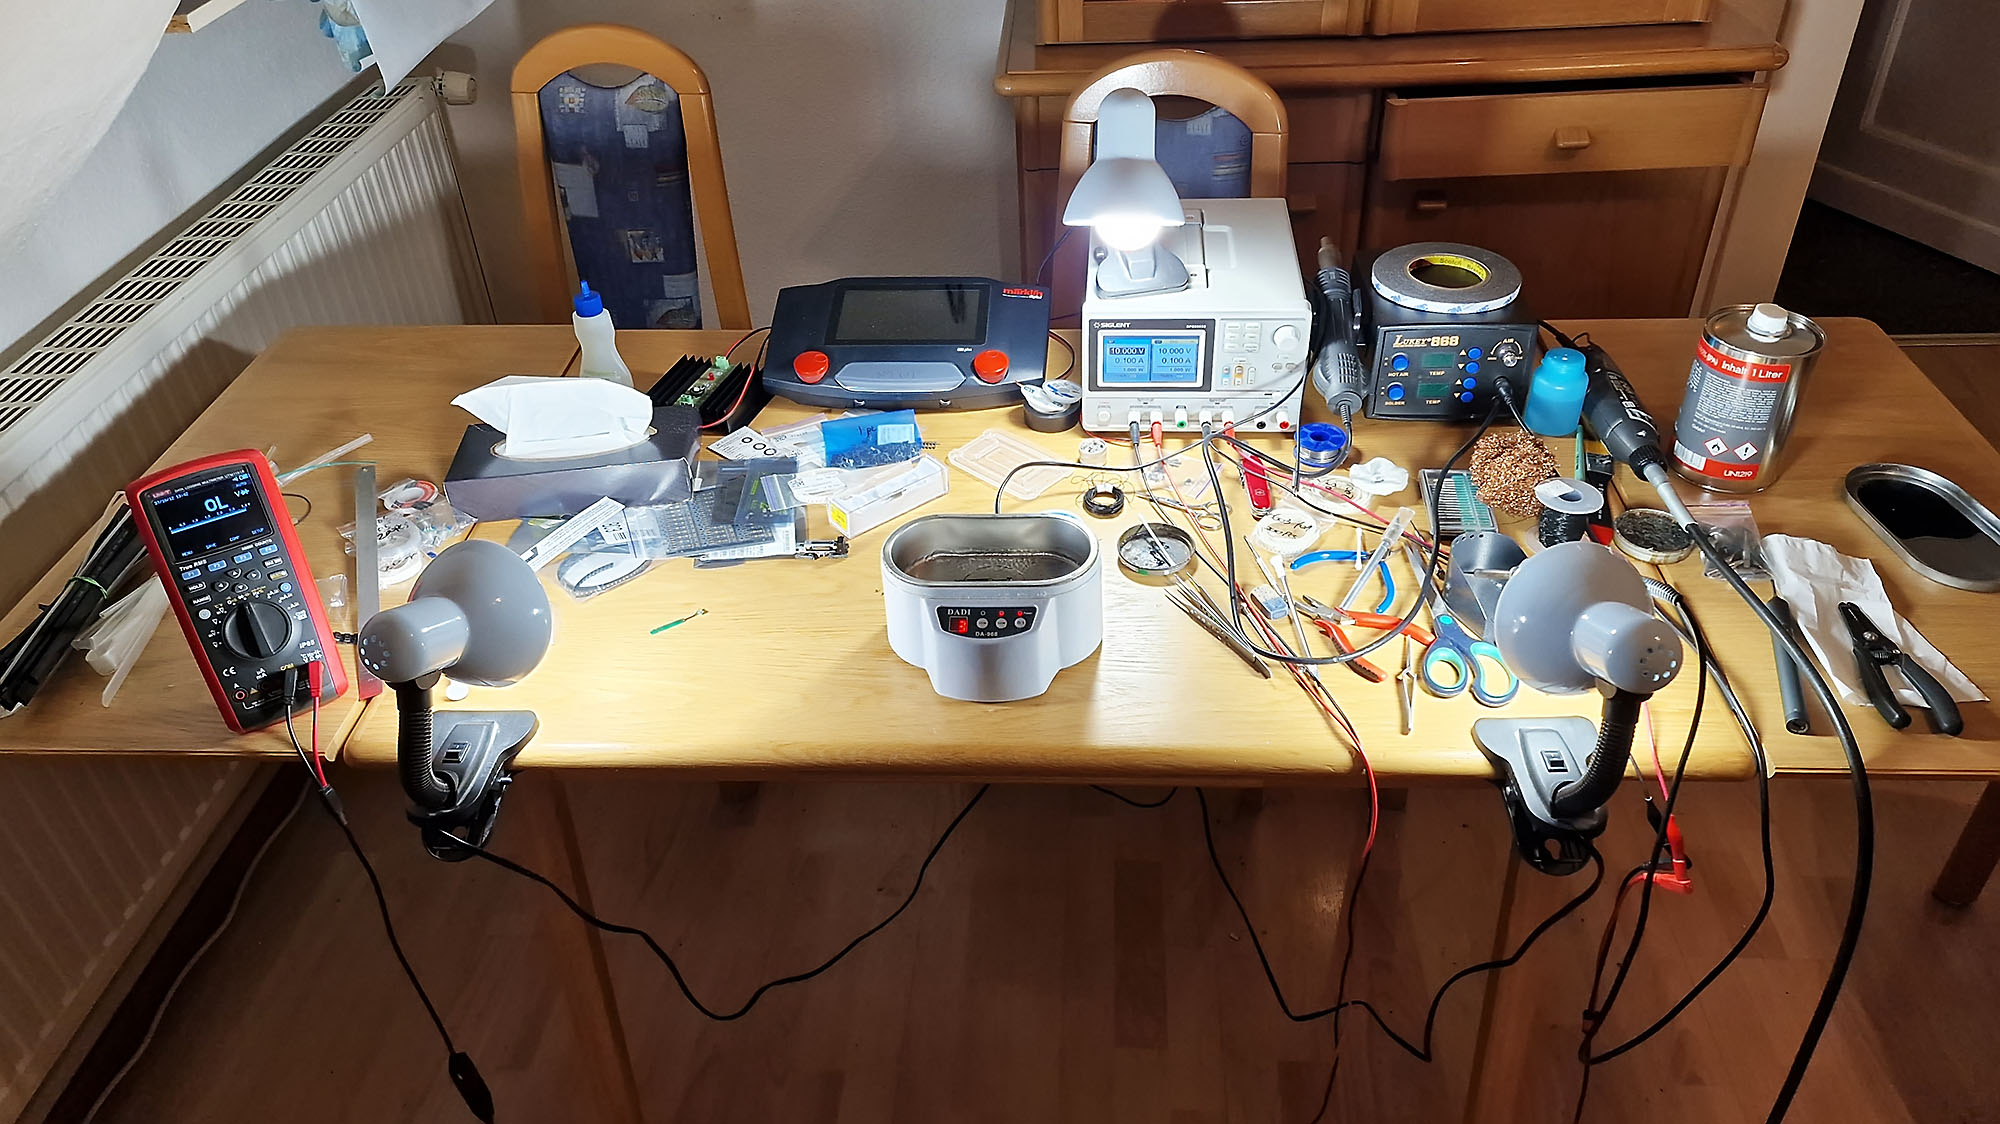
Here are some funny (and not too funny at the same time) facts regarding assembly. I was ready to place an order at the local PCB assembly factory back in Ukraine this winter shortly before the war. But all of you already know what happened later. The first series copy of this decoder I assembled manually yesterday here in Germany – on the kitchen table, using minimal amount of required equipment that I was lucky to get from Ukraine thanks to my friends who stayed there in Kiev:
Here is one of the production stages: applying a special SMD soldering paste onto the circuit board using brass photo-etched stencil before populating electronic components:
Since it is impossible for me to produce all ordered decoders at home (the quantity of orders I received is too big for home production), I am going to find a solution for this here in Germany. But the only thing I would like to ensure everyone about – is that I will do my best to finish this project in any case. And for sure, I will keep everyone informed regarding any updates on this subject.
Best regards,
Alex


 But this is not even the most important thing. I would like to say that first series copy of this decoder in its final version is ready. Here is it, top side:


